Pelco Manual C480M-F (10/04) 3
3.0 INSTALLATION
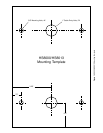
Before installing the enclosure to a wall or ceiling, make certain that the mounting
surface is able to support the full load of the enclosure plus all other equipment
such as camera, lens, etc.
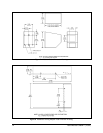
The tilt table bracket may be removed to provide adequate clearance for mounting
the enclosure.
3.1 WINDOW SELECTION
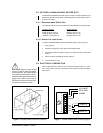
After the enclosure position (wall or ceiling) has been selected, the appropriate
viewing port must be selected. The enclosure is shipped standard for wall installa-
tions with the window in the uppermost position. If using any other than the stan-
dard port, follow the steps outlined below to position the viewing window. If using
the standard port, refer to Section 4.2 for mounting instructions.
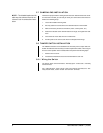
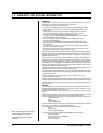
1. Remove the two (2) tamper-resistant screws and open the cover. A special
socket is provided (fits 1/4" square drive).
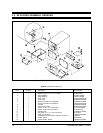
2. The window, speaker plate, and filler plate are held in place with twelve (12)
1/4-20 nuts. Remove the nuts and lock washers.
3. Remove the window, speaker plate, and blank plate as needed.
4. Place the window in the desired viewing port and the filler plates (or speaker
grill and filler plate) in the unused openings.
5. Secure with the 1/4-20 nuts and lock washers. Tighten all hardware.
6. Close the lid. And reinstall the 1/4-20 Tampruf fasteners.
NOTE:
The four (4) fasteners re-
quired to secure the enclosure to the
mounting surface (minimum 3/8" di-
ameter recommended) are not sup-
plied.
NOTE:
Unless otherwise noted all
instructions, drawing, etc. apply to
both the HS8000 and HS8013 except
for the ceiling adapter. The
HS8000CA ceiling adapter will not
work with the HS8013.
NOTE:
A speaker grill for a 4" (10.16
cm) speaker is provided with a block-
off plate. When using the speaker
grill, make certain that the speaker
you provide does not interfere with the
camera.


