


BEFORE TAKING PICTURES
17
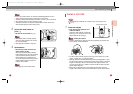
• To set the correct date and time, see
ADJUSTING THE DATA BACK on page
42.
• If the imprinting looks too light or if the
Data back’s display looks light or shows
nothing, replace the Data back’s bat-
tery. ( p.40)
• The date or time of the first frame will
be imprinted in the multi-exposure
mode.
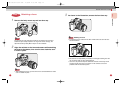
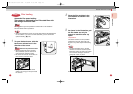
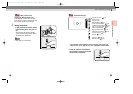
Adjusting the viewfinder’s diopter
Adjust the viewfinder’s diopter to suit your eye’s
vision.
1 Look through the viewfinder and
point the camera to a well-lit
scene. Then move the diopter
adjustment lever left or right
until the autofocus frame in the
finder looks sharp.
The diopter can be adjusted from -2.0 to
+1.0m
-1
(per meter).
Memo
Memo
NOTE
SET UP
THINGS TO DO
16
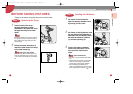
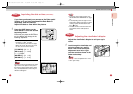
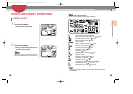
Imprinting the date or time
(OPTIONAL)
If you have purchased your camera as the Date model
Version, or if you have purchased the Data Back FJ
separately, read this section.
Imprint the date or time within the picture.
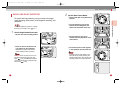
1 Press the DATE button on the
DATA BACK F
J to set the desired
imprinting format.
Each time you press the DATE but-
ton, the display will change in the
following sequence:
* The sample display below indicates
November 1, 2001, 2:10 PM.
YY indicates the year’s last two digits,
MM is the month, DD is the day, hh is
the hour, and mm is the minute.
[YY MM DD]→[01 11 1]
[DD hh mm]
...
[ 1 14:10]
[-- -- --]
...
Blank
[MM DD YY]
...
[11 1 01]
[DD MM YY]→[ 1 11 01]
The date or time is imprinted on the lower
right corner of the picture. If this part of
the picture is light-colored (white, yellow,
etc.), the imprinted date or time may be
difficult to distinguish.
Memo
Memo
Step 4
Step 5
MZ-6(E)02 B/011-020 11/8/02 11:55 AM Page 16