


Page 14 2005-12-12
5 TROUBLE SHOOTING
This chapter describes the action to take if the Inca board
does not operate correctly. Moreover, the means of
support are described.
5.1 KNOWN PROBLEMS USING THE INCA
When using the Micro D to Sub D cable (8122 410 81530)
that is also included into the starter kit please notice that
the point 5 and 7 are interchanged all other points are
interconnected one to one.
The Digital IO of the Inca does not have a defined reset
status. Only after a complete boot of the Inca including the
start of the user application the IO ports will have a defined
level.
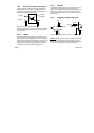
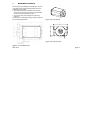
The cleanness of the sensor is of major importance for the
image quality. During the production of the Inca special
account is taken with respect to the cleanness of the
sensor. However when you remove the sensor protection
cap from the Inca front end prior to the mounting of the
lens, the sensor can attract some dust or dirt. This pollution
can affect the image captured with the Inca. Remove the
sensor protection cap only in a clean environment by
holding the Inca with the sensor facing down. After
removing the sensor protection cap inspect the cleanness
of the sensor and immediate assemble the required lens to
the Inca.
In case of a red blinking system LED (see 2.4.1 System
LED) during the boot sequence but after the three seconds
of blinking the general purpose LEDs 1 and 2 one of the
following files are probably missing on the flash file system;
‘RapIB311Lcm.rbf’ or the appropriate license file
Rhapsody.key or Clicks.key. These files are required when
you like to use the Inca either under Rhapsody or Clicks
software control.