


English
OSD (On Screen Display) Controls
18
En
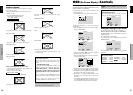
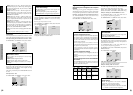
Setting high definition images to the suitable
screen size
Use this procedure to set whether the number of vertical
lines of the input high definition image is 1035 or 1080.
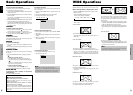
Example: Setting the “HD SELECT” mode to “1035I”
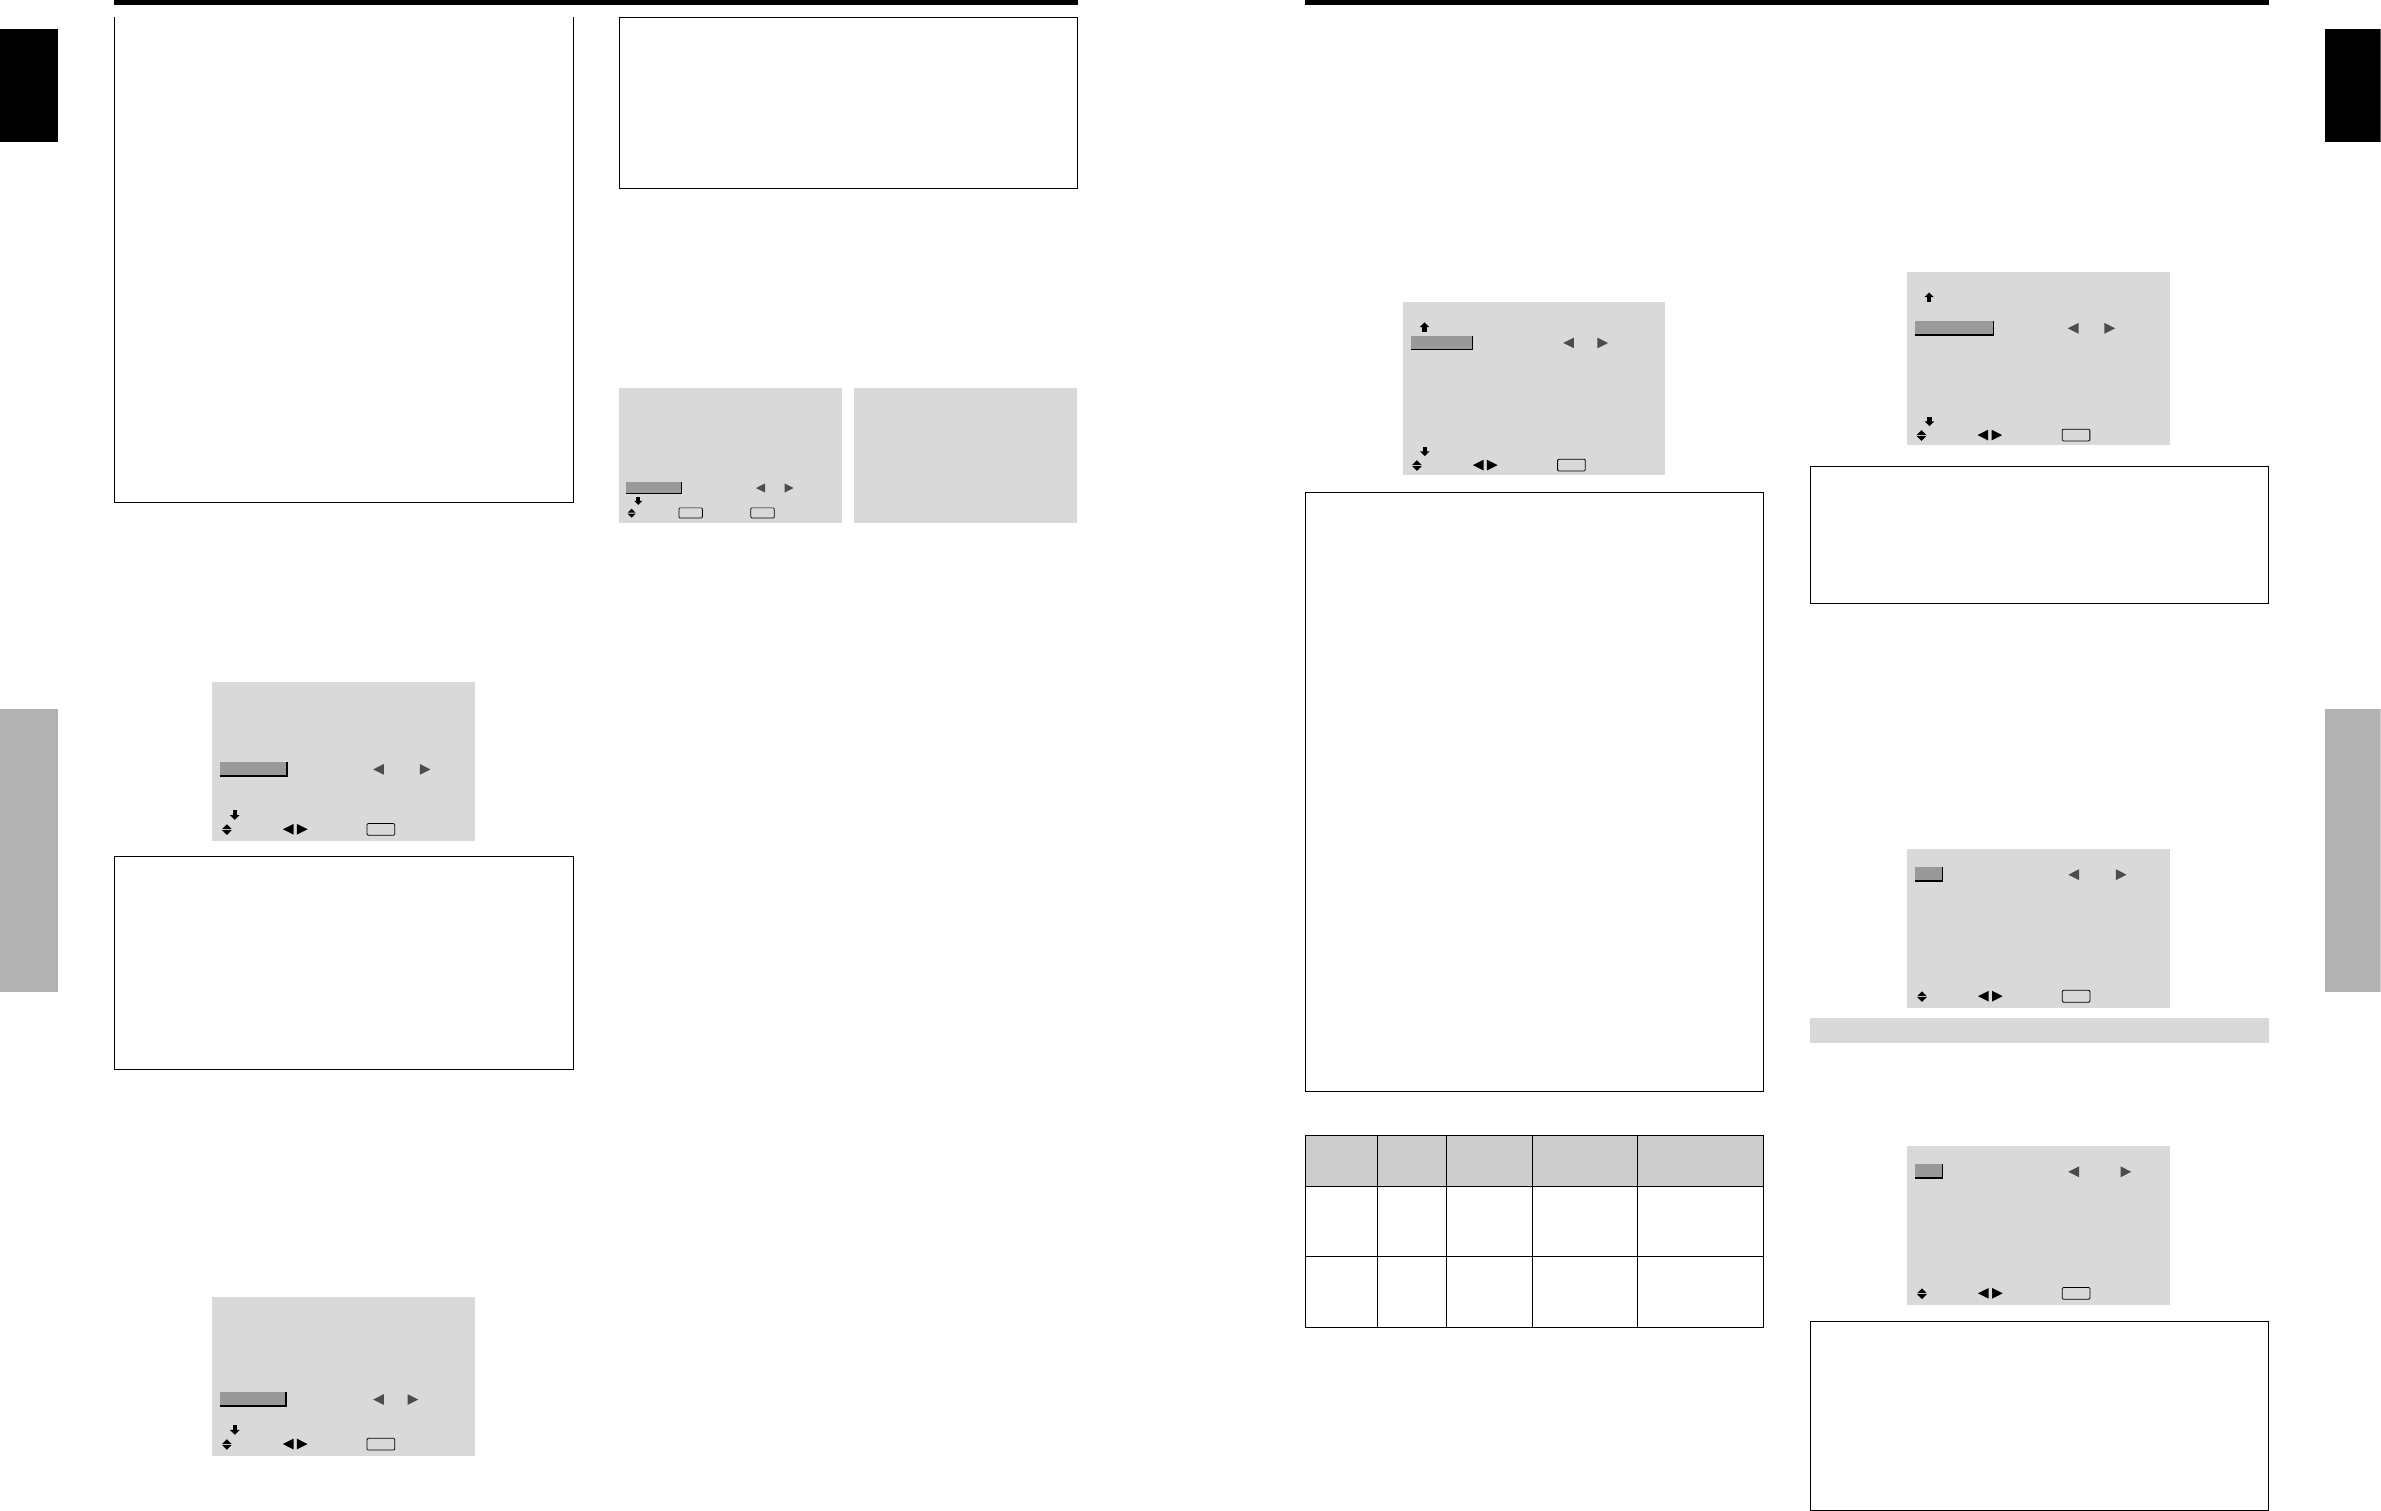
On “HD SELECT” of “OPTION1” menu, select “1035I”.
OPTION1
1 / 3
OSD
BNC INPUT
D-SUB INPUT
RGB SELECT
HD SELECT
INPUT SKIP
ALL RESET
NEXT PAGE
: RGB
: RGB
: AUTO
: 1035
I
: OFF
: OFF
SEL.
ADJ.
EXIT RETURN
Information
Ⅵ HD SELECT modes
These 3 modes are not displayed in correct image
automatically.
1080B: Standard digital broadcasts
1035I: Japanese “High Vision” signal format
1080A: Special Digital broadcasts (for example :
DTC100)
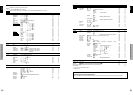
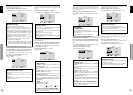
Setting the Input Skip
When this is ON, signals which are not present will be
skipped over and only pictures whose signals are being
transmitted will be displayed.
This setting is valid only for the INPUT/EXIT button on
the unit.
Example: Set to “ON”
On “INPUT SKIP” of “OPTION1” menu, select “ON”.
OPTION1
1 / 3
OSD
BNC INPUT
D-SUB INPUT
RGB SELECT
HD SELECT
INPUT SKIP
ALL RESET
NEXT PAGE
: RGB
: RGB
: AUTO
: 1080B
: ON
: OFF
SEL.
ADJ.
EXIT RETURN
WIDE1: When an 852 dotן 480 line signal with a
horizontal frequency of 31.7kHz is input, the image may
be compressed horizontally. To prevent this, set RGB
SELECT to WIDE1.
WIDE2: When an 848 dotן 480 line signal with a
horizontal frequency of 31.0 kHz is input, the image
may be compressed horizontally. To prevent this, set
RGB SELECT to WIDE2.
WIDE3: When an 1920 dotן 1200 line signal with a
horizontal frequency of 74.0 kHz is input, the image
may be compressed horizontally. To prevent this, set
RGB SELECT to WIDE3.
WIDE4: When an 1280 dotן 768 line signal with a
horizontal frequency of 59.8 kHz or an 1680 dotן 1050
line signal with a horizontal frequency of 60 kHz is
input, the image may be compressed horizontally. To
prevent this, set RGB SELECT to WIDE4.
DTV: Set this mode when watching digital broadcasting
(480P).
See page 30 for the details of the above settings.
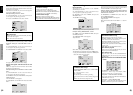
Resetting to the default values
Use these operations to restore all the settings (PICTURE,
SOUND, SCREEN, OPTION1~3, etc) to the factory
default values.
Refer to page 12 for items to be reset.
On “ALL RESET” of “OPTION1” menu, select “ON”, then
press the MENU/SET button.
OPTION1
1 / 3
OSD
BNC INPUT
D-SUB INPUT
RGB SELECT
HD SELECT
INPUT SKIP
ALL RESET
NEXT PAGE
: RGB
: RGB
: AUTO
: 1080B
: OFF
:
ON
SEL.
EXIT RETURN
OK
MENU
ALL RESET
SETTING NOW
When the “SETTING NOW” screen disappears, then all the
settings are restored to the default values.
Information
Ⅵ INPUT SKIP settings
OFF: Regardless of the presence of the signal, scan
and display all signals.
ON: If no input signal is present, skip that signal.
* “SETTING NOW” will appear during the input search.
English
OSD (On Screen Display) Controls
19
En
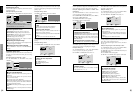
Option2 Settings Menu
Setting the power management for computer
images
This energy-saving (power management) function
automatically reduces the monitor’s power consumption
if no operation is performed for a certain amount of time.
Example:
Turning the power management function on
Set “ADVANCED OSD” to “ON” in the main menu (1/
2), then perform the following operations.
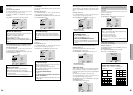
On “PWR. MGT.” of “OPTION2” menu, select “ON”.
OPTION2
2 / 3
PREVIOUS PAGE
PWR. MGT.
PURECINEMA
LONG LIFE
SIDE MASK
S1/S2
PICTURE SIZE
DVI SET-UP
NEXT PAGE
: ON
: ON
: 3
: OFF
: ON
SEL.
ADJ.
EXIT RETURN
Information
Ⅵ Power management function
* The power management function automatically reduces
the monitor’s power consumption if the computer’s
keyboard or mouse is not operated for a certain amount
of time. This function can be used when using the
monitor with a computer.
* If the computer’s power is not turned on or if the
computer and selector tuner are not properly connected,
the system is set to the off state.
* For instructions on using the computer’s power
management function, refer to the computer’s operating
instructions.
Ⅵ Power management settings
ON: In this mode the power management function is
turned on.
OFF: In this mode the power management function is
turned off.
Ⅵ Power management function and STANDBY/
ON indicator
The STANDBY/ON indicator indicates the status of
the power management function. See below for
indicator status and description.
STANDBY/ON indicator
Power
management
mode
On
Off
Turning the picture
back on
Picture already on.
Operate the keyboard or
mouse. The picture
reappears.
STANDBY/
ON indicator
Green
Red
Power
management
operating status
Not activated.
Activated.
Description
Horizontal and vertical
synchronizing signals
are present from the
computer.
Horizontal and/or
vertical synchronizing
signals are not sent
from the computer.
Setting the picture to suit the movie
The film image is automatically discriminated and
projected in an image mode suited to the picture.
[NTSC, PAL, PAL60, 480I (60Hz), 525I (60Hz), 576I
(50Hz), 625I (50Hz), 1035I (60Hz), 1080I (60Hz) only]
Example: Setting the “PURECINEMA” to “OFF”
Set “ADVANCED OSD” to “ON” in the main menu (1/
2), then perform the following operations.
On “PURECINEMA” of “OPTION2” menu, select “OFF”.
OPTION2
2 / 3
: OFF
: OFF
: 3
: OFF
: ON
SEL.
ADJ.
PREVIOUS PAGE
PWR. MGT.
PURECINEMA
LONG LIFE
SIDE MASK
S1/S2
PICTURE SIZE
DVI SET-UP
NEXT PAGE
EXIT
RETURN
Information
Ⅵ PURECINEMA
ON: Automatic discrimination of the image and
projection in PURECINEMA.
OFF: PURECINEMA does not function.
Reducing burn-in of the screen
The brightness of the screen, the position of the picture,
positive/negative mode and screen wiper are adjusted to
reduce burn-in of the screen.
Set “ADVANCED OSD” to “ON” in the main menu (1/
2), then perform the following operations.
On “OPTION2” menu, select “LONG LIFE”, then press the
MENU/SET button.
The “LONG LIFE” screen appears.
LONG LIFE
ABL
ORBITER
INVERSE
SCREEN WIPER
SOFT FOCUS
: AUTO
: OFF
: OFF
: OFF
: OFF
SEL.
ADJ.
EXIT RETURN
ABL (Auto Brightness Limiter)
Use this to activate the brightness limiter.
Example: Setting “ABL” to “LOCK1”
On “ABL” of “LONG LIFE” menu, select “LOCK1”.
LONG LIFE
ABL
ORBITER
INVERSE
SCREEN WIPER
SOFT FOCUS
: LOCK1
: OFF
: OFF
: OFF
: OFF
SEL.
ADJ.
EXIT RETURN
Information
Ⅵ ABL settings
AUTO: The brightness of the screen is adjusted
automatically to suit the picture quality.
LOCK1, 2, 3: Sets maximum brightness.
The brightness level decreases in the order of LOCK
1, 2, 3. LOCK 3 provides minimum brightness.