169
7
Connecting to a Computer
Connect the camera to a computer using the provided USB cable.
1
Turn the computer on.
2
Turn the camera off.
3
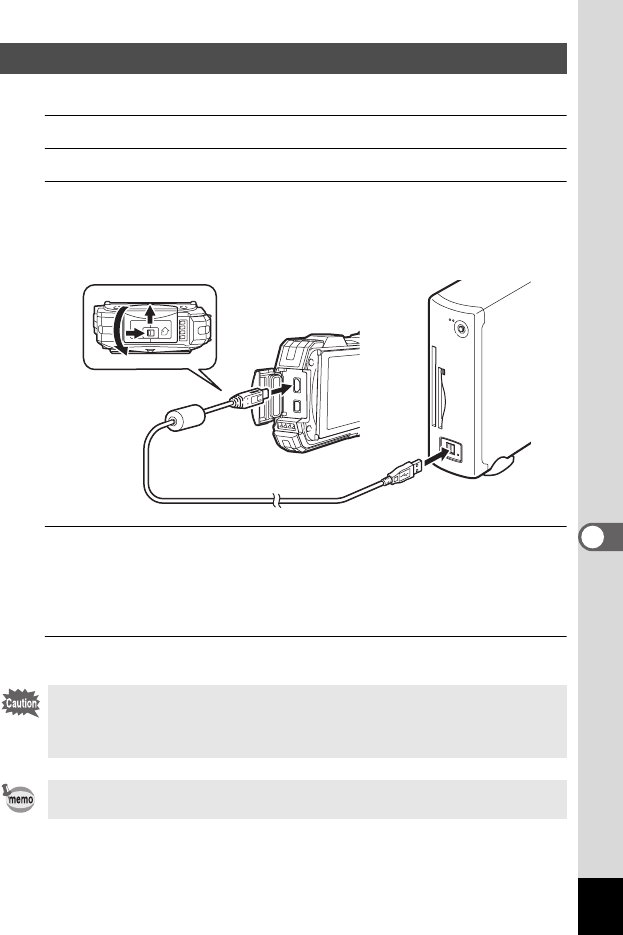
Connect the camera to the computer using the USB cable.
Connect the terminal of the USB cable with the B mark facing the display side
of the camera.
The power lamp blinks when the camera is connected to the computer correctly.
4
Turn your camera on.
The power lamp stops blinking and remains lit when the camera is recognized
as a removable disk by the computer.
If the “WG-30” dialog appears when the camera is turned on, select [Open folder
to view files] and click the OK button.
5
Save the captured images to the computer.
Connecting the Camera and a Computer
If the battery runs out of power while images are being transferred to a
computer, the image data may be lost or damaged. When connecting the
camera to a computer, use of the AC adapter kit (K-AC117) (optional) is
recommended (p.33).
For information on system requirements, refer to p.170.


