31
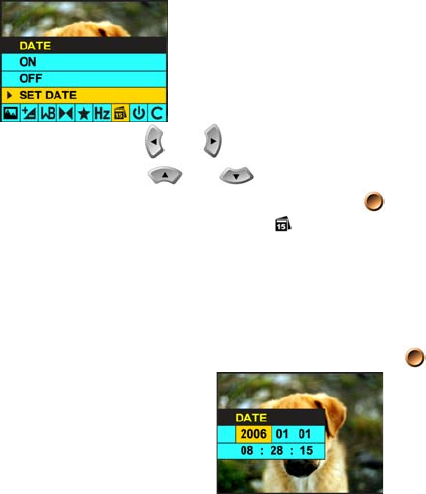
1. Press the
and navigation buttons until you have selected the Date menu.
2. Using the
and navigation buttons, select your Date setting: On, Off or Set
Date and then press the OK/Enter button
to confirm your selection.
a. ON: The date icon
will appear on the LCD screen. The date and time of
recording will be imprinted on the bottom right of the photo. The imprinted date
and time cannot be deleted.
b. OFF: The date and time will not appear on your pictures. (The date and time
will still be stored in the picture data and can be added, removed or edited
using PhoTags Express software).
c. SET DATE:
i. Press the OK/Enter button
.


