ŝ49Ş
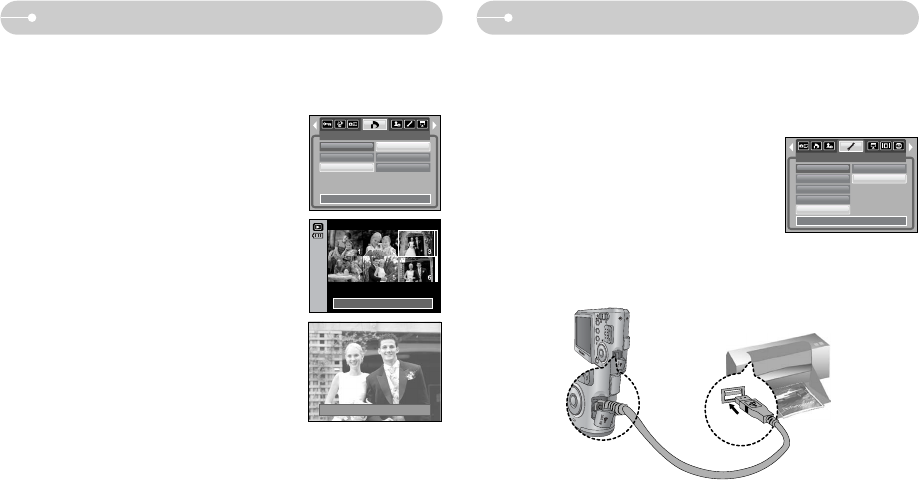
PictBridgeDPOF : Print size
ƃ Setting the Print Size
1. Select the [Size] menu by pressing the UP / DOWN
button and press the RIGHT button.
2. Select a desired sub menu by pressing the
UP / DOWN button and press the OK button.
[Select] : Selection window for an image to be
changed printed size is displayed.
- Up / Down / Left / Right : Select an image.
- Zoom W / T Button : Change the print size.
- OK button : Your changes will be saved and the
menu will disappear.
[All Pics] : Change print size of all saved images.
- W / T button : Select a print size
- OK button : Confirm the changed setting.
[Cancel] : Cancel all of the print size settings.
ſ DPOF [Size] secondary menu : Cancel, 3X5, 4X6,
5X7, 8X10
ſ Depending on the manufacturer and printer model,
cancelling the printing may take a little longer for
the printer to process.
ƈ You can specify the print size when printing images stored on the memory card.
The [Size] menu is available only for DPOF 1.1 compatible printers.
Set:OK
W Cancel T
DPOF
Standard
Index
Size
Back: Set:OK
Select
All Pics
Cancel
Set:OK
W Cancel T
ƈ You can use the USB cable to connect this camera to a printer that supports
PictBridge (sold separately) and print the stored images directly. Movie clips and
voice files cannot be printed.
ƈ Setting up the camera for connection with the printer
1. In any mode with the exception of Voice Recording
mode, press the MENU button.
2. Press the LEFT / RIGHT button and select
[SETUP] menu tab.
3. Select [USB] menu by pressing the UP / DOWN
button and press the RIGHT button.
4. Select [Printer] menu by pressing the UP / DOWN
button and press the OK button.
SET UP
Format
Date&Time
Imprint
Sound
USB
Back: Set:OK
Computer
Printer
ſ If you selected [COMPUTER] in Step 5, when you connect the camera to your
printer, the [USB ERROR!] message will display and the connection will not be
established. In this case, disconnect the USB cable, and then follow the
procedure from Step 2 onwards.


