


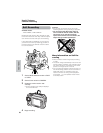

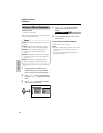

Useful Features
Playback
Useful Features
39
Displaying the Date and
Time of Recording
Available modes:
All modes
Follow the procedure below to display the date,
or both the date and time, of recording on the
screen. You can display the date and time
during both recording and playback.
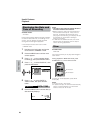
• The example screens shown are for TAPE-
CAMERA mode.
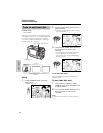
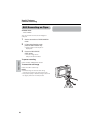
1 Hold down the Lock button and set the
Power switch to CAMERA or VCR.
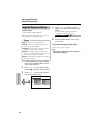
2 Press the MENU button until the menu
screen appears.
3 Press l or m on the operation button
to select P, then press the SET button.
4 Press l or m to select “DISPLAY”, then
press the SET button.
5 Press l or m to select “DATE” or
“DATEHTIME”, then press the SET
button.
6 Press the MENU button until the date (or
date and time) displays.
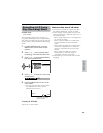
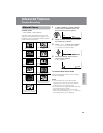
OFF
DATE
DATE T IME
+
CLOCK SET
DISPLAY
SETTING
12H 24H/
RETURN
DISPLAY
DATE
+
TIME
AUTO
30
min
3002.2
03MA:01
JUN.
Notes:
• The date (or date and time) appears when the
on-screen indicators are turned on.
• Before recording, make sure that the date and
time have been correctly set. If they have not
been set, the display will be left blank when
playing back the recording. (The display will also
be left blank for unrecorded or damaged
portions of the tape.)
• In TAPE-VCR or CARD-VCR mode, the current
date and time are displayed when the tape or
card is not being played back.
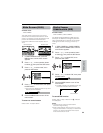
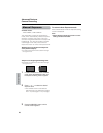
Slow
Available mode:
TAPE-VCR
This function allows you to play back images in
slow motion.
During playback in TAPE-VCR mode, press
SLOW button (f) on the remote control.
To return to normal playback, press PLAY
button (t).
Notes:
• The sound is off in Slow mode.
• To protect the tape, the camcorder automatically
returns to normal playback if it is left in Slow
mode for more than 10 minutes.
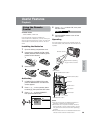
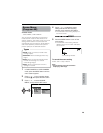
SLOW button
PLAY button