


Getting Started Guide 7.0 | 27
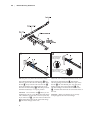
3
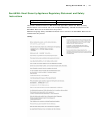
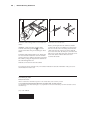
Pins extended through:
• Rack-mount flange
• Rail-mount flange
Pins not extended through:
• Rack-mount flange
• Rail-mount flange
Attach the front rail bracket to the rack:
Press the tab 2 away from the rail. Slide the front
rack-bracket pins 1 away from the rail-mount
flange3 until the front rail bracket stays open.
Place the rack-mount flange 4between the front
rack-bracket pins 1and the rail-mount flange3.
Press the tab 2away from the rail. The pins snap
forward and extend through the rack-mount flange
and the rail-mount flange.
Attention: Make sure that the rail is securely
clamped against the rack-mount flange.
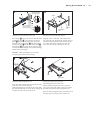
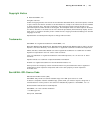
4
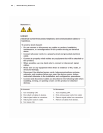
Server
Side release
latch
Rail-lock
pin
Insert the server into the rack cabinet:
Align the server on the slide rails and push the
server into the rack cabinet. If the rail-lock pins are
extended out, pull the side release latches toward
you, which lifts up the rail-lock pins. Push the
server into the rack the remainder of the way.
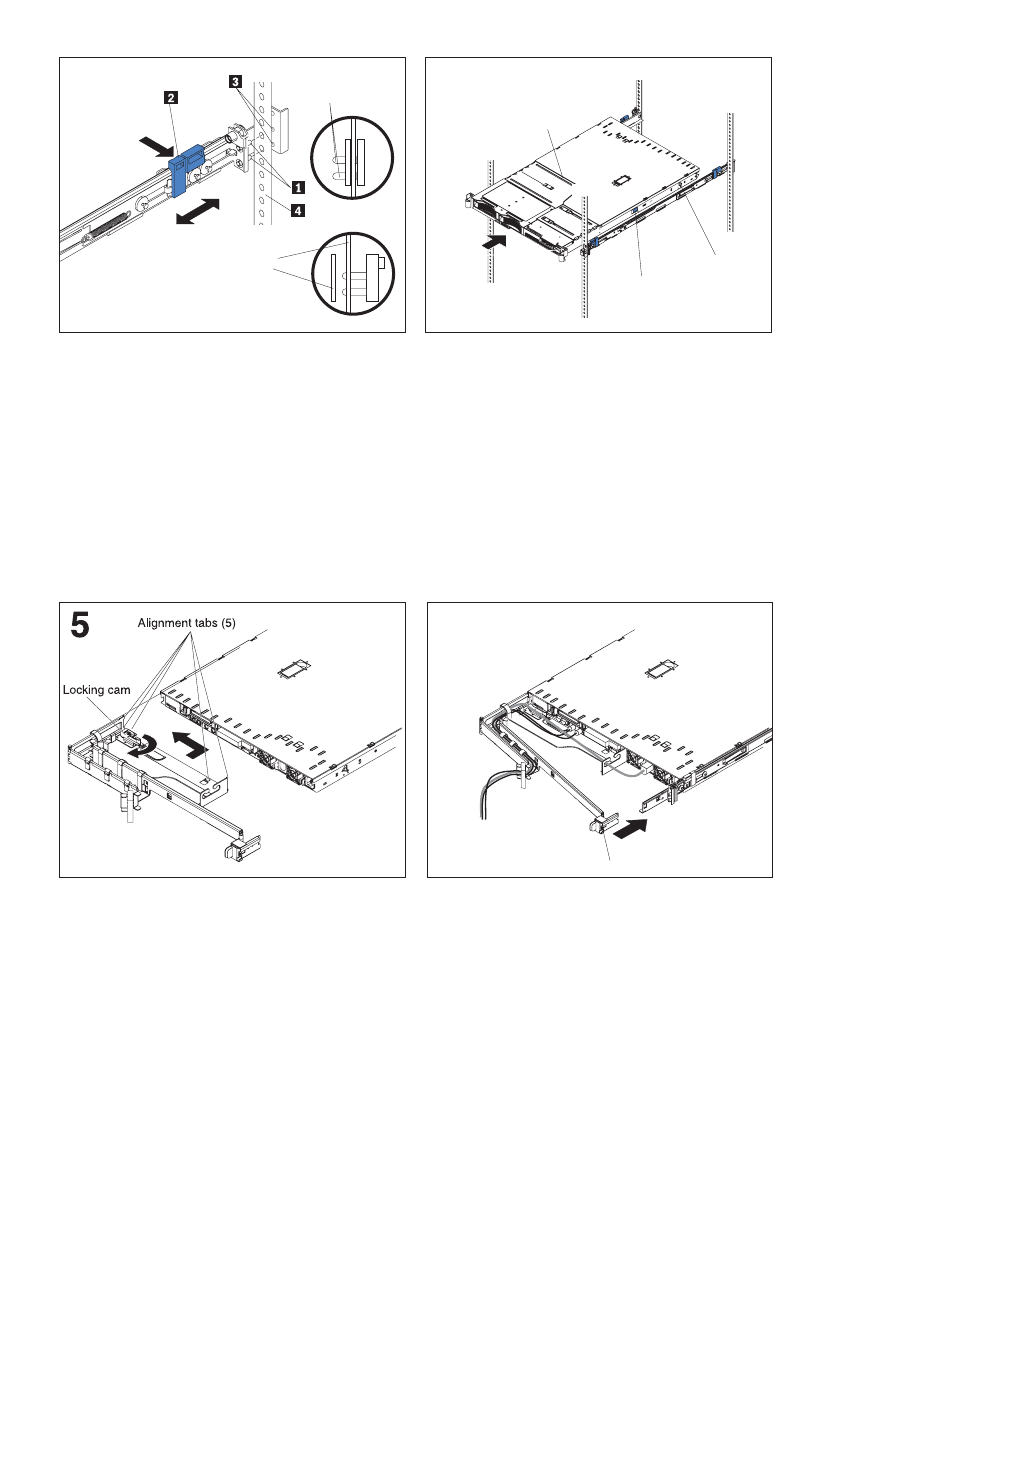
Install the cable-management arm:
Insert the cable-management arm into the five slots
in the rear of the server. When the
cable-management arm is inside all five slots, slide
the cable-management arm to the left by pulling the
locking cam back, away from the server.
6
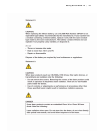
Snap latch
Connect the cables and secure the
cable-management arm to the rack:
Pull the cable-management arm away from the
server, and connect the cables to the server. Route
the cables through the cable-management arm.
Move the cable-management arm toward the rail on
the right side, and snap the latch onto the rail.