


Chapter 1 Overview
22 Chapter 1 Overview
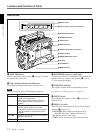
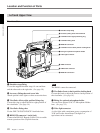
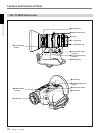
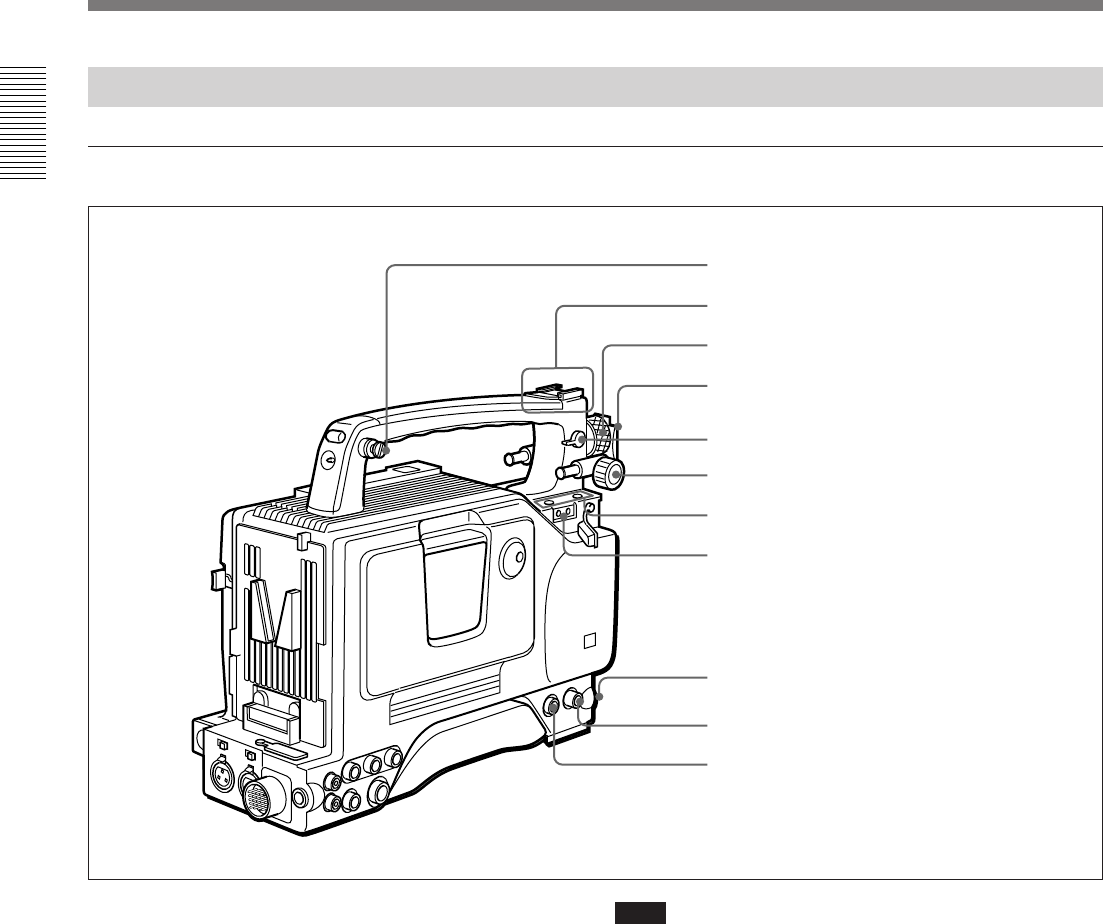
Left and Upper View
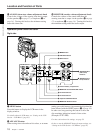
Front section
1 Shoulder strap fitting
To use the supplied shoulder strap, fix one end here
and the other end to the right side. (See page 38.)
2 Accessory fitting shoe and screw hole
Attach optional video lights or other accessories here.
3 Viewfinder left-to-right position fixing ring
Loosen this ring to adjust the left-to-right position of
the viewfinder. (See page 34.)
4 Viewfinder fitting shoe
Fix the DXF-701WS/701WSCE Viewfinder here.
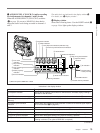
5 REMOTE connector 1 (mini-jack)
Connect the RM-LG1 Remote Control Unit to enable
remote operation of the ClipLink function.
Note
The RM-81 cannot be connected.
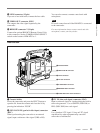
6 Viewfinder front-to-back position locking knob
Loosen this knob to adjust the front-to-back position of
the viewfinder. (See page 34.)
7 Fitting for optional microphone holder
You can fit an optional CAC-12 Microphone Holder
here. (See page 35.)
8 Video light connector
A video light with a maximum power consumption of
30 W such as the Anton Bauer Ultralight 2 or
equivalent can be connected.
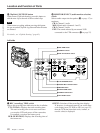
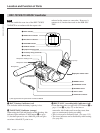
1 Shoulder strap fitting
2 Accessory fitting shoe and screw hole
3 Viewfinder left-to-right positioning ring
4 Viewfinder fitting shoe
5 REMOTE connector 1
6 Viewfinder front-to-back position locking knob
7 Fitting for optional microphone holder
8 Video light connector
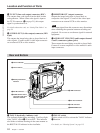
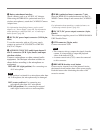
9 LENS connector
0 VIDEO OUT connector
!¡ REMOTE connector 2
Location and Function of Parts