


84 Chapter 4 Viewfinder Screen Indications and Menus
Chapter 4 Viewfinder Screen Indications and Menus
Viewfinder Advanced Menu
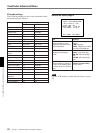
Contents and Settings of Each Page
Each page’s contents and settings are described below.
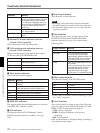
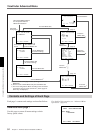
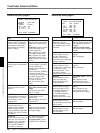
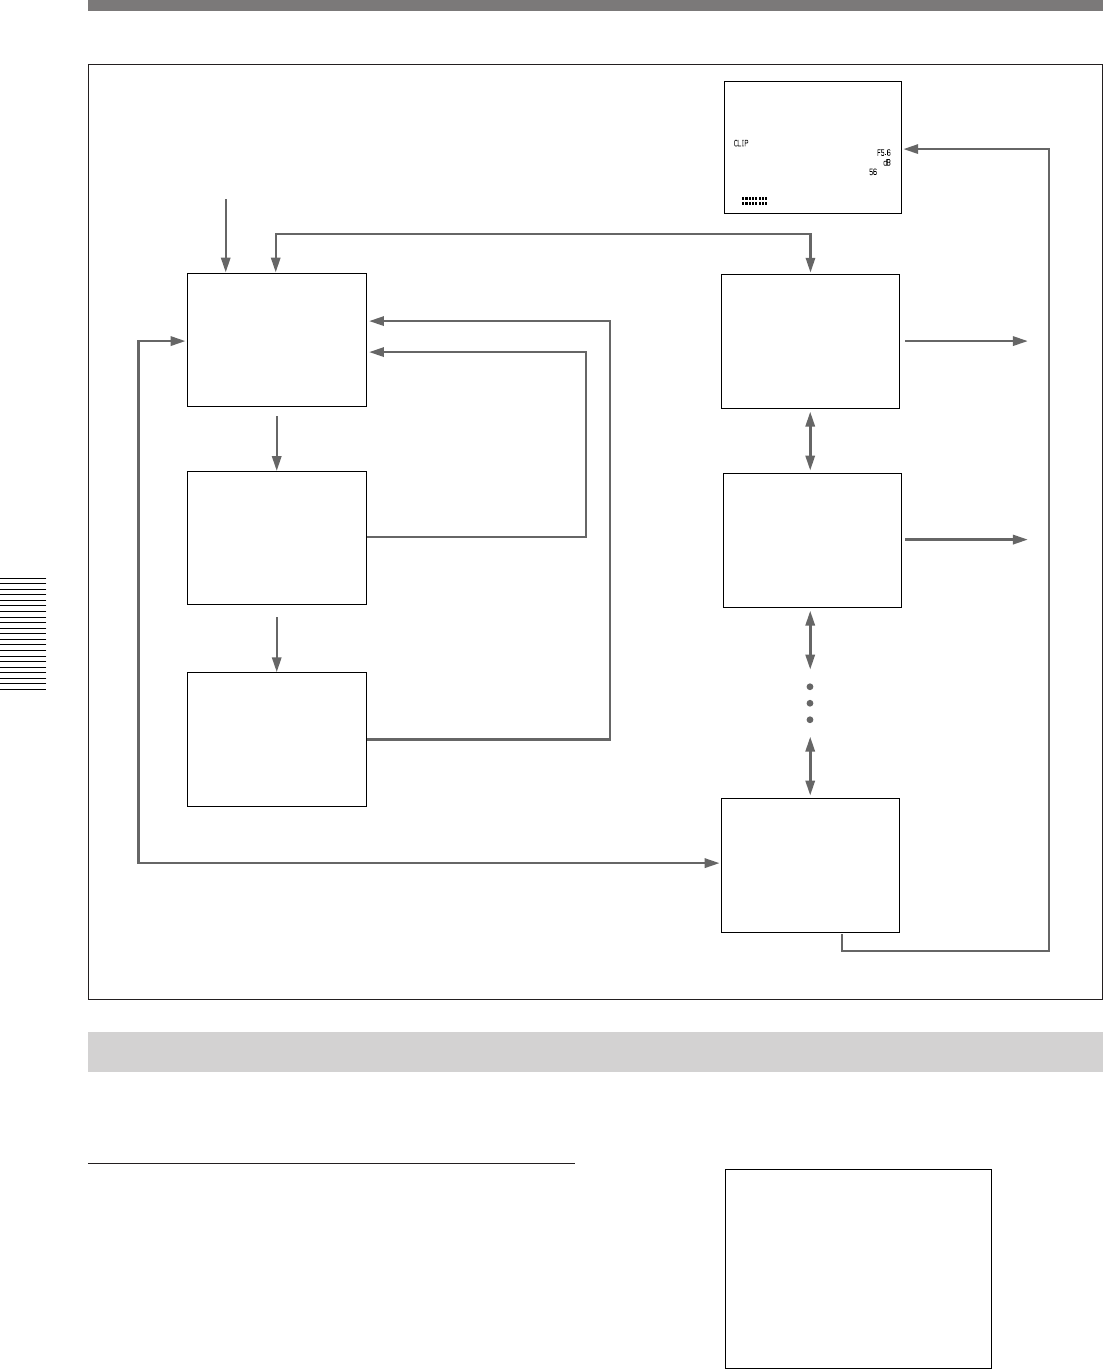
Advanced menu page 1
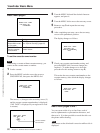
Use this page to return all menu settings to their
factory preset values.
For details of this operation, see “Advanced Menu
Operations” (page 83).
PAGE1 (NEXTm$ PREVm4)
mALL RESET
(YESmPUSH)
EXIT MENU (YESmPUSH)
mPAGE1 (NEXTm$ PREVm4)
ALL RESET
(YESmPUSH)
EXIT MENU (YESmPUSH)
PAGE1 (NEXTm$ PREVm4)
mALL RESET SURE?
(YESmPUSH)
EXIT MENU (YESmPUSH)
PAGE1 (NEXTm$ PREVm4)
mALL RESET OK!
(YESmPUSH)
EXIT MENU (YESmPUSH)
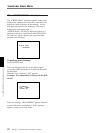
PAGE2 (NEXTm$ PREVm4)
GAIN
m HIGH:18dB
MID : 9dB
LOW : OdB
DL:ON
EXIT MENU (YESmPUSH)
PAGE3 (NEXTm$ PREVm4)
mAWB MEM : 2
PRE. WHT : 3200
TONE : OFF
BARS : SMPTE
REMOTE1 : REC
REMOTE2 : MARK
BAUD RATE: 38400
EXIT MENU (YESmPUSH)
TCG 2:34 56:1:00
ND
04 1809
0100MA
S1/00:0S1
189
:
M
0
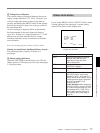
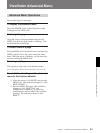
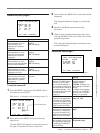
mPAGE10(NEXTm$ PREVm4)
SAT : ±0
HUE : ±0
SKIN SAT: ±O
SKIN HUE: ±0
EXIT MENU (YESmPUSH)
a) Set the cursor to the page number (blinking) and turn the
MENU dial.
b) Set the cursor to EXIT MENU and press the MENU dial.
c) The menu configuration differs according to the connected
accessories such as remote control unit. (Some pages or
items may not displayed.)
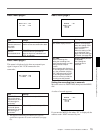
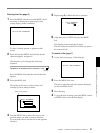
Move the POWER switch to
the ON position with the
MENU dial held down.
Turn the MENU dial.
a)
Align the cursor to
“ALL RESET” and
press the MENU dial.
Advanced
menu page 1
Turn the MENU dial
(to cancel resetting).
Press the MENU dial
(to cancel resetting).
Turn the MENU dial.
Turn the MENU dial.
a)
Confirmation
screen
Press the
MENU dial.
b)
Normal indications
page 2
c)
Press the
MENU dial.
b)
page 3
c)
Turn the
MENU dial.
a)
Turn the
MENU dial.
a)
page 10
c)
Press the
MENU dial.
b)