


15
GB
Basic operations
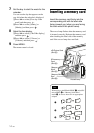
For details on compatible memory cards, see
pages 45 to 46. For supported file formats, see
the Operating Instructions, page 27.
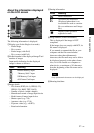
When you insert a memory card
When you insert a memory card, the images on
it are automatically displayed. If you switch off
the power while they are being displayed and
then switch the power back on, the same
images continue to be displayed.
Note
In “Clock and calendar” display, change to
“Slideshow”, “Single image display” or “Index ” (See
next section).
To change the playback device
Press the SELECT DEVICE (page 26).
To remove a memory card
Remove the memory card from its slot in the
opposite direction from which it was inserted.
Do not remove the memory card while the
access lamp is flashing.
When the Clock and calendar view mode is
selected, the access lamp does not flash.
Notes
• The slot is both a “Memory Stick” standard and
Duo size compatible slot, so you do not need a
“Memory Stick” adaptor.
• The “Memory Stick” (Standard/Duo)/SD memory
card/MMC/xD-Picture Card multi-purpose slot
automatically detects the card type.
• Do not insert multiple memory cards into A, B
slots simultaneously. If multiple memory cards are
inserted, the photo frame will not work properly.
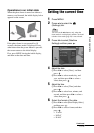
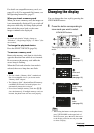
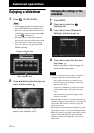
Changing the display
You can change the view style by pressing the
VIEW MODE buttons.
1 Press the button corresponding to
view mode you want to select.
The display changes to selected view
mode.
.
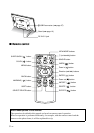
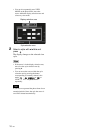
Tips
• When using the buttons on the photo frame,
press VIEW MODE on the upper back of
the LCD screen, press V to move the cursor
to the display selection area and press B/b
to select a display.
1
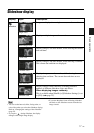
Slideshow
(.page 17)
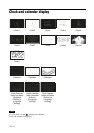
2
Clock and
calendar
(.page 18)
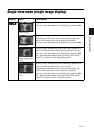
3
Single image
display
(.page 19)
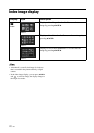
4
Index
(.page 20)
VIEW MODE buttons
Continued