


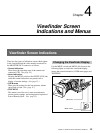
Chapter 4 Viewfinder Screen Indications and Menus
Chapter 4 Viewfinder Screen Indications and Menus 51
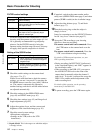
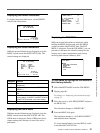
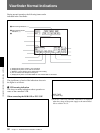
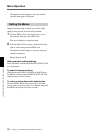
Displaying the normal indications
To display the normal indications, set the POWER
switch to the ON position.
PLAY TAPE NEAR END
TCG 12:34:56:00
03 08 01
5600K
12:34:56PM
64ND
SKIN
W:A
36dB
1
00.4H
Z
::::::::
30
-
25
F5.6
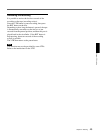
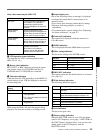
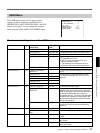
Displaying the Status indications
While the normal indications are displayed, press the
MENU switch toward the OFF/STATUS side. The
current settings are displayed.
WHITE : 3200K
A.IRIS : SPOT L.
SCENE 01: ABCD1234
DCC : ON
BATT : 13.1V
PLAY TAPE NEAR END
TCG 12:34:56:00
03 08 01
5600K
12:34:56PM
64ND
SKIN
W:A
36dB
1
00.4H
Z
::::::::
30
-
25
F5.6
Indication Content
WHITE Color temperature during the white balance
adjustment
A. IRIS Aperture adjustment method (STD/SPOT L./
BACK L.)
SCENE Number and filename of the selected scene
file
DCC ON/OFF of DCC while DCC is selected in the
menu setting, or ON/OFF of ADAPTIVE while
ADAPTIVE is selected in the menu setting
BATT Power voltage indication
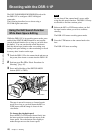
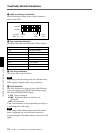
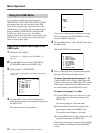
Displaying the USER menu
While the normal indications are displayed, press the
MENU switch toward the ON/CANCEL side. The
USER menu is displayed. On the USER menu, basic
camera settings and selection of scene files can be
performed.
<USER PAGE 1> U1
A.IRIS OVERRIDE : 0
DTL LEVEL : 0
MASTER BLACK : 0
PRESET MATRIX : STD
SCREEN MODE : 16:9
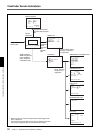
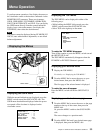
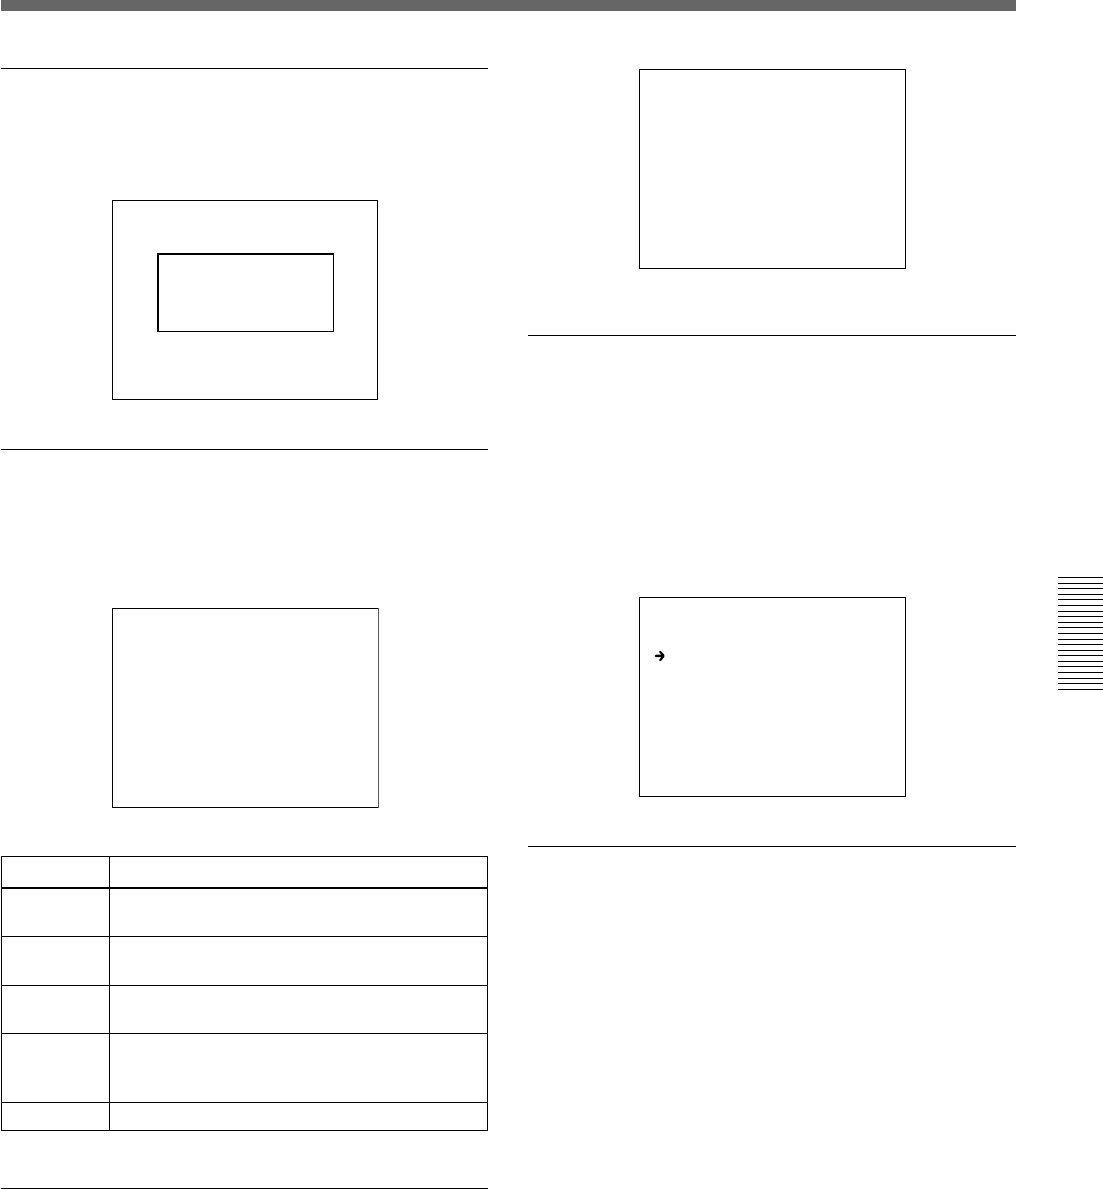
Displaying the TOP MENU
While the normal indications are displayed, while
holding the MENU dial pressed, press the MENU
switch toward the ON/CANCEL side. The TOP
MENU is displayed. From the TOP MENU, you can
proceed to each menu for advanced settings for the
camera, user’s menu customization, and storing/
retrieving data to/from a Memory Stick.
<TOP MENU>
USER
USER MENU CUSTOMIZE
OPERATION
PAINT
MAINTENANCE
FILE
To reinitialize all settings on the menus to
their factory defaults
1 Select MAINTENANCE from the TOP MENU.
2 Display page M1.
For details, see “Displaying your desired menu page”
on page 55.
3 Move the cursor to ALL MENU RESET and press
the MENU dial.
The indication changes to “RESET OK?”.
4 Press the MENU dial again.
The indication changes to “ALL MENU RESET,”
and reinitialization completes.
To cancel reinitialization, press the MENU switch
toward the ON/CANCEL side.