


94
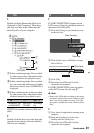
1 Select [SET] t [DATE/TIME] t
[DATE] or [DAY & TIME] with the
SEL/PUSH EXEC dial.
2 Select [ RETURN] by turning the
SEL/PUSH EXEC dial, then press the
dial.
The PictBridge selection screen appears
again.
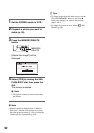
4 Select [EXEC] t [YES] with the
SEL/PUSH EXEC dial.
When printing is finished, [Printing...]
disappears and the image selection
screen appears again.
Press the MENU button when printing
is completed.
b Notes
• We do not guarantee proper operation when a
PictBridge incompatible device is connected.
• Refer also to the operating instructions for the
printer to be used.
• Do not attempt the following operations when
the printer is connected ( is on the screen).
The operations may not be performed properly.
– Operate the POWER switch.
– Disconnect the USB cable from the printer.
– Remove the “Memory Stick Duo” from your
camcorder.
• If the printer stops working, disconnect the USB
cable, turn the printer off and on again and
restart the operation from the beginning.
• Depending on your printer, the top, bottom or
side edges may be cut. Particularly when
printing a wide (16:9) image, the sides may be
cut significantly.
• Some printer models may not support the date/
time printing function. Refer to your printer’s
operating instructions for details.
• We cannot guarantee the printing of images
recorded with a device other than your
camcorder.
z Tip
• PictBridge is an industry standard established
by the Camera & Imaging Products Association
(CIPA). You can print still images without using
a computer by connecting a printer directly to a
digital video camera or digital still camera,
regardless of model or manufacturer.
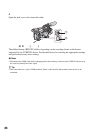
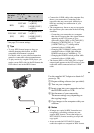
Printing recorded images (PictBridge compliant printer) (Continued)