


113
Chapter 5 Settings
4
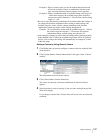
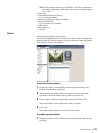
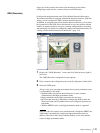
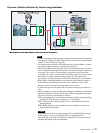
While checking the image in the preview, use the buttons to create and edit
the motion detection area and configure items.
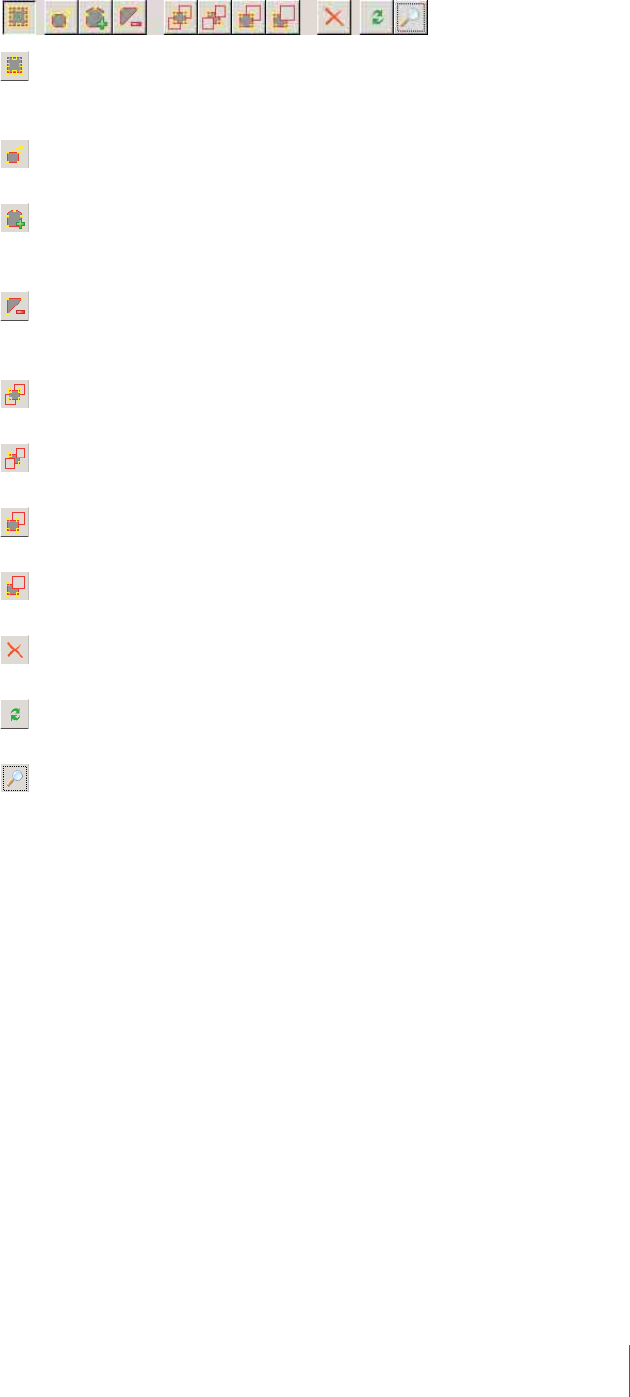
Buttons and functions
(Move Polygon)
Use this button to move an area or to create a rectangular area by dragging
an area edit point.
(Edit Points)
Use this button to add/delete edit points and to create areas in complex shapes.
(Add Point)
Use this button to divide a line at a specific location. You can also add an
edit point to an area by clicking a line.
(Remove Point)
Use this button to decrease the number of lines by one. You can also remove an
edit point from an area by clicking an edit point.
(Bring to Front)
Moves the selected area to the top of a stack of overlapping areas.
(Send to Back)
Moves the selected area to the bottom of a stack of overlapping areas.
(Bring Forward)
Moves the selected area up one level in a stack of overlapping areas.
(Send Backward)
Moves the selected area down one level in a stack of overlapping areas.
(Delete Polygon)
Deletes the selected area.
(Refresh Image)
Refreshes the still image that includes all the areas.
(Preview)
Displays a live image from the camera that includes the areas.
This allows you to confirm how the configured areas appear.
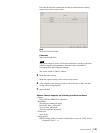
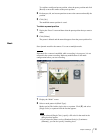
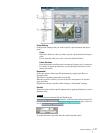
Setting items
Area Mode
Click [V], and from the list that appears, select whether to detect motion
inside or outside the set area.
To detect motion inside the set area, select [Include], and to detect motion
everywhere outside the set area, select [Exclude].
Display Color
Click the [Display Color] box, and specify a color to fill the motion
detection area in the dialog box that appears.
Preset Name
To configure by preset positions, click [V], and from the list that appears,
select a preset camera position to include in the configuration area.
If this setting is configured, the camera moves to the specified preset
position when motion detection starts.
Threshold
Set a value from 1 to 100 as the threshold for motion detection.