


13
GB
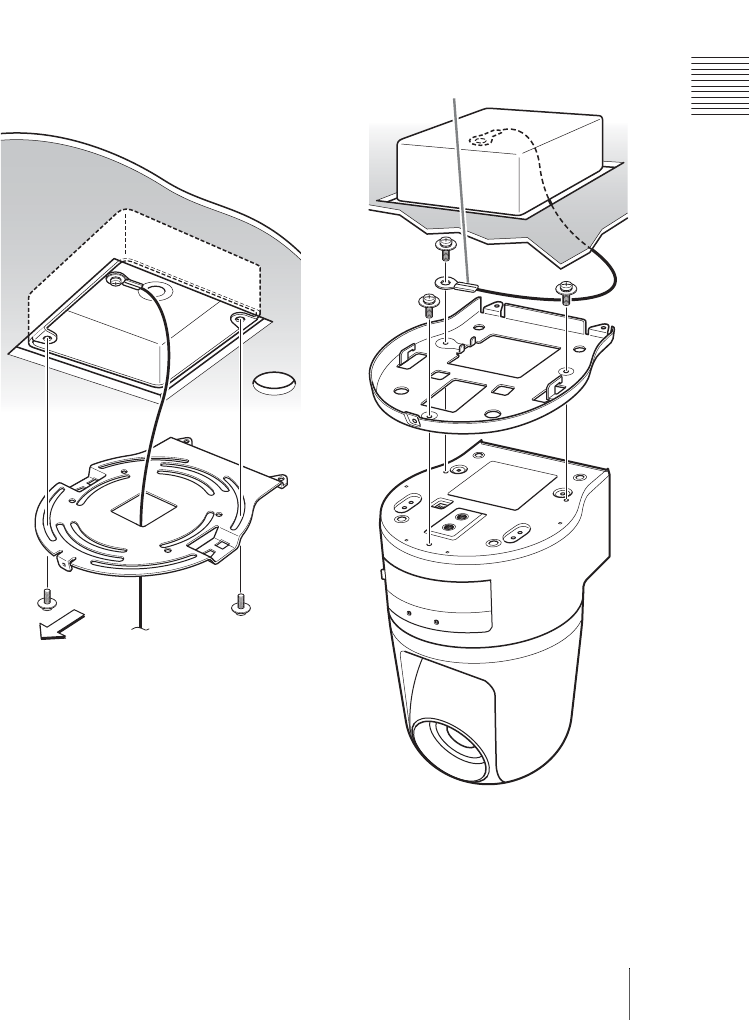
Installing the Camera
Basic Installation and Connections
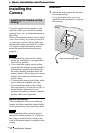
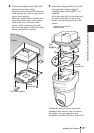
2 Attach the ceiling bracket (B) to the
junction box on the ceiling.
Align the holes in the bracket with those
in the junction box, and use appropriate
screws (not supplied).
There are elongated holes for the screws
along the rounded edges of the ceiling
bracket (B). Later, the front of the
camera will be positioned along this
edge. Face the camera to the front, adjust
the aim, and attach it securely.
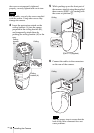
3 Attach the ceiling bracket (A) to the
bottom of the camera using the
supplied three screws (
3M 3 × 6)
supplied.
Align the screw holes on the bottom of
the camera with those in the ceiling
bracket, and attach the bracket to the
camera.
Tighten the screws a bit at a time in the
numbered order shown in the illustration.
Attach the wire rope using the screw
designated as number 3 above. After all of
Front of the camera
Ceiling
Ceiling
bracket (B)
Attach the wire rope at
the same time.
3M
3
× 6
(supplied)
1
2
3
Ceiling
bracket (A)
Ceiling