Administrating the Camera
Configuring the System — System Menu
31
Custom: Displays your individual homepage.
You can display your favorite homepage stored in the
built-in flash memory.
To store the HTML file of the homepage in the built-
in flash memory, use the Custom Homepage Installer
included in the supplied CD-ROM.
To learn how to use of the Custom Homepage
Installer, see page 89.
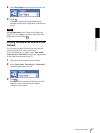
To display your individual homepage, perform the
following operation:
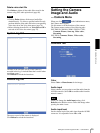
1
Select Custom.
2
Type the path of the HTML file using up to 64
characters in the text box on the right of Path.
Tip
Even when you select Custom, the homepage inside the
camera can be displayed by typing the following URL in
the address box of your Web browser.
Example: When the IP address of the camera is set to
192.168.0.100
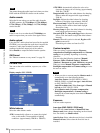
Exclusive control mode (SNC-DM110 /
DM160 / CM120 only)
Controls the authority to operate pan, tilt, zoom and
some other functions of the camera.
On: Only one user has control authority. Set the
operation time for one user in Operation time.
If a user tries to operate a function during operation
by another user, the authority is controlled by the
settings of Operation time and Maximum wait
number.
Off: Multiple users can control pan, tilt and zoom at the
same time. When multiple users control these
functions at the same time, the last operation has
priority.
Operation time
Sets the time length for a user who has control authority.
The selectable range is from 10 to 600 seconds. This is
effective when Exclusive control mode is On.
Maximum wait number
Sets the number of users who are permitted to wait for
their turn for control authority during operation by one
user. The selectable number is from 0 to 10. This is
effective when Exclusive control mode is On.
Notes
•To use Exclusive control mode, the date and time of
the camera and the connected computer must be set
correctly at first.
•To use Exclusive control mode, do not disable the
web browser Cookie. When it is disabled, this mode
cannot be used.
• When you change the Exclusive control mode
setting, click Refresh on the web browser to reflect
the change when opening the main viewer.
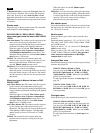
PTZ mode (SNC-DM110 / DM160 / CM120
only)
Select the pan/tilt control mode using the 8-direction
arrow buttons (page 24) and the zoom control mode
using the TELE/WIDE button (page 24).
Select Normal or Step.
Normal: When you click the mouse button, panning,
tilting or zooming operation starts, and the operation
continues while you hold down the mouse button. To
stop the operation, release the mouse button.
Step: Each time you click the mouse button, the image
moves (panning, tilting or zooming). If you keep the
mouse button held down for more than 1 second, the
operation mode is temporarily changed to Normal.
When you release the mouse button, the image
operation stops and the Step mode is restored.
When you select Step, Pan/Tilt level and Zoom level
are selectable.
Pan/Tilt level: Select the image transition level from 1
to 10 by clicking the 8-direction arrow button for
panning/tilting. Selecting 10 provides the maximum
transition level.
Zoom level: Select the image transition level from 1 to
10 by clicking or for zooming.
Selecting 10 provides the maximum transition level.
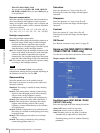
Sensor input mode
Specify the detection mode of the signal input to the
sensor input terminal of the camera.
Normally open: Detects alarm when the sensor input is
short-circuited.
Normally closed: Detects alarm when the sensor input
is open-circuited.
OK/Cancel
See “Buttons common to every menu” on page 28.


