Administrating the Camera
Setting the Camera Image and Audio — Camera Menu
36
Note
You cannot change the audio input level when you select
LINE with the AUDIO IN selector on the camera.
Audio encode
Select the bit rate when you send the audio from the
AUDIO connector. G.711 (64kbps), G.726 (40kbps),
G.726 (32kbps), G.726 (24kbps) or G.726 (16kbps)
can be selected.
Note
If the bit rate is set to other than G.711(64kbps), no
audio is output when you use the Java applet viewer.
Audio upload
Using the SNC audio upload tool stored in the supplied
CD-ROM, you can output the audio that is input to the
computer’s audio input terminal from the speaker
connected to the line output jack of the camera.
Select Enable to output the audio from the speaker.
OK/Cancel
See “Buttons common to every menu” on page 28.
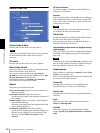
Picture Tab
You can set the color condition, exposure, etc. of the
camera.
Display sample: SNC-CM120
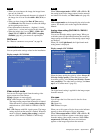
White balance
Select the white balance mode.
ATW: Automatically adjusts to re-create the original
color, as this mode is insusceptible to lighting
conditions. (approximately 2000 K to 10000 K)
ATW-PRO: Automatically adjusts the color to be
closest to the image you are viewing. (approximately
3000 K to 7500 K)
Tungsten bulb: Adjust the white balance for shooting
indoors under the tungsten bulb. (approximately
3200 K)
Daylight: Adjusts the white balance for shooting
outdoors in daylight. (approximately 5800 K)
Fluorescent lamp: Adjust the white balance for
shooting indoors under a three-band daylight
fluorescent lamp.
Mercury lamp: Adjusts the white balance for shooting
under a high-pressure mercury lamp.
One push WB: The One push trigger button becomes
active. Click the button to adjust the white balance
instantly.
Manual: When this option is selected, R gain and B
gain become active.
Selectable gain values are from 0 to 255.
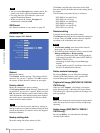
Custom template
When you select a custom template, Exposure
compensation, Backlight compensation and Gamma
setting are set optimally depending on shooting
situations.
You can select the following situations: Manual,
Entrance, Office, Platform (Indoor), Platform
(Outdoor), Basement car park, Multistory car park.
When you select Manual, Exposure compensation,
Backlight compensation and Gamma setting are set to
the user set values.
Notes
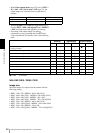
• When you select a custom template, Shutter mode is
automatically set to the following modes:
Auto Slow shutter: On SNC-DM110 / DS10 /
DM160 / DS60, or when Lens type is Auto iris lens
on SNC-CM120 / CS20.
Auto (Slow shutter on): When Lens type is Manual
iris lens on SNC-CM120 / CS20.
• When Shutter mode, Exposure compensation,
Backlight compensation or Gamma setting is
changed, the custom template turns back to Manual
automatically.
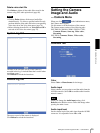
Exposure
You can set the exposure.
Lens type (SNC-CM120 / CS20 only)
Select the lens, Auto iris lens or Manual iris lens.
Shutter mode items change depending on the selected
lens. For details, see Shutter mode.
Auto iris lens: Select when the auto iris lens is installed.
Manual iris lens: Select when the fixed iris lens is
installed.


