VIVOTEK - A Leading Provider of Multimedia Communication Solutions
32 - User's Manual
Network
This section explains how to congure wired network connection for the Network Camera.
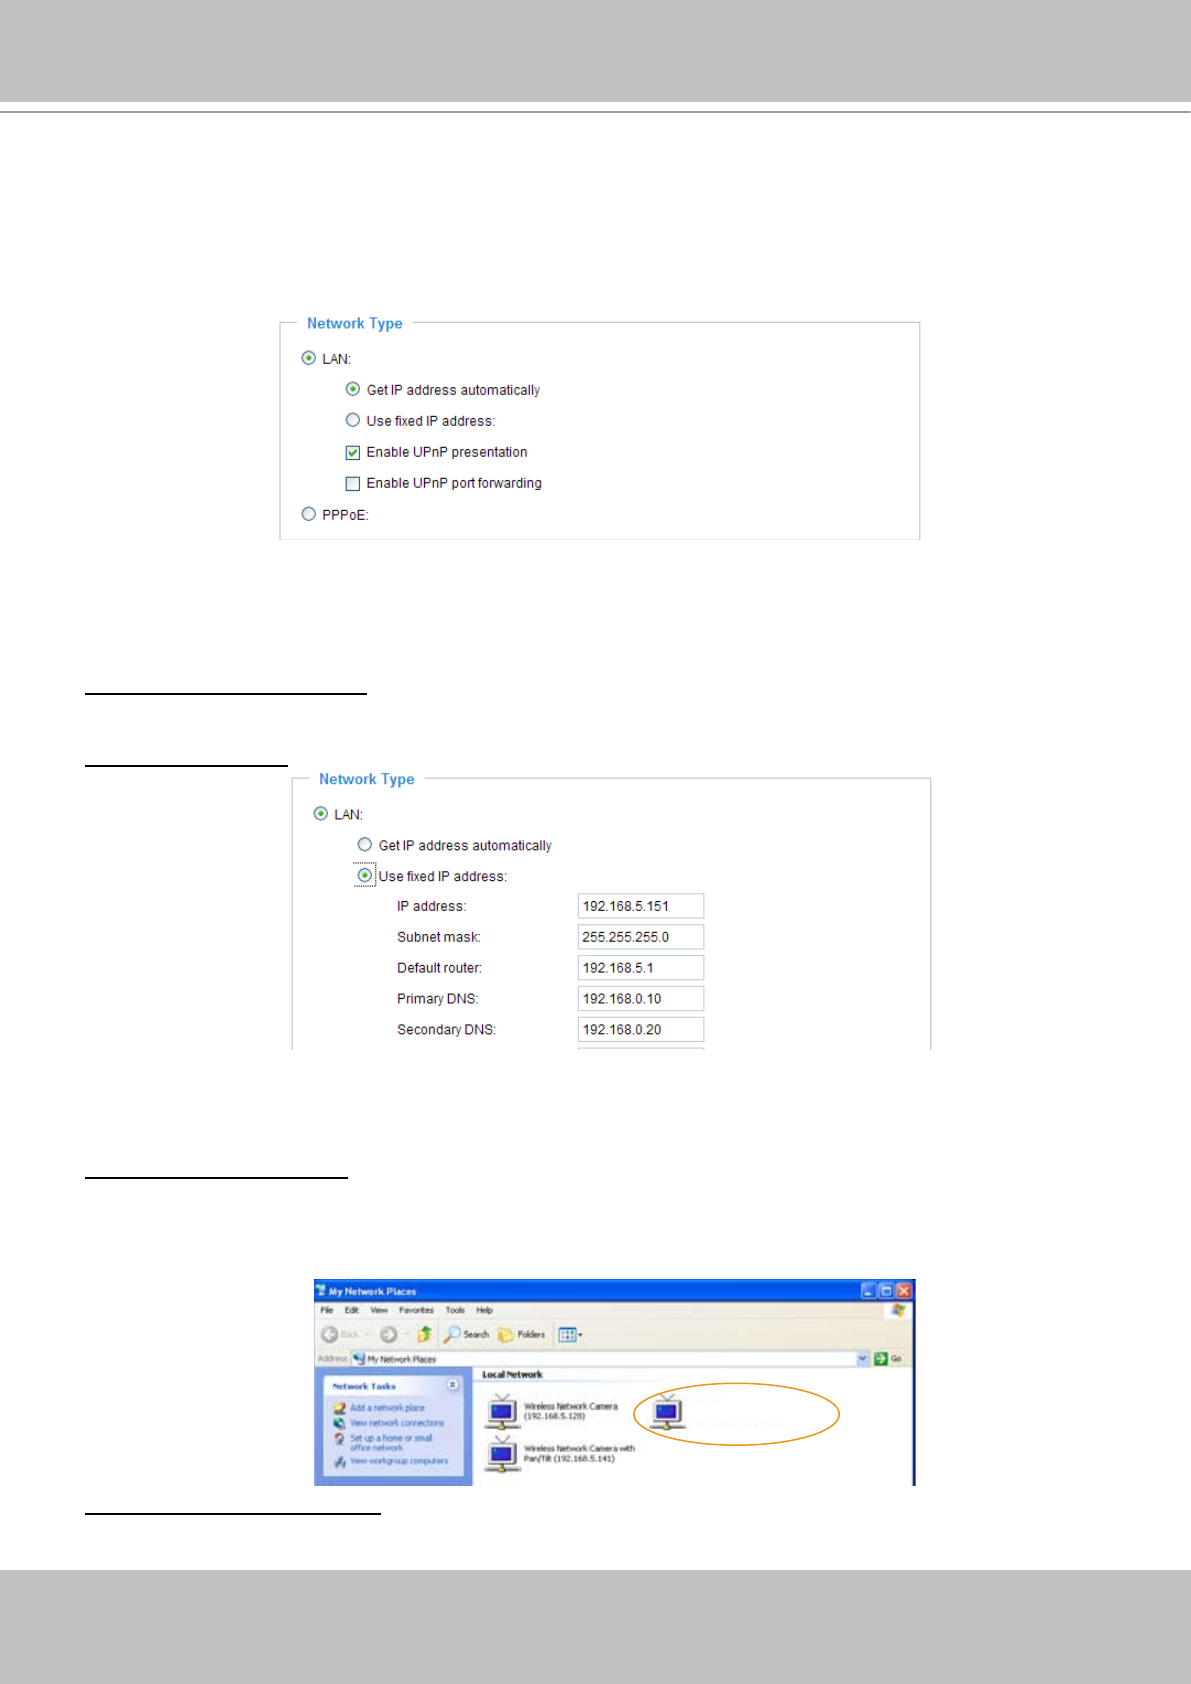
Network Type
LAN
Select this option when the Network Camera is deployed in a local area network (LAN) and is intended
to be accessed by local computers� The default setting of Network Type is LAN� Rememer to click Save
when you complete the Network setting�
Get IP address automatically: Select this option to obtain an available dynamic IP address assigned by a
DHCP server each time the camera is connected to the LAN�
Use xed IP address: Select this option to manually assign a static IP address to the Network Camera�
1� You can make use of VIVOTEK installation wizard 2 (IW2) on the software CD to easily set up the
Network Camera in LAN� Please refer to Software installation on page 11 for details�
2� Enter the static IP, Subnet mask, Default router, Primary DNS provided by your ISP�
Enable UPnP presentation: Select this option to enable UPnP
TM
presentation for your Network Camera
so that whenever a Network Camera is presented to the LAN, shortcuts of connected Network Cameras
will be listed in My Network Places� You can click the shortcut to link to the web browser� Currently,
UPnP
TM
is supported by Windows XP or later. Note that to utilize this feature, please make sure the
UPnP
TM
component is installed on your computer�
Enable UPnP port forwarding: To access the Network Camera from the Internet, select this option to
allow the Network Camera to open ports on the router automatically so that video streams can be sent
out from a LAN� To utilize of this feature, make sure that your router supports UPnP
TM
and it is activated�
Network Camera (192.168.5.151)


