2322
MULTI-CAMERA SYSTEMS
The Sentinel Camera System is designed so that you can use up to four
cameras together. Follow the steps in this section to set up and use your
additional cameras.
Setting Up Multiple Cameras
Each camera comes pre-programmed as camera 1 (C1). The first camera
you set up will stay C1. Program the additional cameras as C2, C3, and C4:
Bottom of
camera
1. Pick the camera to use as C2.
Follow the instructions at the
beginning of the manual to set it up.
2. Set the mode switch on the bottom
of that camera to Program.
3. Press C2 on your remote control to
set this camera to C2.
4. Set the mode switch back to
Transmit Enable.
Repeat these steps for the rest of the cameras, using C3 for the third camera
and C4 for the fourth camera.
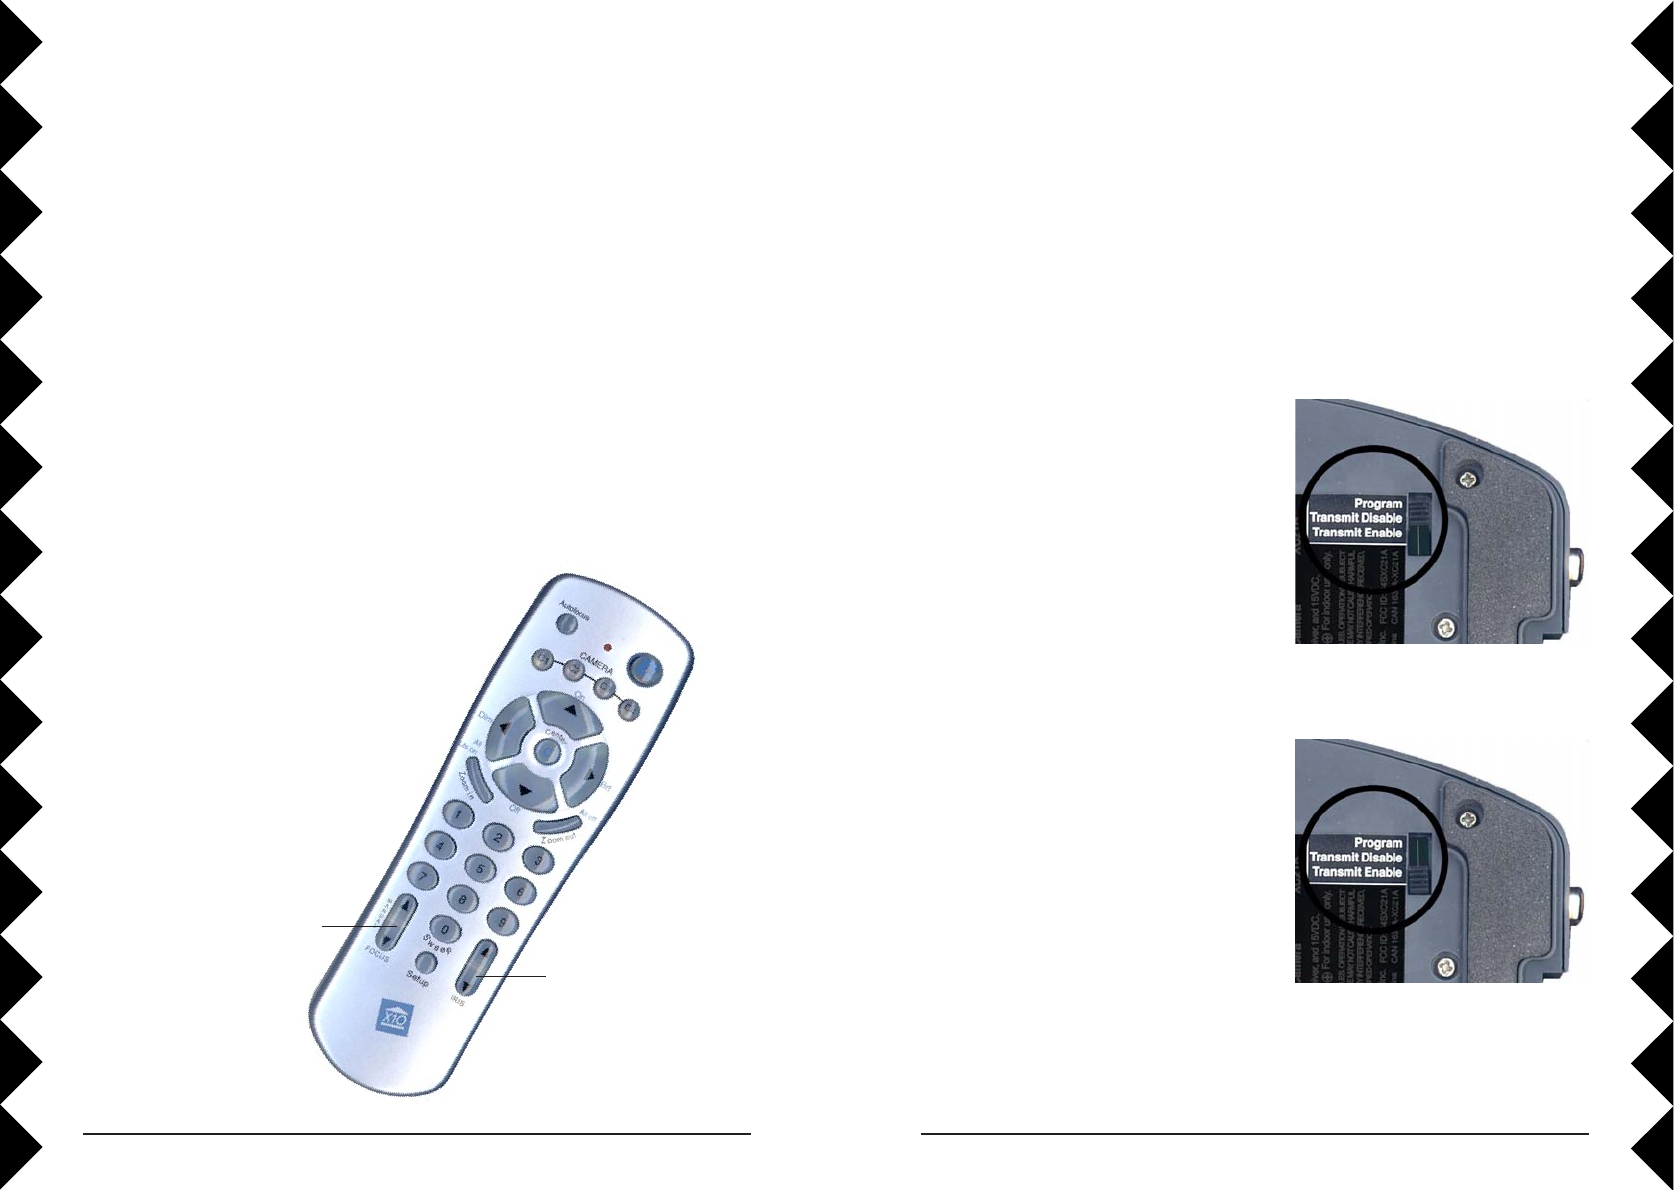
Up and Down arrows flip
the camera image from
left to right (mirror
image).
Up and Down arrows
flip the image from
top to bottom.
Picture Orientation
Vertical Orientation: If you choose not to mount the camera upside down.
Here’s how to flip the picture vertically in the camera so that the display on
the TV is the right way up:
1. Press and release C1.
2. Press and hold Setup on the remote until the C1 button lights green.
3. Press Iris Up to flip the picture. Press Iris Down to flip it back.
4. Press Setup again to save this setting.
Horizontal Orientation: You can also use the camera like a rearview
mirror by reversing the picture horizontally from left to right:
1. Press and release C1.
2. Press and hold Setup on the remote until the C1 button lights green.
3. Press Focus Up to reverse the picture.
Press Focus Down to reverse it back.
4. Press Setup again to save this setting.
Additional Setup Options
Note, if you flip the picture vertically,
you also need to flip it horizontally.
This also makes the left and right
movement buttons work the correct
way for upside down mounting.
