3938
TROUBLESHOOTING
If there’s no camera picture on your TV (wireless connection):
1. Make sure your Wireless Video Receiver is connected to power and
turned On.
2. Select the appropriate video input on your TV. Usually you can select
the input mode by pressing the VIDEO or INPUT button on the remote
control. Or you might have to change the TV to Channel 0 or 2, and
then use Channel Down to change video inputs. See your TV’s owner’s
manual if you still aren’t sure how to change the video source.
3. Make sure your camera is connected to power and turned on. Press C1
on the remote to turn it on.
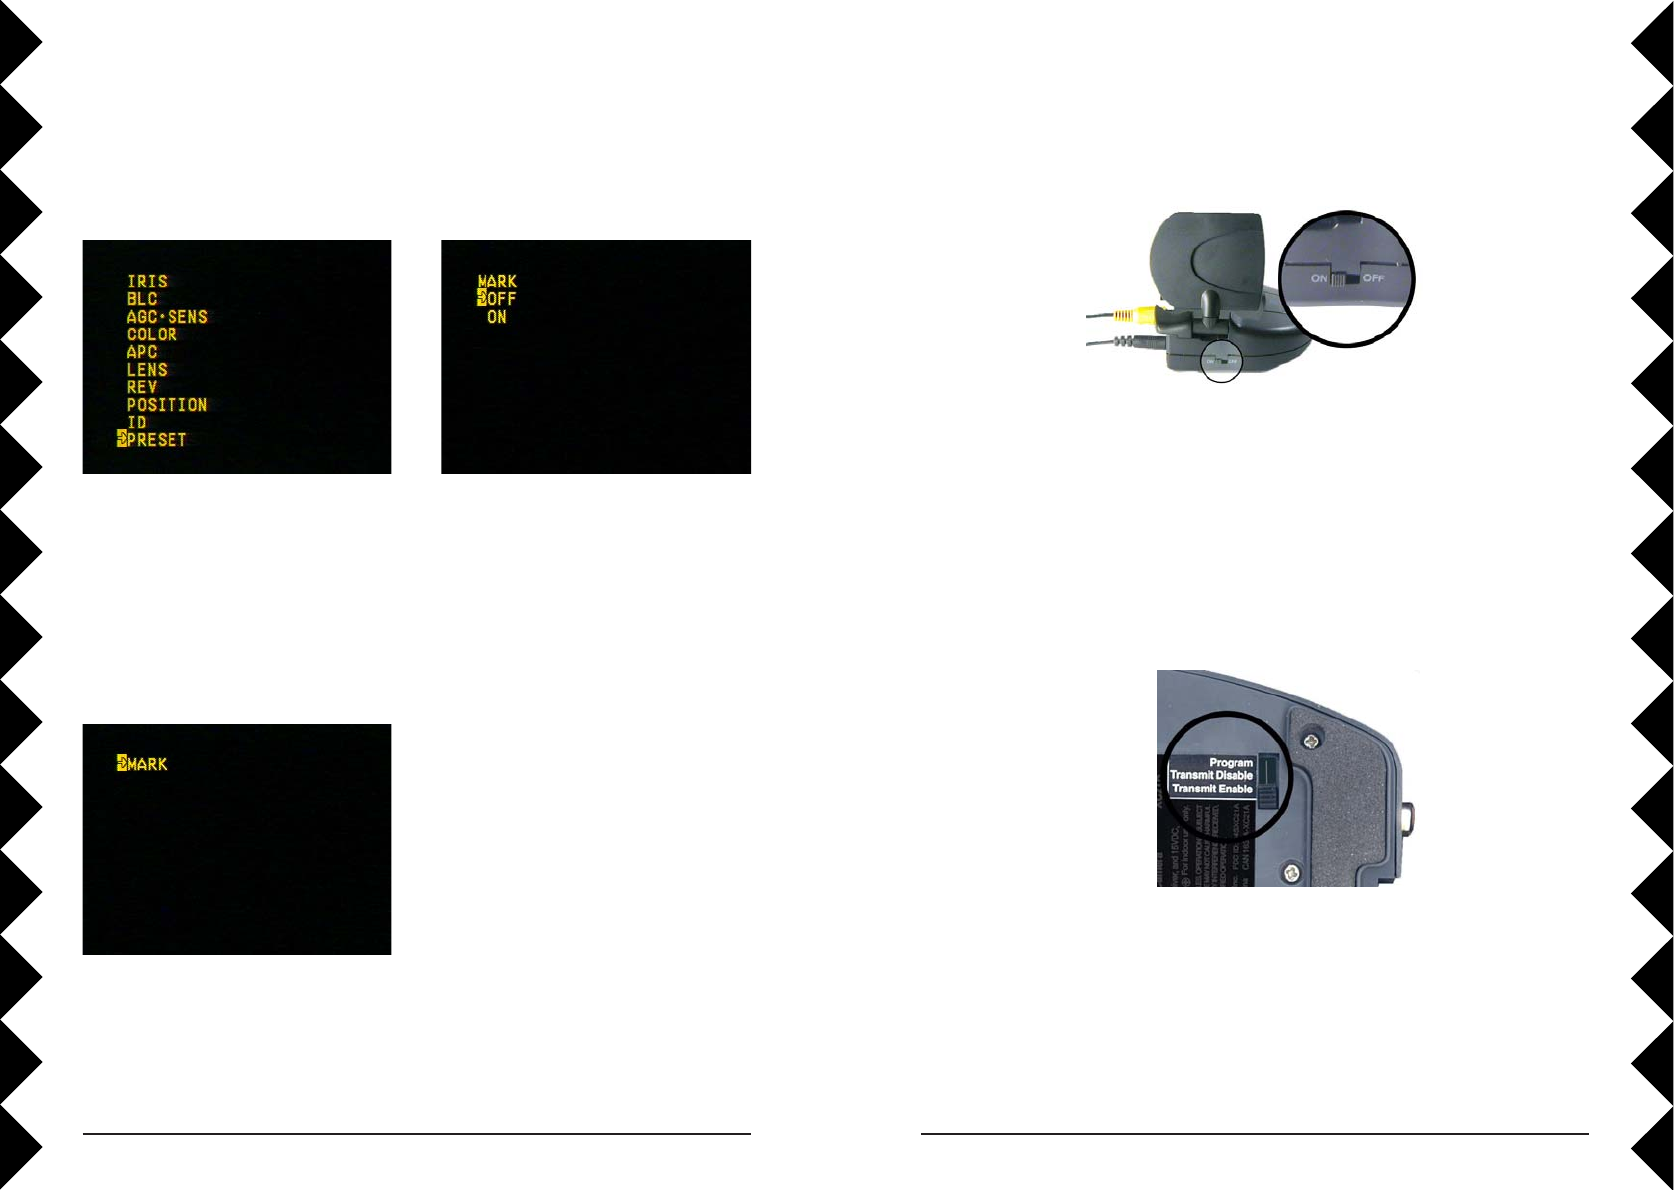
4. Check that the mode switch on the bottom of the camera is set to
Transmit Enable.
Bottom of
camera
5. Follow the setup instructions again (pages 4 through 11), and check that
you have done each step correctly.
6. Make sure that the ABCD switches on the bottom of the camera and the
bottom of the wireless video receiver are set to the same letter (see
pictures on next page).
Advanced Onscreen Menu Options
· MARK: Selecting Mark ON puts a cross-hairs mark on the screen.
Follow the step on page 27 to bring
up the onscreen menu. Then use the
Down arrow to select past the last
item (PRESET), or the Up arrow to
select past the first item (IRIS).
This will display the MARK menu.
Select MARK with the Right Arrow.
Then select OFF or ON with the Up
and Down arrows. Select with the
Right Arrow, and then back out to
the main menu with successive
presses of the Left arrow.
