


AXIS Q3505–V Fixed Dome Network Camera
System Options
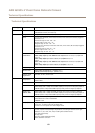
Accelerometer
Tilt angle indicates the angle to which the camera’s lens holder is tilted. A 0° tilt is when the camera is pointing to the ground. It’s
possible to have a tilt angle between 0 and 180°. To tilt to 180°, tilt to an angle of 90°, rotate the lens holder and tilt to a further 90°.
Rotation angle indicates the angle to which the camera’s lens holder is rotated. The rotation range is between 0 to 360°. The camera
is considered to be in a level position when the rotation angle is 0°, 90°, 360° or 270°.
The leveling assistant that helps to level the camera is enabled by default. To disable it, de-select the Enable leveling assistant option
from System Options > Ports & Devices > Accelerometer and click Save. To refresh the page and view the saved setting, click Reset.
Maintenance
The Axis product provides several maintenance functions. These are available under System Options > Maintenance.
Click Restart to perform a correct restart if the Axis product is not behaving as expected. This will not affect any of the current
settings.
Note
A restart clears all entries in the Server Report.
Click Restore to reset most settings to the factory default values. The following settings are not affected:
• the boot protocol (DHCP or static)
• the static IP address
• the default router
• the subnet mask
• the system time
• the IEEE 802.1X settings
• the focus position
• uploaded applications are kept but must be restarted
Click Default to reset all settings, including the IP address, to the factory default values. This button should be used with caution. The
Axis product can also be reset to factory default using the control button, see Reset to Factory Default Settings on page 57.
To reset the optics, click Calibrate under System Options > Maintenance > Optics. This may be necessary in situations where the
optics has lost its calibration during transport or has been exposed to extreme vibrations. If necessary congure focus and zoom
again (see Basic Setup on page 17).
To identify the product or test the Status LED, click Flash LED under Identify and specify the duration in seconds, minutes or hours.
This can be useful for identifying the product among other products installed in the same location.
For information about rmware upgrade, see Upgrade the Firmware on page 58.
Support
Support Overview
The System Options > Support > Support Overview page provides information on troubleshooting and contact information,
should you require technical assistance.
See also Troubleshooting on page 58.
55