20
Cover
Contents
Part Names
Basic Operations
Printing via USB
Cable
Troubleshooting
Appendix
Printing via Wi-Fi
Print Settings
Cropping Images
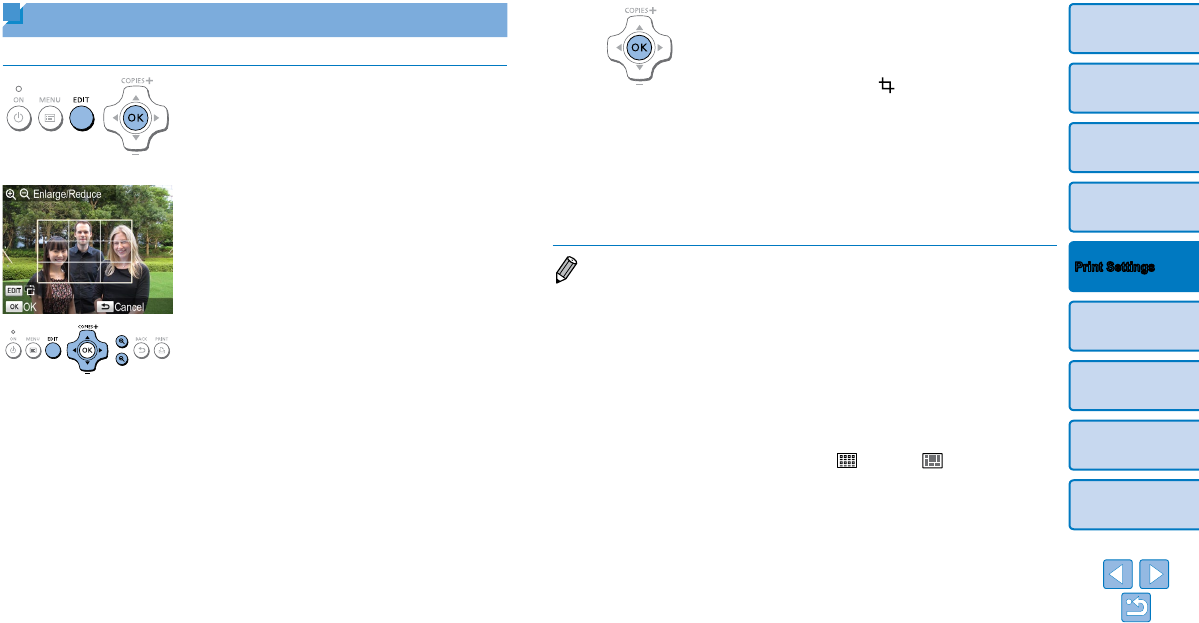
Print only selected areas of an image as follows.
1 Access the cropping screen.
Choose an image as described in step 4
of “Printing Images” (=
14), press the
EDIT button, and then press the <o>
button.
A crop frame is displayed, showing the
image area that will be cropped.
2 Adjust the image area to crop.
To switch the crop frame between portrait
and landscape orientation, press the
EDIT button.
To move the crop frame, press the
<u><d><l><r> buttons.
To enlarge the crop frame, press the
<-> button, and to reduce it, press the
<0> button.
3 Confirm the setting.
To confirm the cropping area and return
to the image display screen, press the
<o> button.
is now shown in the
lower left.
To crop other images for printing with the
first one, repeat steps 1 – 3.
4 Print.
Print as described in step 6 of “Printing
Images” (=
15).
After printing, crop settings are cleared.
• To adjust the cropping area once you have set it, press the EDIT button on the
image display screen, press the <u><d> buttons to select [Adjust Cropping],
and then press the <o> button. Repeat steps 2 – 3.
• To cancel cropping after you have set the cropping area, press the EDIT button
on the image display screen, press the <u><d> buttons to select [Reset
Cropping], press the <o> button to access the reset cropping screen, and
then press the <o> button again.
• Cropping areas you have set are cleared if you turn off SELPHY or remove the
memory card before printing.
• You can specify cropping for up to 99 images at once.
• Cropping is not available when printing with [Print All Images] or [DPOF Print]
or when [Page Layout] (=
25) is set to [ Index] or [ Shuffle].
• The cropping aspect ratio indicated by the frame displayed on images cannot
be adjusted.
• To change the number of prints, press the <u><d> buttons on the image
display screen in step 3. Note that specifying zero prints will not clear cropping
settings.
