2-4
1
2
3
4
Cover/Table of
Contents
Introduction
Downloading Images
from the Camera
Setting the Cameras
other than the EOS-1D
Series Cameras
Setting the EOS-1D
Series Cameras
Troubleshooting
Index
Remote Shooting
Detailed Settings
1
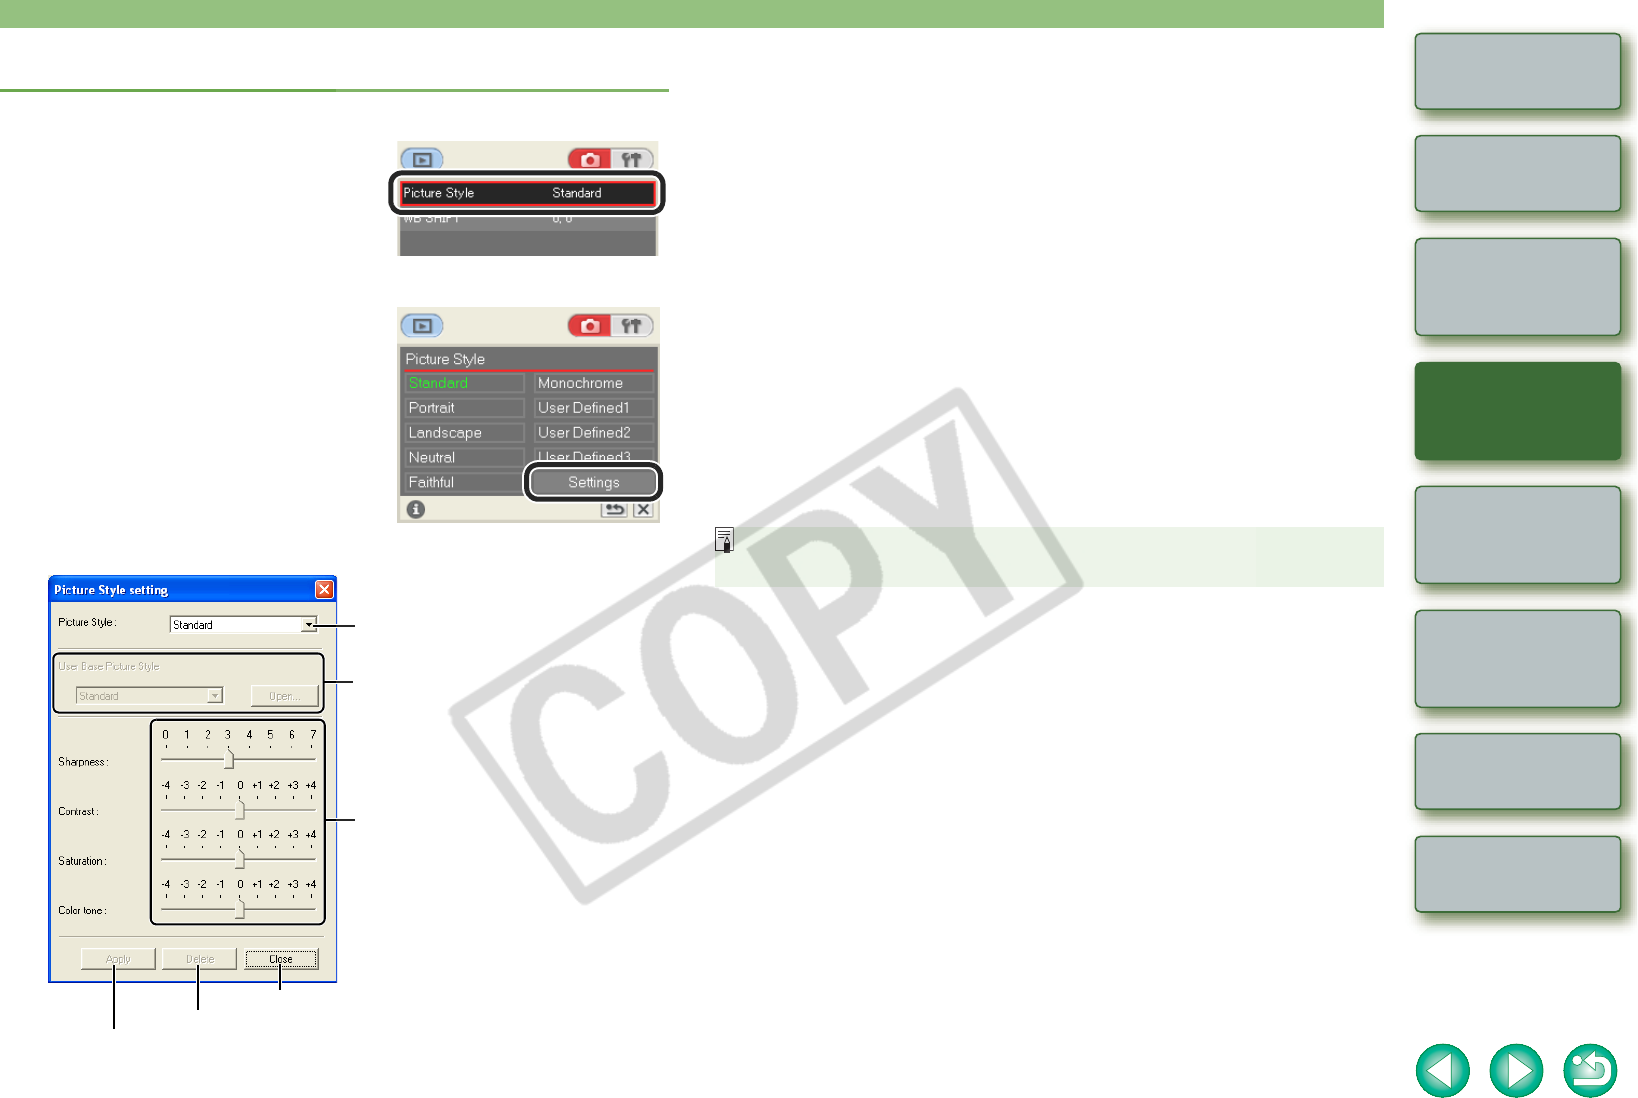
Click [Picture Style].
¿ The [Picture Style] window appears.
2
Click [Settings].
¿ The [Picture Style setting] dialog box
appears.
3
Specify desired settings.
Select the Picture Style to be set.
If you have selected [User Defined1] to [User
Defined3] in the [Picture Style] list box, you can
click the [Open] button and load a Picture Style
file saved on your computer. You can also
select from the list box the Picture Style that will
become the base style.
Deletes the selected Picture Style from the camera.
Drag the slider for each item left or right to set.
Cancels all the settings and closes the dialog box.
Applies the settings to the camera.
O You can register up to 3 user settings in your camera.
O When you select [Monochrome] in the [Picture Style] list box, the [Filter effect] and
[Toning effect] list boxes appear.
O Refer to “Registering the Picture Style” in the camera’s Instruction Manual for
information about using the Picture Style registered in the camera.
4
Click the [Apply] button.
¿ The [Confirm settings] dialog box appears.
5
Confirm the settings and click the [OK] button.
¿ The settings are registered in the camera.
6
Click the [Close] button.
¿ The [Picture Style setting] dialog box closes.
7
Select the specified user setting.
O Following the “Selecting a Picture Style” procedure (p.2-3), select the specified
Picture Style.
¿ The settings are applied to the camera, and the display returns to the shot settings
window.
A Picture Style file is a file that expands the Picture Style function. For detailed
information on Picture Style file, refer to the Canon’s web site.


