79
Admin Tools
5
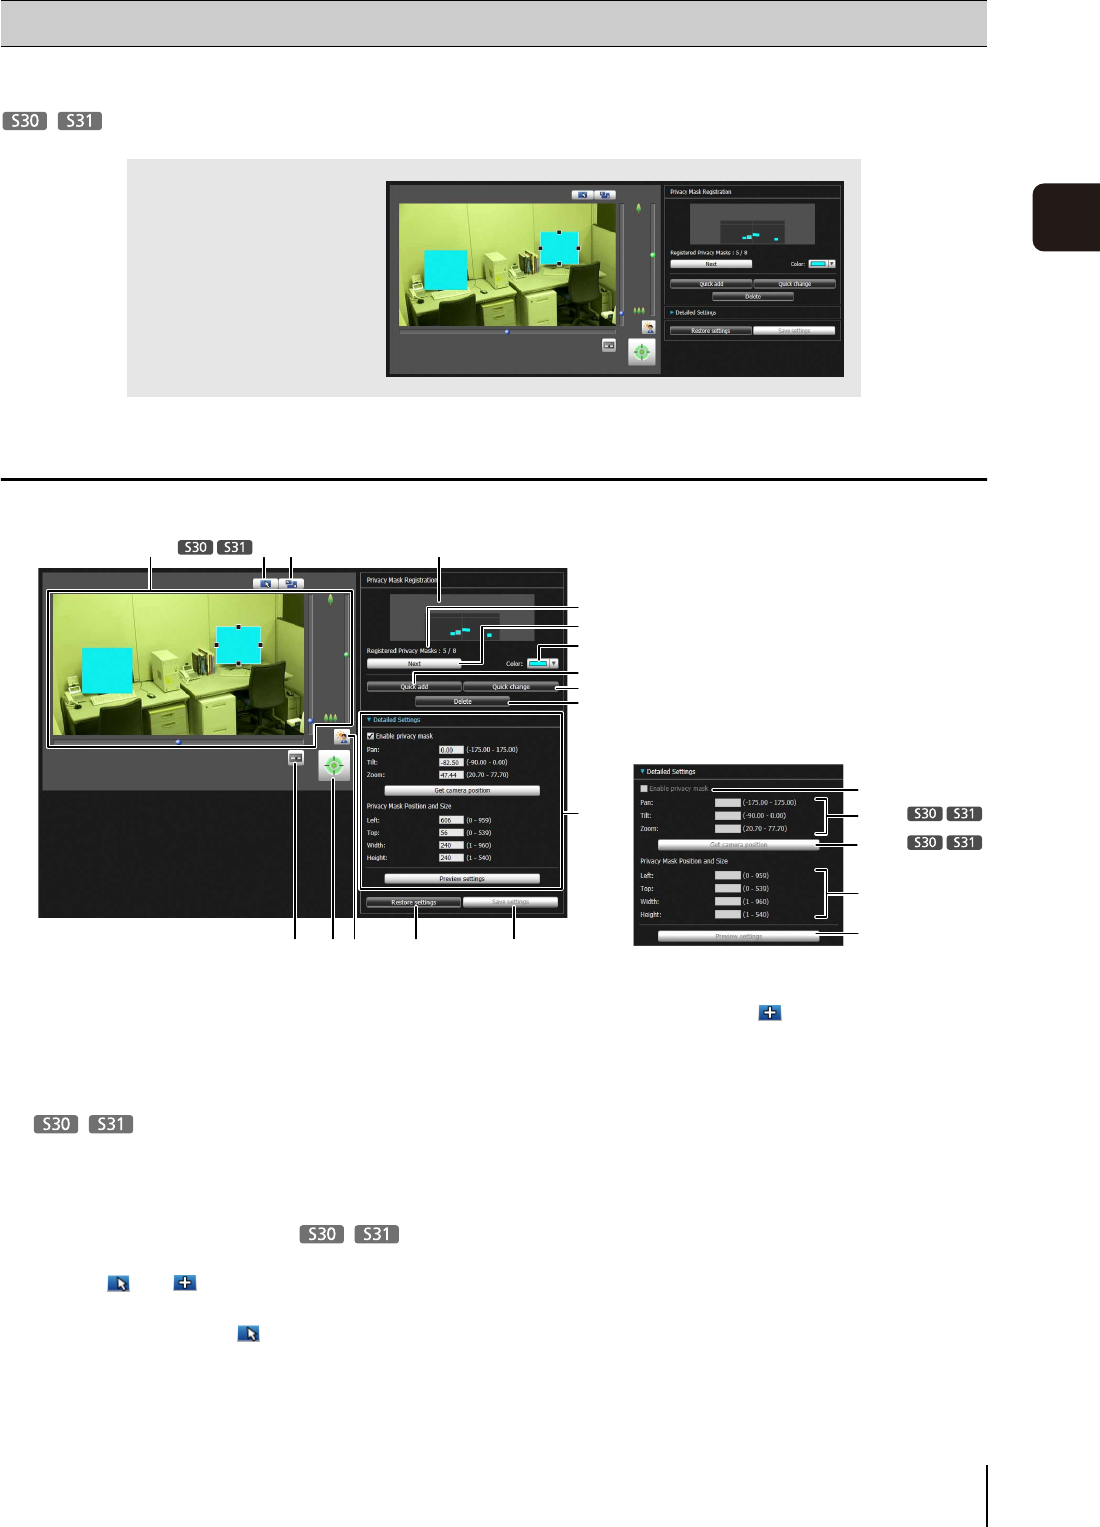
A tool that lets you cover certain areas on the camera video with privacy masks.
When the camera is panned, tilted, or zoomed, the privacy mask area responds to the camera video.
Display Screen of Privacy Mask Setting Tool
(1) Video Display Area
The video currently captured by the camera is shown.
Privacy masks can be resized/moved in the video
display area.
Pan, tilt, and zoom operations are the same as in the
Admin Viewer. For details, see “How to Operate the
Viewer” (p. 124).
(2) [Switch Mouse Operation] button
Each time this button is clicked, the button switches
between and , and the mouse operation in the
video display area changes.
When the button is set to , privacy masks can be
resized/moved. While in this mode, the camera
orientation will not change.
When the button is set to , pan/tilt operations can
be performed.
(3) [Switch Screen Size] button
Each time this button is clicked, the screen size of the
video display area switches between “480 x 270” and
“960 x 540”.
(4) [BLC] (Back Light Compensation) button
This button turns on/off backlight compensation. This
control is effective when the video is dark due to
backlight.
(5) [Obtain/Release Camera Control] button
This button is used to obtain/release the camera
control privileges. For details, see “Obtaining Camera
Control Privileges” (p. 126). If camera control
privileges have not yet been obtained elsewhere,
Privacy Mask Setting Tool
You can set privacy masks
for up to eight areas while
checking the video on the
camera.
(1)
(5)(6) (15) (16)(4)
(14)-1
(14)-2
(14)-3
(14)-4
(14)-5
(14)
(13)
(12)
(3)(2) (7)
(10)
(11)
(8)
(9)
