138
• Click [Register] after completing the above settings to register
the custom settings.
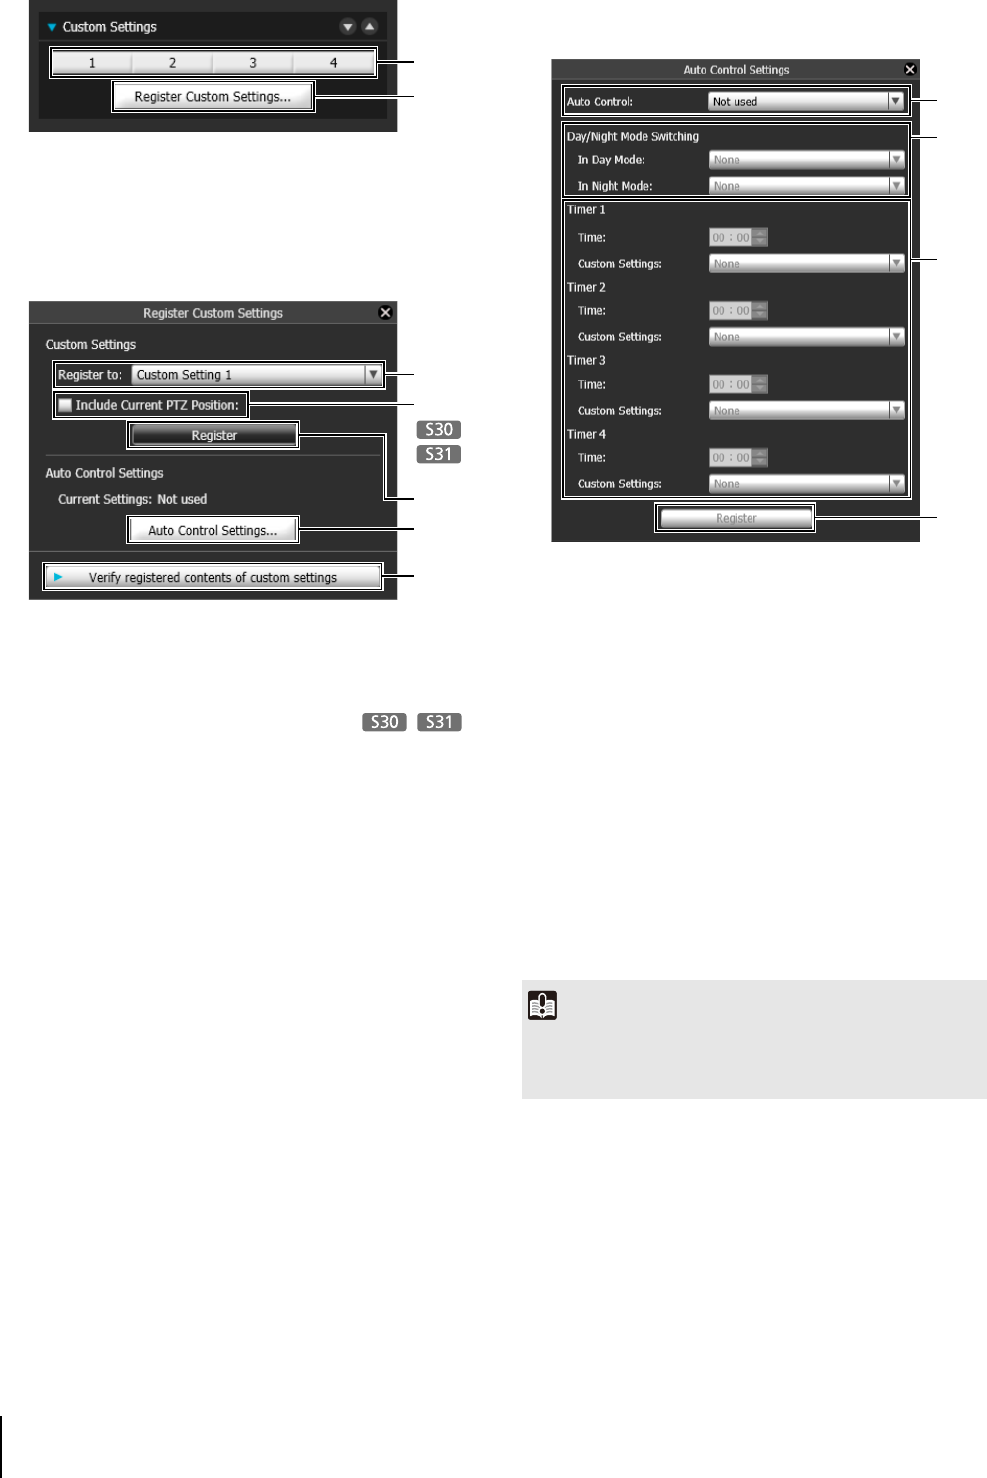
(1) Custom setting button
Select the numbered button with the registered
custom settings to load the settings.
(2) [Register Custom Settings]
The [Register Custom Settings] panel is displayed.
(3) [Register to]
Select the number for the custom setting you want to
register from the selection box.
(4) [Include Current PTZ Position] checkbox
Select the checkbox to register the current pan, tilt,
and zoom settings.
(5) [Register]
Register the current camera settings in the custom
setting number selected in [Register to].
(6) [Auto Control Settings]
Displays the [Auto Control Settings] panel.
(7) [Verify registered contents of custom settings]
Displays the settings registered for the custom setting
number selected in [Register to].
Setting automatic control
Click the [Auto Control Settings] button to display the
[Auto Control Settings] panel, and set the [Day/Night
Mode Switching] and [Timer].
(1) [Auto Control]
Select [Not used], [Day/Night Mode Switching], or
[Timer] for the auto control setting.
(2) [In Day Mode], [In Night Mode]
When [Day/Night Mode Switching] is selected in [Auto
Control], select the custom setting number used when
switching day mode and night mode or select [None]
for each item.
(3) [Timer 1] to [Timer 4]
When [Timer] is selected in [Auto Control], set the
time for switching the custom setting in [Time] in 24-
hour format and select the custom setting number in
[Custom Setting], or select [None].
(4) [Register]
Register the auto control settings.
(1)
(2)
(3)
(4)
(5)
(6)
(7)
Important
If the same time is specified multiple times for [Timer 1] to
[Timer 4], [Register] will be disabled and the settings will not be
possible.
(3)
(1)
(4)
(2)
