


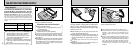
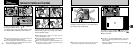
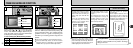
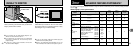
LCD monitor OFF
LCD monitor ON
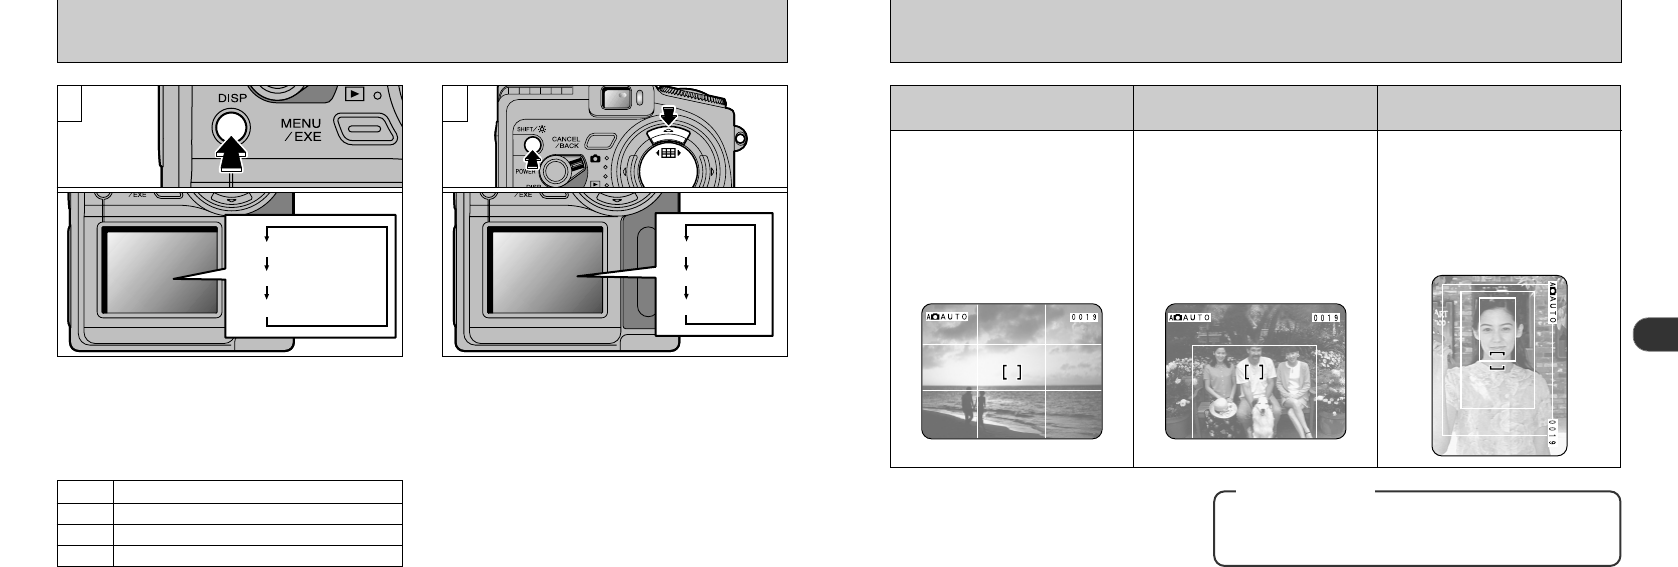
Framing Guideline displayed
Scene
Group shot
Portrait
2
3332
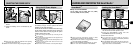
FRAMING GUIDELINE FUNCTION
21
During shooting, when the Photography Mode
dial is set to “3”, “7”, “6” or “8”, the display
on the LCD monitor changes each time you
press the “DISP” button. Press the “DISP button
to display the “Framing Guideline”.
➀
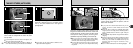
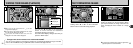
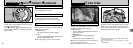
You can select an framing guideline by holding
down the “SHIFT/
r
” button
➁
and pressing “a”
on the 4-direction button. The selected framing
guideline serves as a guide to composing your
shot when you are taking pictures using the LCD
monitor.
●
!
The framing guideline is not recorded on the image.
●
!
Press the “SHIFT/
r
” button to view the Camera
Operation Guide (an explanation of the operations
available when you press the “SHIFT/
r
” button).
◆
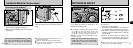
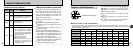
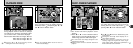
List of Photography Modes/Framing Guideline
Scene • Group Shot • Portrait
Portrait frames only (3 types)
Scene • Group Shot
Scene • Group Shot
3
7
6
8
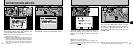
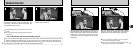
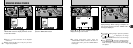
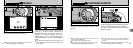
Scene Group Shot
Portrait
(Vertical shot frame)
Always use the AF/AE lock to compose your picture.
Failing to use the AF/AE lock may result in the image
being out of focus.
◆
Important
◆
Use this frame when you want
to position your main subject in
center of the frame or when you
want to align your shot with the
horizon.
This is the most effective frame
for monitoring the size and
balance of your subject when
the shot involves motion.
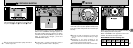
Use this frame when you are
shooting groups of 2 or more
people.
By composing the shot so that
your subjects are as large as
possible within the frame, the
photograph will clearly show
their facial expressions.
Use this frame for portrait
photography.
Fit the subject's face into one of
the 3 frames to shoot a close-up
portrait (large frame), a head and
shoulders shot (middle frame), or
a half-body shot (small frame).
●
!
The lines in the scene frame roughly
divide the recorded pixels into three equal
parts horizontally and vertically. When the
image is printed, the resulting print may be
shifted slightly from the scene frame.
●
➀
●
➁