74
[ SHOOTING MENU]
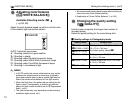
Adjusting color balance
([T WHITE BALANCE])
Available Shooting mode: s,
(➝p.54, 55)
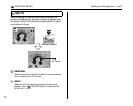
Adjust the color balance based on white to suit the color
of the ambient light around the subject.
AUTO: Automatic adjustment
6: Shooting outdoors in good weather
7: Shooting in shade
9: Shooting under Daylight fluorescent lamps
0: Shooting under Warm White fluorescent lamps
-: Shooting under Cool White fluorescent lamps
8: Shooting in incandescent light
MEMO
• In AUTO mode, the correct white balance may not be
achieved for subjects such as close-ups of people’s
faces and pictures taken under a special light source.
Select the correct white balance for the light source.
• When the flash fires, the white balance setting for the
flash is used. Consequently, to achieve a particular
effect, the flash mode should be set to C Suppressed
flash (➝p.61).
• The color tones may vary depending on the shooting
conditions (light source, etc.).
• We recommend playing back images after shooting to
check the color tones (white balance).
• Explanation of Terms “White Balance” (➝p.154)
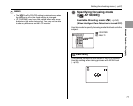
Changing the quality setting
([ QUALITY])
Use this menu to specify the image size (number of
recorded pixels).
Select the quality setting for the scene being shot.
ZQuality settings in Photography mode
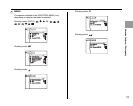
WHITE BALANCE
WHITE BALANCE
AUTO
AUTO
Quality mode Sample uses
iF (3264 × 2448)
iN (3264 × 2448)
Printing at up to 10R (25.4 × 30.5 cm/
10 × 12 in.) / A4 size
For better quality, select iF
% (3072 × 2176)
4 (2304 × 1728) Printing at up to 6R (15.2 × 20.3 cm/
6 × 8 in.) / A5 size
2 (1600 × 1200) Printing at up to 4R (10.2 × 15.2 cm/
4 × 6 in.) / A6 size
` (640 × 480) To use for e-mail or web site
Setting the shooting menu (➝p.67)[ SHOOTING MENU]


