


4.1 Uninstalling Supplied Programs
ScanSnap S500M Operator's Guide 77
Uninstalling ScanSnap
4
■ To uninstall ScanSnap Manager in Mac OS X v10.3/v10.4
1. Start your computer.
2. Quit ScanSnap Manager; all users must quit those running applications.
(Click and hold the mouse button on the ScanSnap icon , and select "Quit" from
the displayed menu.)
3. If the ScanSnap icon
still remains on the Dock menu, drag the ScanSnap icon
into the Trash.
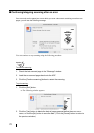
4. From the Apple ( ) menu, select "System Preferences."
5. In the "System Preferences" window, select "Accounts."
⇒ The [Accounts] window appears.
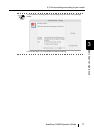
6. In the "Accounts" window, select the relevant user from the "My Account" pane.
7. In the "Accounts" window, click "Login Items" (if your OS is Mac OS X v10.4) or
"Startup Item" (if your OS is Mac OS X v10.3).
⇒ In the "Login Items" (Mac OS X v10.4) pane or the "Startup Items" (Mac OS X v10.3)
pane, a list of all applications that automatically start at a login is displayed.
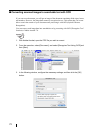
8. Select "ScanSnap Manager" to delete it.
9. Click (-).
⇒ "ScanSnap Manager" is deleted from the list.
10. Close the "Accounts" window.
11. Log in as the computer Administrator. With Finder, select the folder in which Scan-
Snap is installed (generally, you can find "ScanSnap" in the "Applications" window.)
and drag it into the Trash.
12. In a multi-user environment, every user must perform steps 3 to 10.
13. Empty the Trash.