45
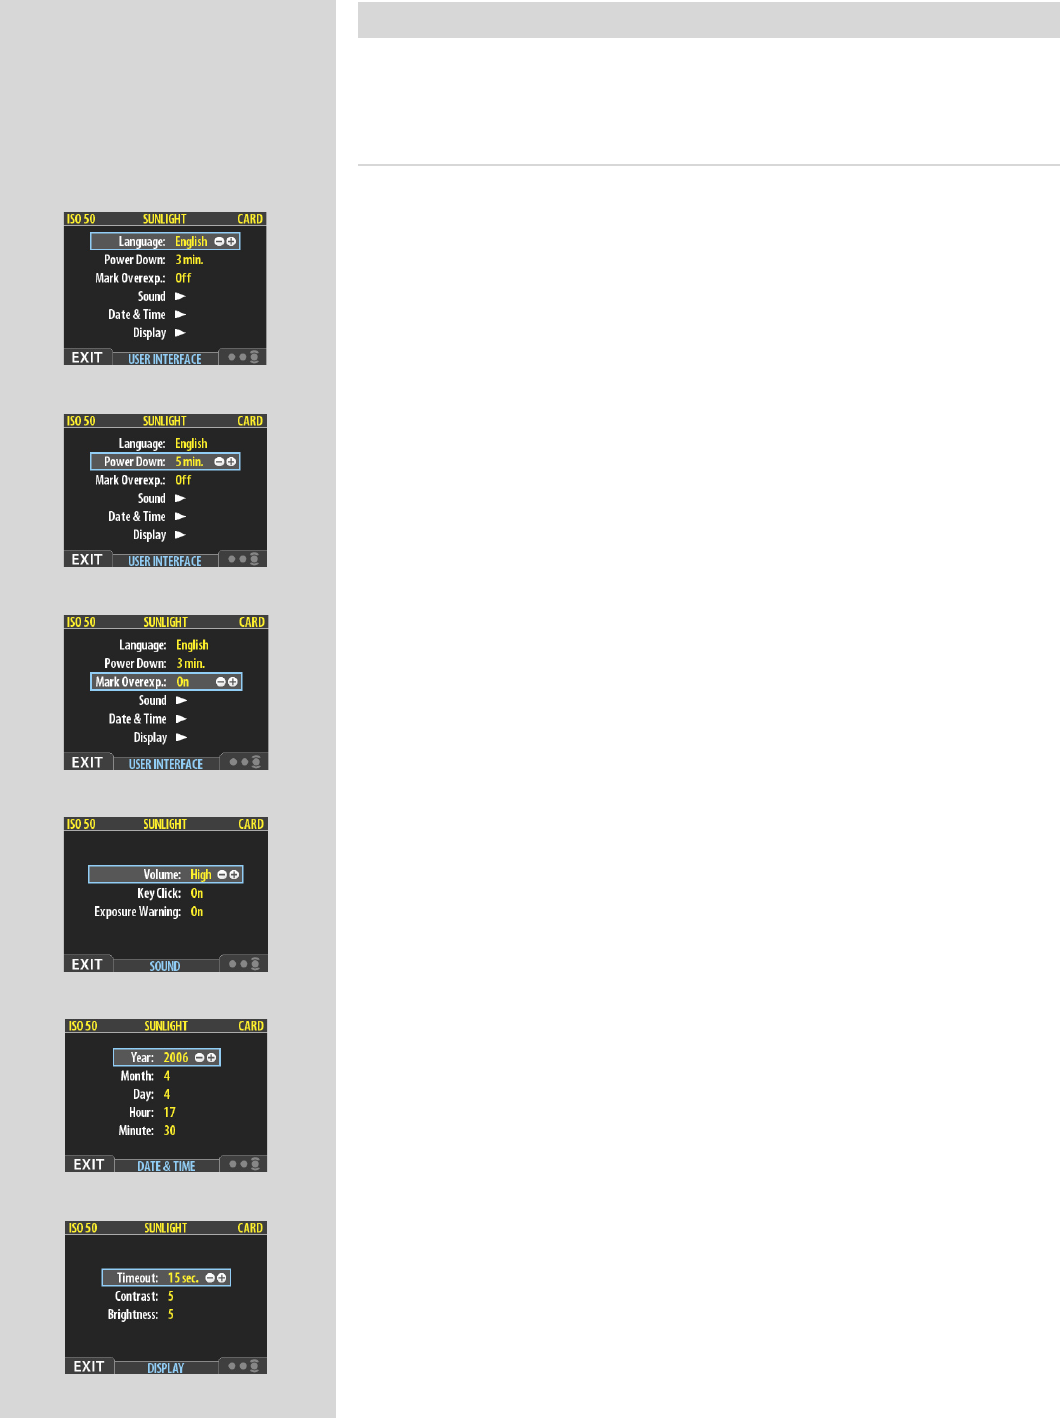
MAIN MENU > SETTINGS > User Interface
By altering the User Interface settings, you can control the way the digital back interacts
to suit you and your preferred way of working. It also includes date and time settings.
Entries of the USER INTERFACE Menu
e user interface menu includes both entries and sub-menus. e following entries are
available here:
• Language:
e menu system can be displayed in any of seven languages. is menu entry
enables you to select your preferred language for the menus.
• Power Down:
To help preserve the charge of the battery, you can set the back to power down
aer a specified period of inactivity. e effect is exactly the same as though
you had pressed the off button on the camera. Once it has powered down, you
must turn the CFV on before you can continue working. Set this to Never to
disable this feature (this is the default setting). Set to a value between 3 and 99
minutes to establish a time-out. (Note the difference between Display ‘timeout’
and Power Down.
)
• Mark Overexp.:
is feature helps draw your attention to areas of your images that are over-
exposed. When this feature is enabled, the single-image preview display will
highlight each overexposed pixel by flashing it white and black.
Set this entry to On to enable the feature; set to Off to disable it.
• Sound:
e CFV uses audio feedback to help let you know if each new image is exposed
correctly. is is described in Using Instant Approval Architecture.
is menu entry has Volume (choose between High, Low and Off), Key Click
(choose between On and Off) and Exposure Warning (choose between On
and Off).
• Date & Time:
e CFV has an internal clock that keeps track of the date and time. is infor-
mation is used to mark each shot with the date and time at which it was taken.
It is also used to label batches with the date on which each batch was created.
• Display:
is feature sets the Timeout (2-30 seconds) on the display, which behaves
very much like a screen saver on a computer.When the timeout is reached, the
display will be turned off, but the back will still be running, so it will imme-
diately respond to a press of the buttons. (Note the difference between Display
‘timeout’ and Power Down.
)
is feature also sets the level of Contrast (on a scale of 1-10) on the display.
Usually, you should leave this set to the default level of 5; however in some
viewing environments and/or with some types of images you may wish to
increase or decrease this value. A value of 10 provides maximum contrast; a
value of 0 provides no contrast (a black screen). You can also help save battery
power by using a low value here.
is feature also sets the Brightness (on a scale of 1-10) on the display. is
sets the brightness shown on the screen. Usually, you should leave this set to
the default level of 5, however in some viewing environments and/or with some
types of images you may wish to increase or decrease this value. A value of 10
provides maximum brightness; a value of 0 provides minimal brightness. You
can also help save battery power by using a low value here.


