1 Get started
Thank you for your HP Photosmart purchase! Read this guide to learn the basics about
printing beautiful photos with the HP Photosmart A820 series printer. This section
provides introductory information about the HP Photosmart A820 series printer.
NOTE: Read the Setup Guide first to setup your HP Photosmart A820 series printer.
The HP Photosmart at a glance
8
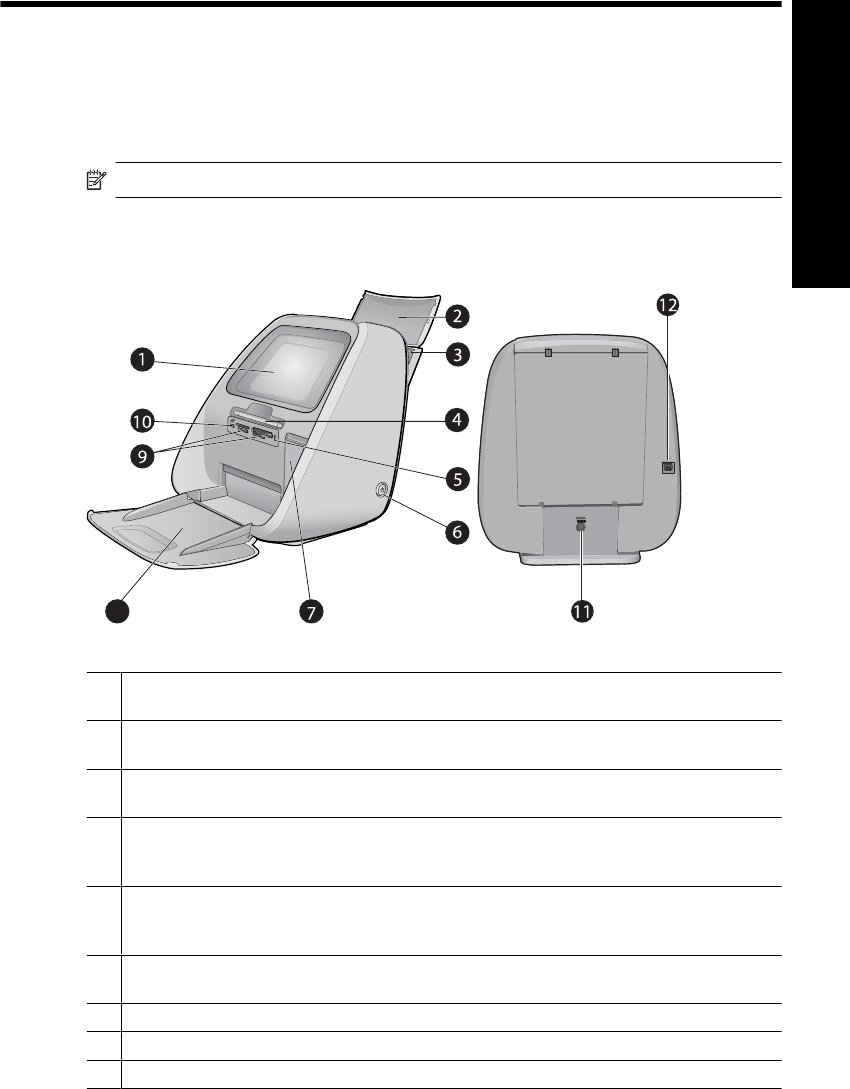
Figure 1-1 Front and rear views
1 Touch screen: View photos and menus here. Touch the screen to select, edit, and print
photos and to select menu items.
2 Input tray lid (open): Open to access the input tray. Close to securely store paper. Leave
open when panorama paper is loaded.
3 Input tray: Load up to 100 sheets of paper here. Push the tray gently back to the open position
before loading paper. Return the tray to the upright position for printing.
4 Stylus: Use on the touch screen to draw on photos or to enter a photo caption with the touch
screen keyboard. May also be used instead of a finger to select menu items and photos.
Remove the tape holding the stylus in place, before first use.
5 Memory card/PictBridge light: The light flashes if the printer is accessing a memory card
or connecting to a PictBridge device. The light is solid if the printer has finished accessing
the card or PictBridge device and is ready to print.
6 On button and light: Press to turn the printer on or off. The light flashes when the printer is
turning on or off. The light is solid when the printer is ready to print.
7 Print cartridge door (closed): Open to insert or remove a print cartridge.
8 Output tray (open): The printer deposits printed photos here.
9 Memory card slots: Insert a memory card into these slots.
Get started 5
English


