


1. Close all programs and temporarily disable any virus protection software.
2. Insert the HP Photosmart Software CD into the CD drive and follow the on-screen
instructions. If the installation screen does not appear, click Start, click Run, type
D:\Setup.exe, where D is the letter of your CD drive, then click OK.
3. When the software has finished installing, re-enable virus protection software.
Macintosh
To install the HP Photosmart Mac software, your Macintosh computer must meet the
system requirements as stated on the camera packaging.
1. Insert the HP Photosmart Software CD into the CD drive.
2. Double-click the CD icon on the computer desktop.
3. Double-click the installer icon, then follow the on-screen instructions.
About the HP Photosmart Software
The CD that came with your camera contains the following versions of HP Photosmart
Software:
● HP Photosmart Premier Software (for Windows XP and x64 systems with at least
128MB of RAM). This version of the software includes some extra features that let
you pause a video and print a frame from it.
● HP Photosmart Essential Software (for Windows 2000, Windows XP, and x64
systems with at least 128MB of RAM).
● HP Photosmart Mac Software (for Macintosh systems).
To learn more about the software features and how to use them, see the Help feature in
the HP Photosmart Software.
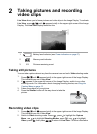
Using your camera
Now that you’ve completed setup, you can take and review still images and video clips.
For information on taking still pictures and
capturing video clips
See Taking still pictures on page 10
and Recording video clips on page 10
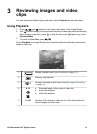
For information on reviewing images and
video clips on the camera
See Reviewing images and video clips
on page 15
For information on transferring images
from your camera to a computer
See Transferring images with
HP Photosmart Software on page 18
For information on printing images See Printing images from the camera
on page 19
Tip To switch between Live View and Playback, press .
HP Photosmart E427 Digital Camera 9