


13
English
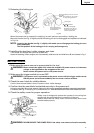
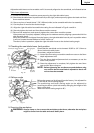
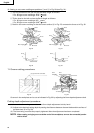
Adjust the table insert on the turntable until it is correctly aligned to the saw blade, as indicated below.
Table insert adjustment:
(1) Loosen the three 6mm machine screws securing the right side table insert.
(2) Check that the table insert is positioned fully to the right, and temporarily tighten the back and front
6mm machine screws.
(3) Secure a piece of wood (about 7-7/8" (200mm) wide) to the turntable with the vise assembly.
(4) Cut the piece of wood at the desired angle.
(5) Align the right side table insert with the cutting line as indicated in Figs. 9-a and 9-b.
(6) Securely tighten the back and front 6mm machine screws.
(7) Remove the workpiece, and securely tighten the center 6mm machine screws.
If the power tool is properly adjusted, cutting can be made accurate by aligning a premarked ink line
with the table insert.
When the power tool is shipped from the factory, the right side table insert is put in a position where
it will not contact the saw blade at a full 45° bevel cut.
Therefore, before operation, adjust the right side table insert to the desired cutting angle.
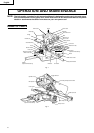
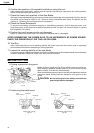
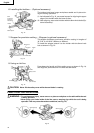
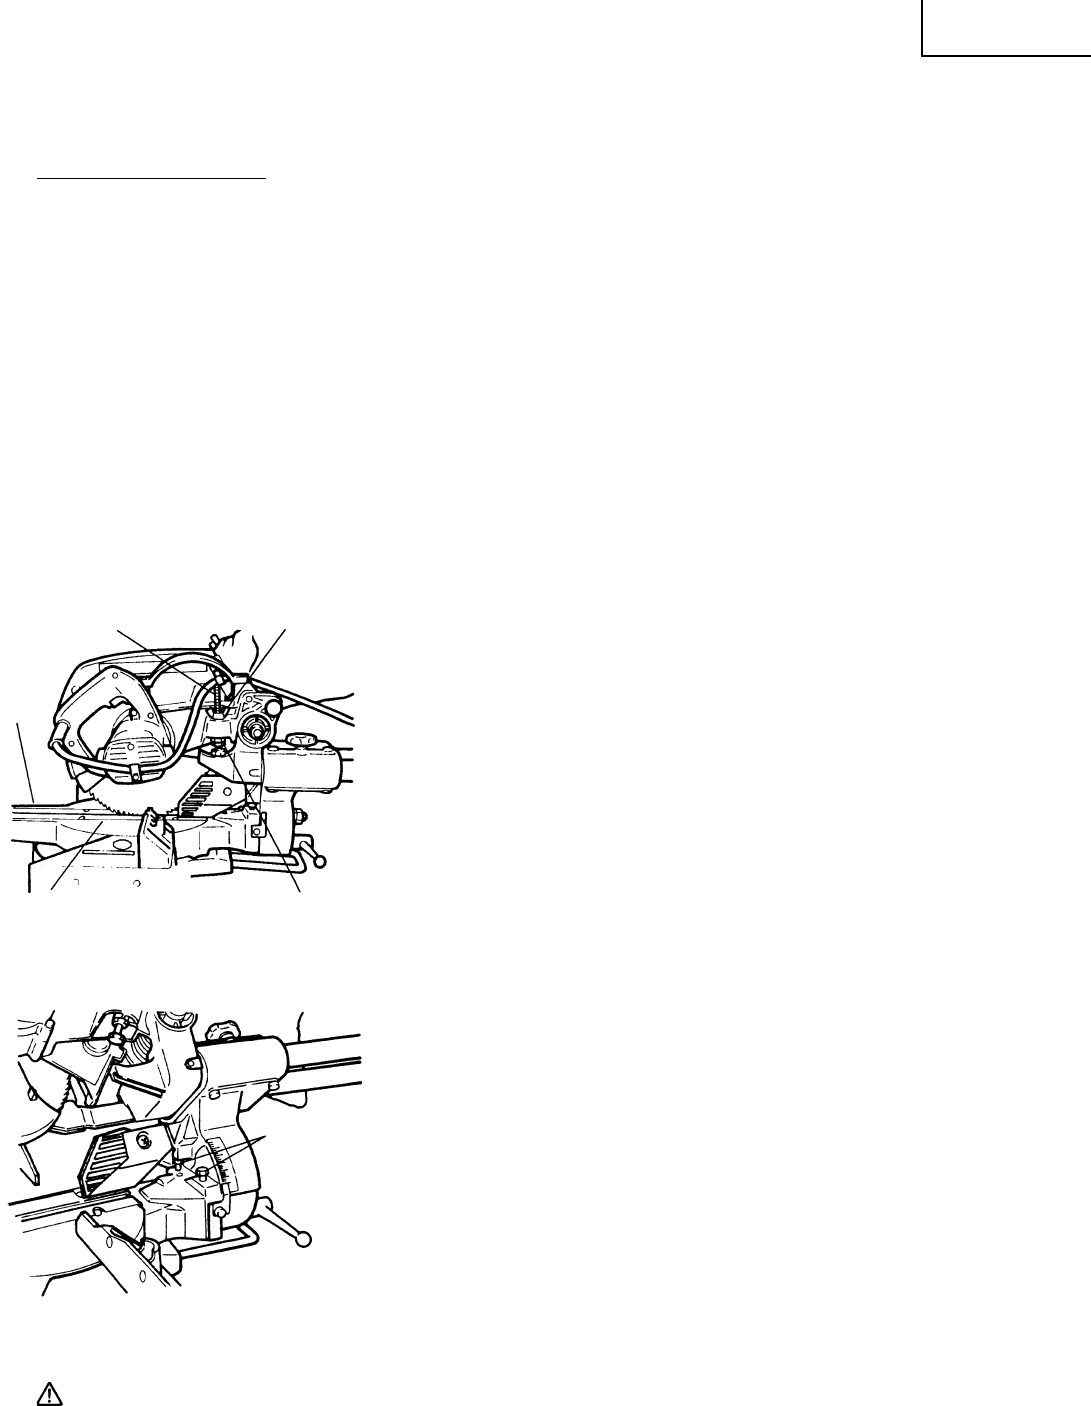
3. Checking the saw blade lower limit position
Check that the saw blade can be lowered 15/32" to 1/2" (12mm to
13mm) below the table insert.
If necessary, adjust as follows:
(1) Loosen the 8mm wing nut and the two 8mm nuts on the 8mm
depth adjustment bolt.
(2) Turn the 8mm depth adjustment bolt as necessary to set the
lower limit position.
(3) Once the adjustment is complete, fully tighten the two 8mm
nuts and the 8mm wing nut.
NOTE: Before tightening the two 8mm nuts and the 8mm wing
nut, confirm that the saw blade is adjusted so that it will
not cut into the turntable.
Fig. 10
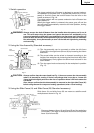
4. Oblique angle
Before the power tool is shipped from the factory, it is adjusted for
0° and left 45° bevel cutting angles.
The positioning and bevel cutting angle can be adjusted by
loosening the 8mm nylock bolt and by changing the height of the
8mm nylock bolt.
(Maximum bevel cutting angle is 45°).
Fig. 11
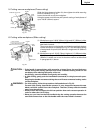
5. Securing the workpiece
WARNING: Always clamp or vise to secure the workpiece to the fence; otherwise the workpiece
might be thrust from the table and cause bodily harm.
8mm Nut
(2 pieces)
8mm Depth Adjustment Bolt
8mm Wing Nut
Table
Insert
Turntable
8mm Nylock
Bolt