


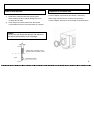


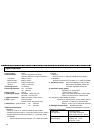

PEDESTAL
The optimum pedestal level has been set at the factory. If
necessary, this can be changed as follows.
1) Use the UP and DOWN buttons to shift the cursor to
“PEDESTAL”, then press the SET button. The adjustment
value at the right of value flashes.
2) Change the “PEDESTAL” by pressing the UP and DOWN
buttons. (Variable range: -128 000 +127)
3) Return the factory setting(000) by simultaneously pressing
the UP and DOWN buttons for two seconds.
4) The setting is fixed when the SET button is pushed, and the
cursor moves below by one line.
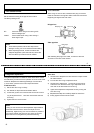
GAMMA
1) Use the UP and DOWN buttons to shift the cursor to
“GAMMA”.
2) Press the SET button to shift the mode in the sequence
“ON”, “OFF”. Factory setting is “ON”.
OFF : =1.0
ON : =0.45
NOTE
The noise might stand out when the detail level is raised.
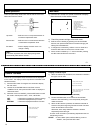
DNR (Digital noise reduction)
It is a function to decrease the noise generation by AGC.
1) Use the UP and DOWN buttons to shift the cursor to “DNR”.
2) Press the SET button to select the setting sequentially in
the following order. Factory setting is “AUTO(LOW)”.
SET button: AUTO(HIGH) ON-1 ON-2 ON-3 ON-4
ON-5 ON-6 ON-7 OFF
AUTO(LOW) AUTO(MID)
AUTO( ) : It synchronizes with the amplification of
AGC and the DNR setting changes from
turning “OFF” to “ON-7”.
LOW : Movement priority mode
(Change into “ON-5” in the maximum. )
MID : The middle mode
(Change into “ON-6” in the maximum. )
HIGH : Image quality priority mode
(Change into “ON-7” in the maximum. )
OFF : DNR doesn't operate.
ON-*(1 7) : DNR always operates. The afterimage
increases according to the coefficient of
the mode, and the noise decrease is
effective.
BURST [Only KP-DE500 type]
Burst signal ON/OFF when a monochrome image is output is set.
1) Use the UP and DOWN buttons to shift the cursor to
“BURST”.
2) Press the SET button to shift the mode in the sequence
“ON”, “OFF”. Factory setting is “ON”.
ON : The burst signal is added
OFF : The burst signal is not added
CAM-RESET
It returns the camera settings to the factory presets that were set
in the factory.
1) Use the UP and DOWN buttons to shift the cursor to
“CAM-RESET”.
2) Press the SET button for two seconds or
more, it executes it. Afterwards, it returns to the
“MAIN MENU”.
POLARITY
1) Use the UP and DOWN buttons to shift the cursor to
“POLARITY”.
2) Press the SET button to shift the mode in the sequence
“POSITIVE”, “NEGATIVE”. Factory setting is “POSITIVE”.
The negative polarity is convenient when using negative
material, such as negative film.
Change in submenu item
1) Use the UP and DOWN buttons to shift the cursor to
“ITEM”.
2) Press the SET button to shift the mode in the sequence
“PICTURE”, “PRESET”.
The display changes into the following menu when “ITEM” is
“PRESET”.
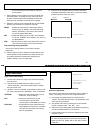
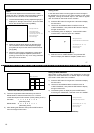
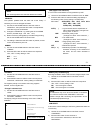
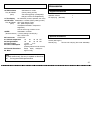
SUB MENU (ITEM: PRESET)
>
Select SUB MENU item
Burst signal ON/OFF of monochrome image [*]
Camera initialize
Return to the main menu
End of menu display
NOTE
A malfunction may occur when the camera is connected
to a VTR and monitor when the BURST is set to OFF.
Please change after confirming the specification of the
connected equipment enough.
(*) Note: KP-E500 is not displayed.
31
32