


Advanced Techniques
55
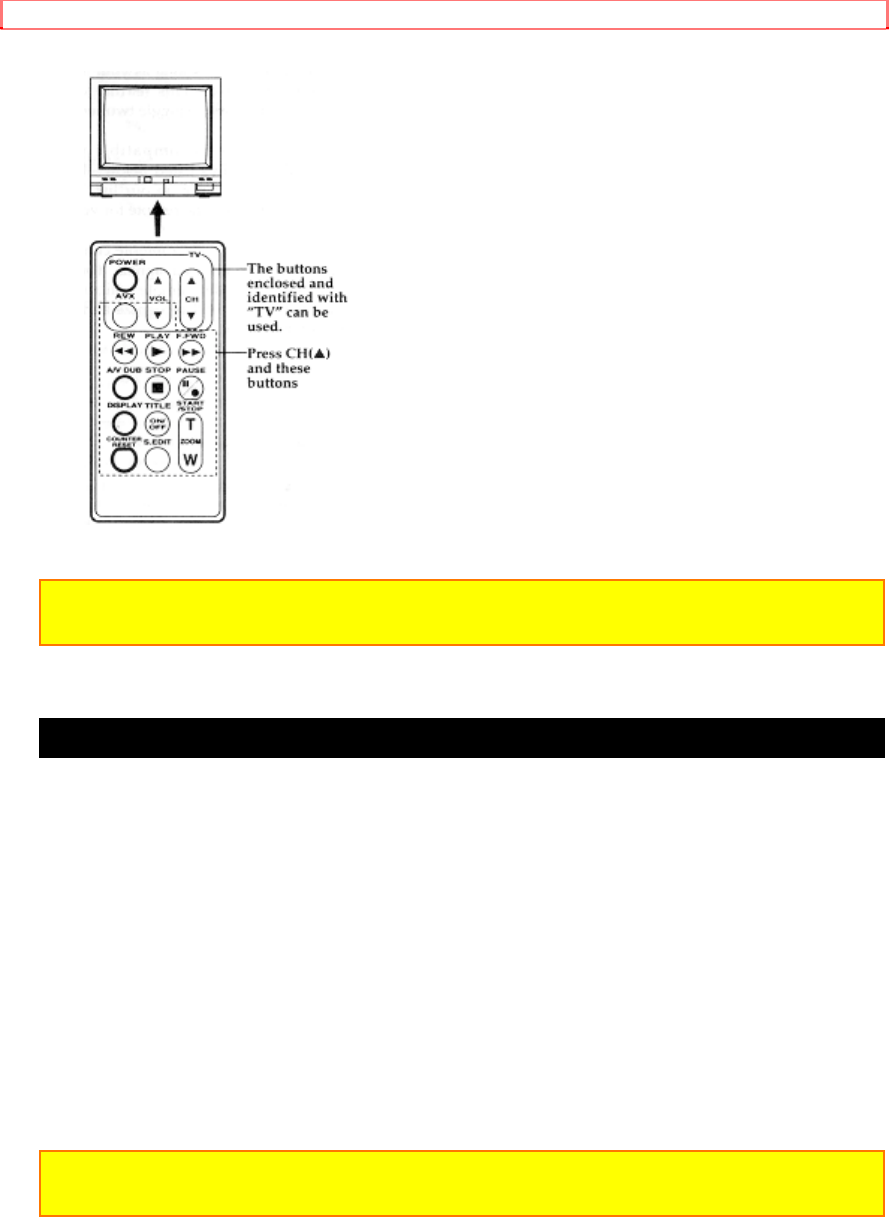
Note: It may not be possible to control all TVs listed in this Table.
Note: The AVX Button can't be used with Gold Star 2 and Sharp TVs.
Using Audio/Video Dubbing
Use audio/video dubbing to record audio and video from the
camera/recorder's built-in microphone and camera onto a previously
recorded tape in the camera/recorder.
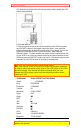
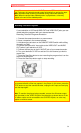
Audio/Video Dubbing operation Illustration
1. Hold down the red button on the CAM/OFF/VIDEO switch while sliding
the switch to VIDEO.
2. Connect the provided AV stereo output cord to the AUDIO IN and
VIDEO IN jacks of your television. Connect either the right or left audio
plug into your television if it has only one AUDIO IN jack.
Note: Some televisions have an S-VIDEO IN jack. Connect the black S-
VIDEO plug to the television instead of the yellow VIDEO plug.
3. Connect the free square plug to the AV IN/OUT jack of your
camera/recorder.
4. Insert a previously recorded tape in the camera/recorder.
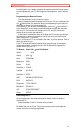
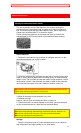
5. Use the wireless remote control and press the PLAY button. Use the
PLAY, F.FWD, and REW buttons to find the place where you want to stop
dubbing. Press the PAUSE (START/STOP) button.
6. Display the linear timer counter with memory ("Using Memory," p.23).
Press the COUNTER RESET button to set the linear time counter to
0:00:00M.
7. Use the REW and PLAY buttons to find where you wish to start
dubbing. Press the PAUSE (START/STOP) button.
8. Press and hold the A/V DUB button while pressing the PLAY button.
This places the camera/recorder in A/V DUB pause mode.
9. Press the PAUSE (START/STOP) button. The audio/video dubbing
starts. When the linear time counter reaches 0:00:00M the
camera/recorder stops automatically, recording only the portion of the tape
that you selected.
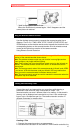
Remote Control of Camcorder Illustration