


EN 47
Master Page: Right
To make thumbnail images during video
recording automatically
1
Load a cassette. (੬ pg. 15)
2 Load a memory card. (੬ pg. 16)
3 Set the VIDEO/MEMORY Switch to “VIDEO”.
4 Set the Power Switch to “A” or “M” while
pressing down the Lock Button located on the
switch.
5 Set “NAVIGATION” to the desired navigation
storing time. (੬ pg. 31, 35)
● If the “” indicator appears blinking on the
screen, wait until it stops blinking. If it does not
stop blinking after a while, check if a memory
card is loaded.
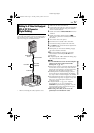
6 Press the Recording Start/Stop Button to start
recording.
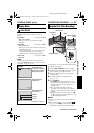
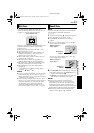
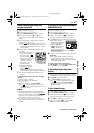
● When the recording time
is over the navigation
time set in step 5, “”
appears briefly, then the
image of the point where
recording is started is
captured and stored in
the memory card as a
thumbnail image.
● If the Recording Start/
Stop button is pressed
before “” stops
blinking, the image of the point where the
loaded memory card is recognised is captured.
7 Press the Recording Start/Stop Button to stop
recording.
To make thumbnail images after video recording
manually...
1) Perform steps 1 to 4 above.
2) Set “NAVIGATION” to “MANUAL”.
(੬ pg. 31, 35)
3) After the recording, press NAVI STORE.
•The “” indicator appears briefly and the
captured image is stored in the memory card as
a thumbnail image.
NOTES:
● The remaining number of storable thumbnail
images also appears on the screen when it reaches
10 or less. If “REC SELECT” is set to “ / ”
in DSC Menu, the number shows how many
640 x 480 pixel images can be stored.
● If “5S” is set to “5S” or “Anim.” in MANUAL
Menu, the NAVIGATION function will not work
properly.
To find scenes on tape using thumbnail images
(NAVIGATION Search)
1
Load a cassette. (੬ pg. 15)
2 Load a memory card. (੬ pg. 16)
3 Set the VIDEO/MEMORY switch to “VIDEO”.
4 Set the Power Switch to “P” while pressing
down the Lock Button located on the switch.
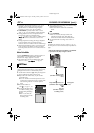
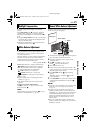
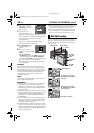
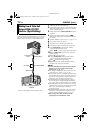
5 Press NAVI during video playback or stop mode.
● The loaded cassette’s
NAVIGATION thumbnail
image screen appears.
● Turn the SHUTTLE
SEARCH Ring to the left
(3) to display the
previous page. Turn the
SHUTTLE SEARCH Ring to the right (5) to
display the next page.
6 Press + or – to select the desired image, and press
SET/SELECT.
● The “NAVIGATION SEARCH” indication
appears blinking and the camcorder starts
searching the tape for the relevant point of the
selected thumbnail image.
To cancel NAVIGATION search midway...
Press 4/9 or 8, or turn the SHUTTLE SEARCH Ring
to the left (3) or to the right (5).
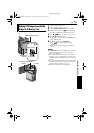
To add thumbnail images during video
playback
1
Perform steps 1 to 4 in “To find scenes on tape
using thumbnail images (NAVIGATION Search)”.
2 Press 4/9 to start video playback.
3 Press NAVI STORE at the desired point.
● The “” indicator appears briefly and the
image of the point where NAVI STORE is
pressed is stored in the memory card as a
thumbnail image.
To delete thumbnail images
1
Load a memory card. (੬ pg. 16)
2 Set the VIDEO/MEMORY switch to “VIDEO”.
3 Set the Power Switch to “P” while pressing
down the Lock Button located on the switch.
4 Press MENU. The Menu Screen appears.
5 Press + or – to select “t”, and press SET/
SELECT. The VIDEO Menu appears.
PAUSE
PAUSE
PAUSE
1h m1
hm
100
Displayed while the
captured image is
being stored in the
memory card.
TC : 13:23:15
35 2.4DATE: 2 1.50:429
ONITNAV IGA
1 2 3
4 5 006
ADVANCED FEATURES
CONTINUED ON NEXT PAGE
GR-DVP10PAL.book Page 47 Tuesday, January 6, 2004 10:55 AM