


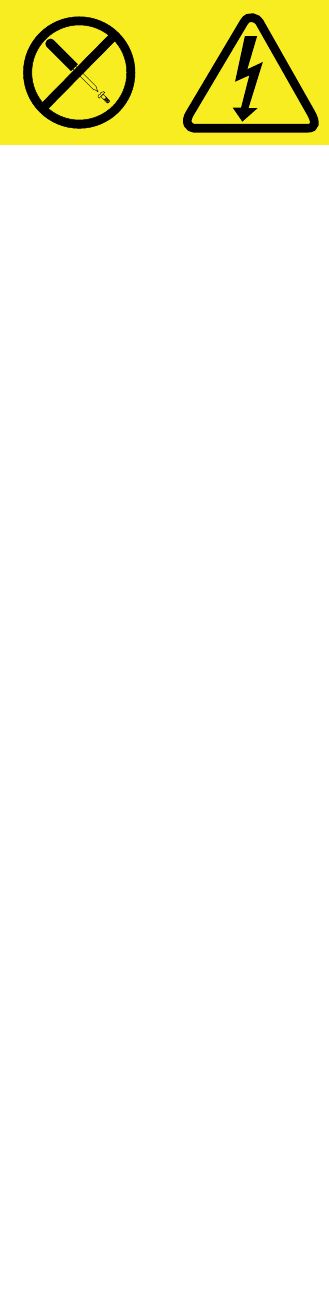
CAUTION:
Never remove the cover on a power supply or any part that has the following label attached.
Hazardous voltage, current, and energy levels are present inside any component that has this label
attached. There are no serviceable parts inside these components. If you suspect a problem with
one of these parts, contact a service technician.
Before you begin, print all the related instructions or ensure that you can view the PDF version on another
computer for reference.
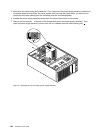
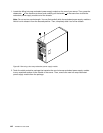
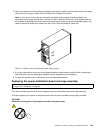
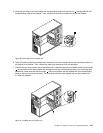
Note: Depending on the model, your server might look slightly different from the illustrations in this topic.
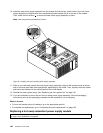
To replace the power distribution board and cage assembly, do the following:
1. Remove all media from the drives and turn off all attached devices and the server. Then, disconnect all
power cords from electrical outlets and disconnect all cables that are connected to the server.
2. Remove the hot-swap redundant power supply module(s). See “Replacing a hot-swap redundant
power supply module” on page 140.
Note: If your server comes with one hot-swap redundant power supply module installed in the
redundant power supply module bay 1 (the bay number is marked on the rear of the chassis), there is a
shied installed on bay 2 to protect the empty bay. Remove the shield and save it for future use.
3. Remove the server cover. See “Removing the server cover” on page 85.
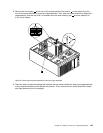
4. Lay the server on its side for easier operation.
5. Remove the front system fan(s). See “Replacing the front system fan” on page 149.
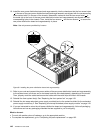
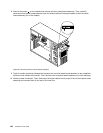
6. Note down the cable routing and connection. Then, disconnect the power cables of the power
distribution board and cage assembly from the system board and all drives. For server models with
hot-swap hard disk drives, you also need to disconnect the power cable(s) from the hot-swap hard
disk drive backplane(s).
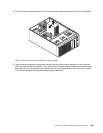
7. Release the power cables of the power distribution board and cage assembly from the cable clips
and ties in the chassis.
144 ThinkServer User Guide