


18
Chapter 6: Installing and Using the Wireless-G Internet Video Camera Viewer & Recorder Utility
Installing the Viewer & Recorder Utility
Wireless-G Internet Video Camera
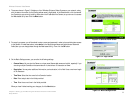
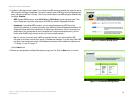
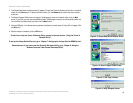
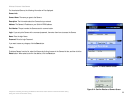
3. The Choose Destination Location screen will appear. To install the Viewer & Recorder Utility files in the default
folder, click the Next button. To select a different folder, click the Browse button and follow the on-screen
directions.
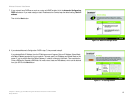
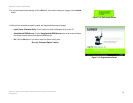
4. The Select Program Folder screen will appear. To add program icons to the default folder, click the Next
button. If you wish, you can rename the default folder. To add program icons to an existing folder, select one
from the Existing Folders listed, and then click the Next button.
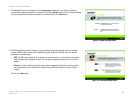
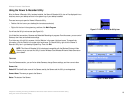
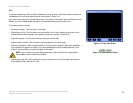
5. After the OCX plug-in for video streaming has been installed, the screen shown in Figure 6-5 will appear. Click
the OK button.
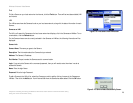
6. When the setup is complete, click the OK button.
To learn how to use the Viewer & Recorder Utility, proceed to the next section, “Using the Viewer &
Recorder Utility.”
To set up the Linksys SoloLink Service, go to “Chapter 7: Setting up the Linksys SoloLink DDNS Service.”
Advanced users: If you want to use the Camera’s Web-based Utility, go to “Chapter 8: Using the
Wireless-G Internet Video Camera Web-based Utility.”
Figure 6-3: Choose Destination Location Screen
Figure 6-4: Select Program Folder Screen
Figure 6-5: OCX Plug-in Screen
Figure 6-6: Setup Complete Screen