


Camera Installation
13
ENG
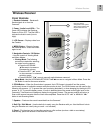
Installing the Camera:
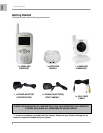
1. Carefully unpack the Camera.
NOTE: If you are installing Cameras that did not come with the System, please see the Pairing Camera
section of this manual for details on installation.
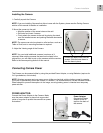
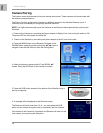
2. Mount the camera to the wall:
• Mark the position of the screw holes on the wall.
• Drill holes and insert 3 screws.
• Firmly attach the camera to the wall by placing the stand
over the installed screws and pushing the base downwards
to secure.
NOTE: The camera can also be placed on a flat surface, such as a
Table or Shelf, and no mounting hardware is required.
3. Adjust the Viewing angle of the Camera.
NOTE: You can install additional cameras (maximum of 4
cameras).When adding cameras that were not included in the
original box; you will need to pair up the cameras with the receiver.
Refer to the camera pairing section of this manual.
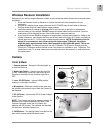
Connecting Camera Power
The Camera can be powered either by using the provided Power Adaptor, or using Batteries (requires 4 x
‘AA’ type batteries, not included).
NOTE: Wireless cameras require a power source (either an electrical outlet or battery power) to operate.
If you plan to permanently mount the camera in a location, it is recommended to use the included Camera
Power adaptor to prevent interruptions in the image, as using battery power is intended as a temporary
power solution.
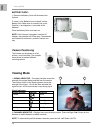
POWER ADAPTOR:
Connect the Power Adaptor to the Camera. Make
sure the power adaptor is placed into a grounded
outlet or surge bar to protect the camera from power
fluctuations.
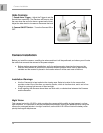
Power Adaptor:
Connect the Power
Adaptor to the 9V
Input on the back of
the camera.
Position the Base holes over the
screws. Slide the base down to
lock the base in place.