31
Flash operation using the R1C1
4
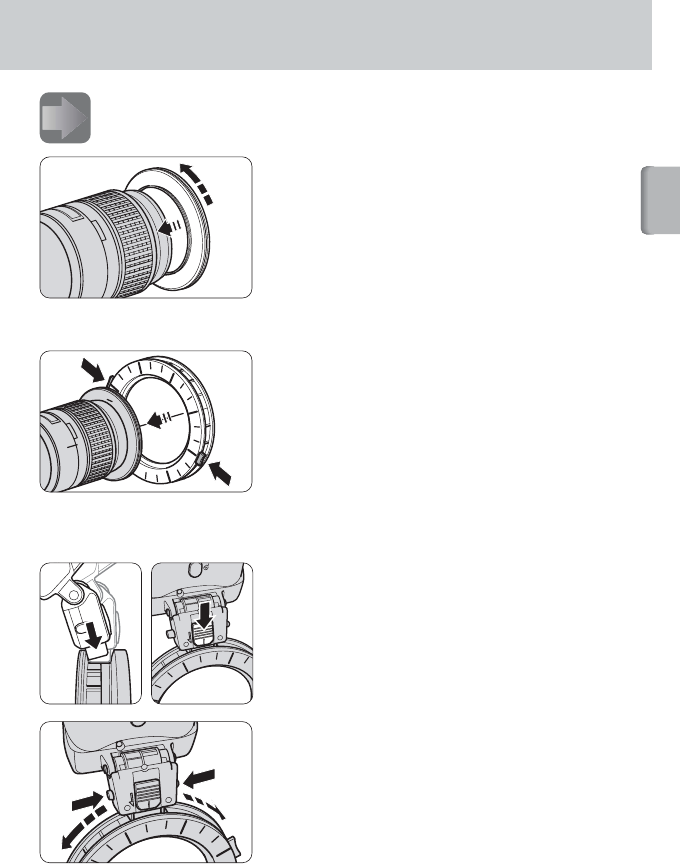
Attaching the SB-R200 to the front of the lens.
1
Attach one of the Adapter Rings to
the front of the lens.
Five types of Adapter Rings with different
diameters (ø52mm, ø62mm, ø67mm,
ø72mm, and ø77mm) are provided.
• Turn the Adapter Ring securely until it stops.
• These rings cannot be used together with
other lens filters.
• AF Micro-Nikkor 105mm f/2.8D is shown in the
illustration.
2
Press the Attachment Ring SX-1’s
Mounting Buttons on both sides to
attach it to the Adapter Ring, then
release.
• Make sure that the Nikon logo (p. 24) on the
SX-1 is on the under side facing down.
• Use fingers of both hands to press the two
Mounting Buttons on both sides to attach the
SX-1 securely.
• Make sure that the SX-1 is not attached at an
angle. If it is, remove and reattach.
3
Slide the SB-R200’s Mounting Foot
into the SX-1’s Mounting Groove,
then slide the lock switch.
The Mounting Foot cannot be inserted in
reverse.
• Slide the lock switch until it stops and make
sure that the red part can no longer be seen.
4
Move the SB-R200 slowly by
holding down the Release Button
on the SB-R200’s Mounting Foot.
Remove your fingers at the desired
position to secure it.
There are click stops every 15° on the
Attachment Ring.
L
O
C
K
LOCK
LOCKL
OCK


