11
EN
3
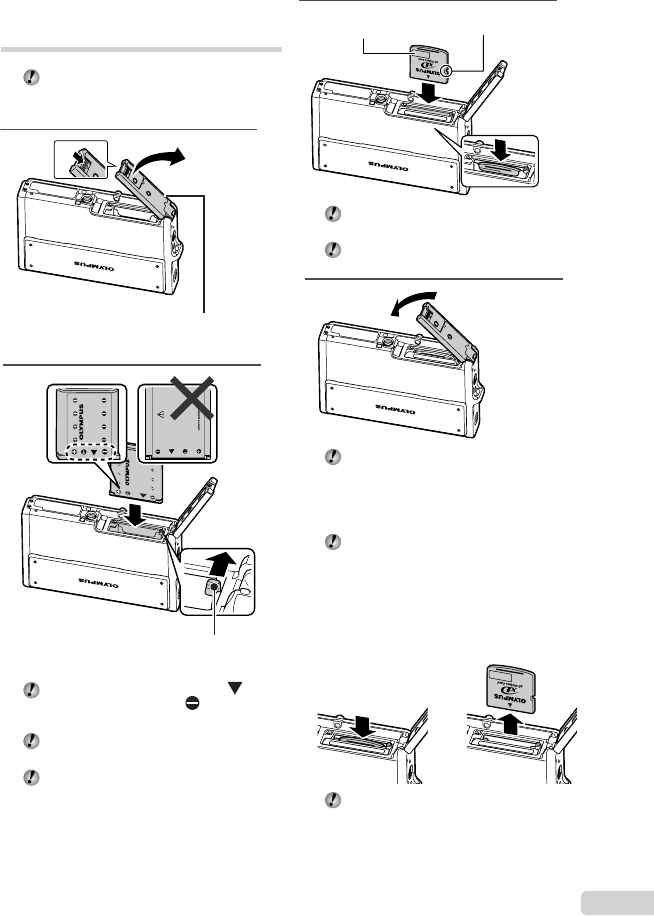
Notch
Index area
Insert the card straight in until it clicks into
place.
Do not touch the contact area on the card.
4
This camera allows the user to take pictures
using the internal memory even when
no xD-Picture Card (sold separately) is
inserted. “Using an xD-Picture Card”
(p. 64)
“Number of storable pictures (still
pictures)/recording length (movies) in the
internal memory and xD-Picture card”
(p. 65)
Removing the xD-Picture Card
12
Press in the card until it clicks and comes
out slightly, and then grasp the card to pull it
out.
Loading the battery and
the xD-Picture Card™ (sold
separately) into the camera
Do not insert anything other than an xD-
Picture Card or the microSD Attachment into
the camera.
1
1
2
Battery/card compartment cover
2
Battery lock knob
Insert the battery by putting in the
marked side fi rst, with the marks toward
the battery lock knob.
Insert the battery while sliding the battery
lock knob in the direction of the arrow.
Sliding the battery lock knob in the direction
of the arrow to unlock, and then remove the
battery.
book_oima_myu1050SW_en.indb 11book_oima_myu1050SW_en.indb 11 2008/07/10 11:48:272008/07/10 11:48:27


