25
Printing pictures from a digital camera
Preparation Printing
For Your
Reference
Introduction
ENGLISH
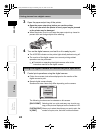
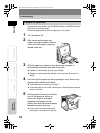
After printing begins, the ACCESS indicator on the printer blinks.
When printing is finished, the indicator turns off.
For details on operating the digital camera, refer to the
instruction manual for the digital camera.
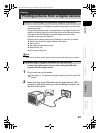
2 After printing is complete, turn off the digital camera and printer
before disconnecting the USB cable.
Note
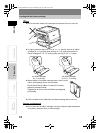
Do not remove the ink ribbon cartridge or paper tray during printing.
Do not move the printer during printing.
Do not turn off the printer and digital camera or disconnect the AC adapter
during printing. In the event that the power is turned off or the AC adapter is
disconnected, turn the power back on. After the paper is automatically
ejected, perform the operation again. Leaving the printer without restoring
the power may cause a malfunction.
If printing does not start up again after you and more paper, remove the
ribbon cartridge once and then insert it again. Printing will resume
automatically.
If the print setting [Not Edged] (borderless) is selected, the edges of
pictures will be cut off during printing because the width and height ratio
with which pictures are taken by the camera is usually 4:3.
When taking pictures, make sure the composition sufficiently compensate
for this.
If the print setting [Edged] (bordered) is selected, the picture size will be
smaller but the whole picture will be printed.
p11_e_000_bookfile.book Page 25 Monday, July 25, 2005 10:47 AM


