65
VQT1S88
Advanced (Recording pictures)
∫ Finely adjusting the white balance [ ]
You can finely adjust the white balance when you cannot acquire the desired hue by
setting the white balance.
•
It can be set from the quick menu (P19).
1 Select [WHITE BALANCE] and then press 1
•
Press 1 again if [ ], [ ] or [ ] is selected.
2 Press 3/4/2/1 to adjust the white balance and then press
[MENU/SET].
•
If you finely adjust the white balance to A (amber), the white balance icon on the LCD
monitor will change to orange. If you finely adjust the white balance to B (blue), the white
balance icon on the LCD monitor will change to blue.
• If you finely adjust the white balance to G_ (green) or M` (magenta), [_] (green) or [`]
(magenta) appears beside the white balance icon on the LCD monitor.
• Select the center point if you are not finely adjusting the white balance.
• You can finely adjust the white balance independently for each white balance item.
• The white balance fine adjustment setting is memorized even if the camera is turned off.
• The white balance fine adjustment setting is reflected in the picture when using the flash.
• The white balance fine adjustment level returns to the standard setting (center point) in
the following cases.
–When you reset the white balance in [ ] or [ ]
–When you reset the color temperature manually in [ ]
∫ Auto white balance
Depending on the conditions prevailing when pictures are taken, the pictures may take on
a reddish or bluish tinge. Furthermore, when a multiple number of light sources are being
used or there is nothing with a color close to white, auto white balance may not function
properly. In a case like this, set the white balance to a mode other than [AWB].
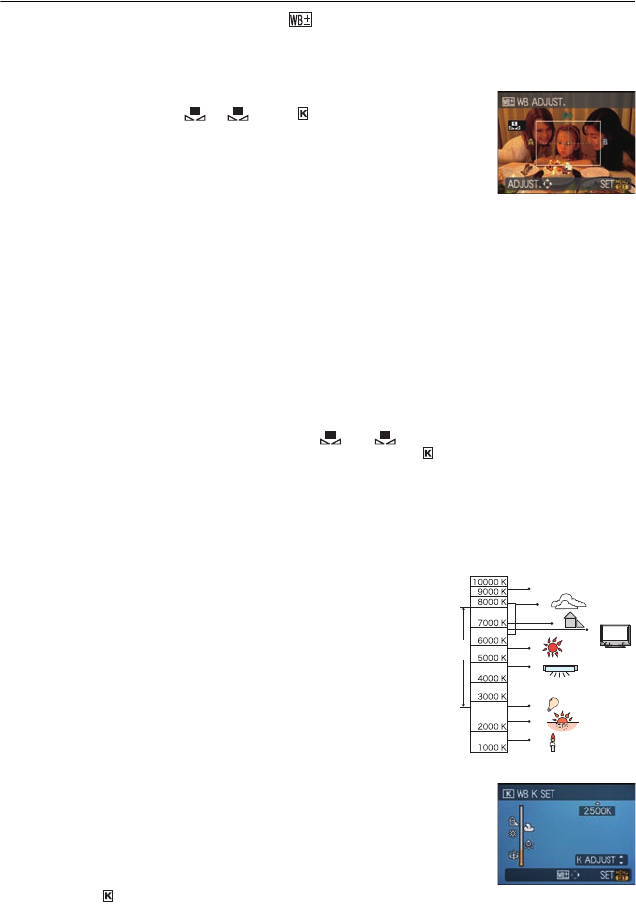
1 Auto white balance will work within this range.
2 Blue sky
3 Cloudy sky (Rain)
4 Shade
5 TV screen
6 Sunlight
7 White fluorescent light
8 Incandescent light bulb
9 Sunrise and sunset
10 Candlelight
KlKelvin color Temperature
∫ Setting the color temperature
You can set the color temperature manually for taking natural pictures
in different lighting conditions. The color of light is measured as a
number in degrees Kelvin. As the color temperature becomes high the
picture becomes bluish and as the color temperature becomes low the
picture becomes reddish.
1 Select [ ] and then press 1.
2 Press 3/4 to select the color temperature and then press [MENU/SET].
•
You can set a color temperature from [2500K] to [10000K].
2 : A (AMBER: ORANGE)
1 : B (BLUE: BLUISH)
3 :
G_ (GREEN: GREENISH)
4 : M` (MAGENTA: REDDISH)
1 2
1 2
1)
2)
3)
4)
5)
6)
7)
8)
9)
10)
DMCFX150-VQT1S88_mst.book 65 ページ 2008年7月9日 水曜日 午後8時18分


