


68 VQT1B61
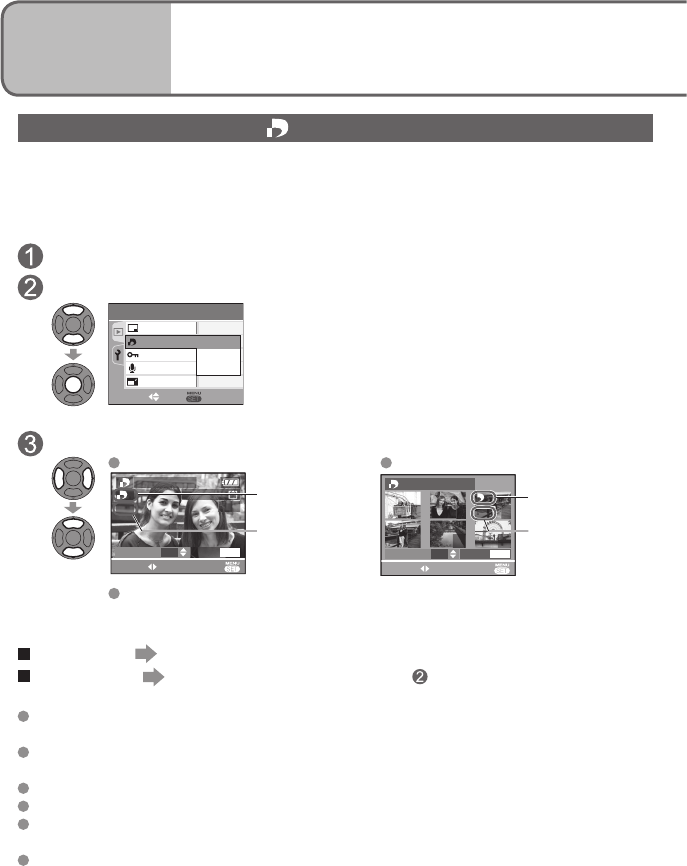
DPOF PRINT
Picture/picture no./date printing settings can be made for when printing with DPOF print-
compatible shops or printers. (Ask at shop to check compatibility)
For more information visit:
http://panasonic.jp/dc/dpof_110/white_e.htm
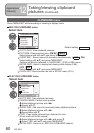
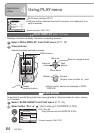
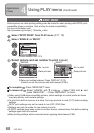
Select ‘DPOF PRINT’ from PLAY menu (P.17, 18)
Select ‘SINGLE’ or ‘MULTI’
AUDIO DUB.
RESIZE
2
/
3
PROTECT
PLAY
SELECT SET
DATE STAMP
DPOF PRINT
CANCEL
MULTI
SINGLE
(Screen example: DMC-TZ3)
Select picture and set number to print (repeat)
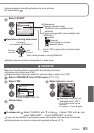
SINGLE
1/13
100-0001
1
1
DISPLAY
DATE
SELECT EXIT
COUNT DATE
DPOF SET THIS
No. to print
Date print set
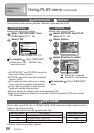
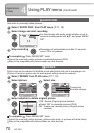
MULTI
7
10 11 12
8 9
1
DATE
1
DISPLAY
DPOF SET MULTI
EXITSELECT
COUNT DATE
No. to print
Date print set
Date print setting/release: Press ‘DISPLAY’ (P.12).
(Cannot be set on pictures with date stamps (P.66).)
To complete Press ‘MENU/SET’ twice.
To release all Select ‘CANCEL’ with ▼ in step → Select ‘YES’ with ▲, and
press ‘MENU/SET’ → Press ‘MENU/SET’ to finish.
When using PictBridge-compatible printers, check settings on actual printer as these
may take priority over camera settings.
To print from built-in memory at a shop, first copy pictures to card (P.73) before making
settings.
DPOF print settings may not be made to non-DCF (P.90) files.
Settings can only be made for one picture at a time.
If DPOF settings have been made on another device, release these first before making
settings again with this camera.
Date printing settings will be canceled when applying date stamps (P.66).
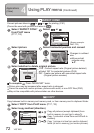
Applications
(View)
4
Using PLAY menu (Continued)