


110
VQT1T93
≥ To cancel the setting, set the number of prints
to [0].
≥ Up to 8 files can be set in succession by
repeating steps 4 and 5.
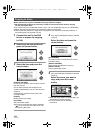
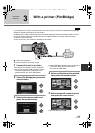
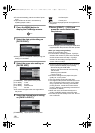
6 Press the MENU button to
display the PictBridge menus.
7 Select the date print setting on
[DATE PRINT].
≥ If the printer is not capable of date printing, this
setting is unavailable.
8 Select the paper size setting on
[PAPER SIZE].
[STANDARD]: Size specific to the printer
[4k5 INCH]: L size
[5k7 INCH]: 2L size
[4k6 INCH]: Postcard size
[A4]: A4 size
≥ You cannot set paper sizes not supported on
the printer.
9 Select the desired layout setting
on [PAGE LAYOUT].
[STANDARD]: Layout specific to the printer
[ ]: No frame print
[]: Frame print
≥ You cannot set page layouts not supported on
the printer.
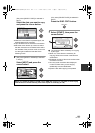
10
Select [PRINT] # [YES] and
press the cursor button to print
the pictures.
≥ Exit PictBridge by disconnecting the USB cable
(supplied) after the pictures have been printed.
When you stop printing halfway
Move the cursor button down.
≥ A confirmation message appears. If [YES] is
selected, the number of prints set is canceled
and the screen returns to step 4. If [NO] is
selected, all the settings are kept and the
screen returns to step 4.
≥ Avoid the following operations during printing.
These operations disable proper printing.
jDisconnecting the USB cable
jOpening the SD card cover and removing
the SD card
jSwitching the mode dial
jTurn the unit off
≥ Check the settings for the paper size, print
quality etc. on the printer.
≥ The print quality varies with paper size.
≥ The edges of still pictures recorded in this unit
with a 16:9 aspect ratio may be cut off. When
using a printer with a trimming or borderless
printing function, cancel this function before
printing. (Refer to the operating instructions of
the printer for details.)
≥ When the unit is connected directly to the
printer, the DPOF settings cannot be used.
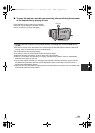
≥ Connect the printer directly to this unit. Do not
use a USB hub.
MENU
HDCHS100P-VQT1T93_ENG.book 110 ページ 2008年7月14日 月曜日 午後1時36分