


Operating Instructions
108
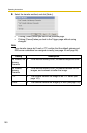
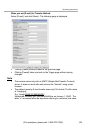
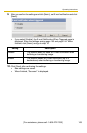
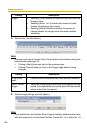
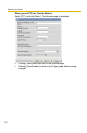
4. Set the time, and click [Next>].
Note
The timer works by an internal clock. Set the date and time before using timer
buffer/transfer (see page
70).
• Clicking [>Back] takes you back to the previous page.
• Clicking [Cancel] takes you back to the Trigger page without saving
changes.
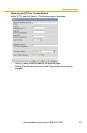
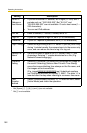
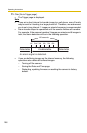
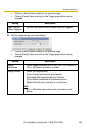
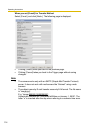
5. Set the image settings, and click [Next>].
Note
If you enable the Lens Position When Triggered setting, buffer/transfer starts
after the camera turns to the Home Position, Preset No.1–8, or Alarm No.1–2.
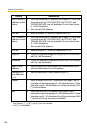
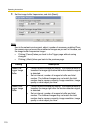
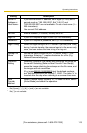
Tr i g ge r • Selecting [Timer] enables the camera to buffer/transfer the
image by timer.
• Selecting [Alarm 1 or 2] enables the camera to buffer/
transfer the image by alarm signal.
• Selecting [Motion Detection] enables the camera to
capture/transfer the images when the motion detects
something.
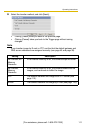
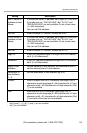
Setting Description
A day of the
week
• Check the box to enable the day. Clear the box to disable it.
Active Time of
Tr i g ge r
• Select the [Always] option when you do not specify the time
period. If you specify the time period, select the time period
option and set the time period.
Setting Description