


15
Before Using
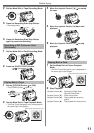
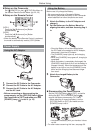
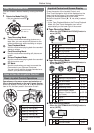
[VCR1]:
Press the [ǿŹ] Button and [ Ŷ ] Button
simultaneously.
1
[VCR2]:
Press the [Żǿ] Button and [ Ŷ ] Button
simultaneously.
2
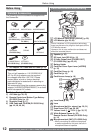
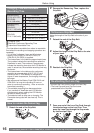
• When the battery in the Remote Control is replaced,
the mode is automatically reset to [VCR1] Mode.
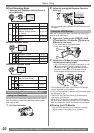
Setup on the Camcorder
Set [ REMOTE] on the [ SETUP] Sub-Menu to
the desired Remote Control Mode. (pp. 22, 23)
Setup on the Remote Control
12
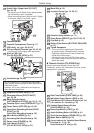
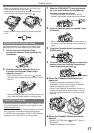
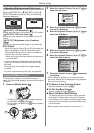
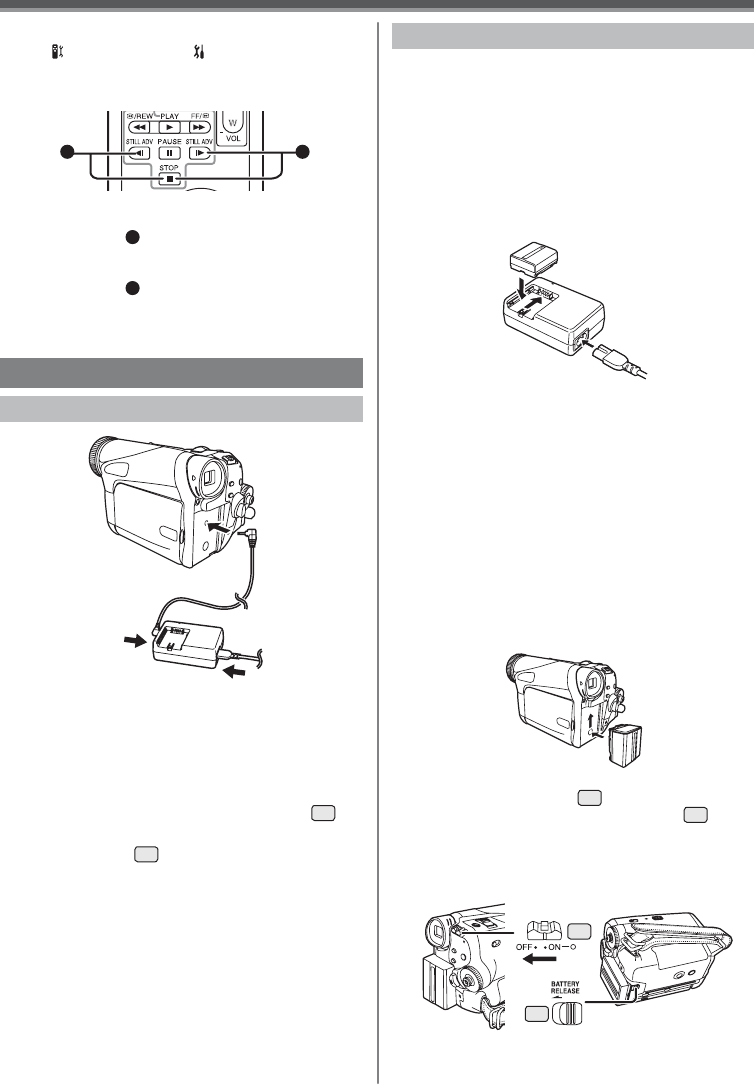
Power Supply
Using the AC Adaptor
1 Connect the DC Cable to the Camcorder.
2 Connect the DC Cable to the AC Adaptor.
3 Connect the AC Cable to the AC Adaptor
and the AC Jack.
• Before connecting or disconnecting the
power supply, set the [OFF/ON] Switch
28
on
the Camcorder to [OFF] and make sure that
[POWER] Lamp
32
is not lit. (p. 18)
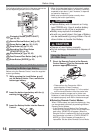
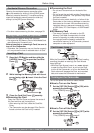
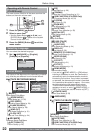
Using the Battery
• We recommend using a Panasonic Battery.
• We cannot guarantee the quality of this Camcorder
when batteries from other companies are used.
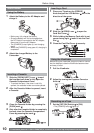
1 Attach the Battery to the AC Adaptor and
charge it.
2 Put the Battery on the Battery Mount by
aligning the mark, and then securely plug it
in.
Before use, fully charge the Battery.
• Since the Battery will not be charged when
the DC Cable is connected to the AC Adaptor,
disconnect it from the AC Adaptor.
• The [CHARGE] Lamp lights up, and charging
starts.
• When the [CHARGE] Lamp goes off, charging is
completed.
• When the battery is completely discharged, the
[CHARGE] Lamp blinks at first, but the battery is
charged normally. When the temperature of the
battery is too high or low, the [CHARGE] Lamp
blinks and the charging time becomes longer
than usual.
3 Attach the charged Battery to the
Camcorder.
• For other notes concerning this item, see page 59.
Disconnecting the Power Source
Set the [OFF/ON] Switch
28
to [OFF], and while
sliding the [BATTERY RELEASE] Switch
39
,
remove the Battery downward or DC Cable.
• When attaching or removing Battery, set the
[OFF/ON] Switch to [OFF] and make sure the
[POWER] Lamp is not lit.
28
39
• Hold down the battery with your hand so it does
not fall.