With a PC
61
LSQT0975
ª Connecting the Camcorder to
personal computer (For Use as a Web
Camera)
1
Install the supplied USB Driver on the
provided CD-ROM.
2 Set the Mode Dial to Tape Recording Mode.
3 Set [ADVANCED] >> [USB FUNCTION] >>
[WEB CAM].
≥To send pictures recorded on a tape to
another personal computer using Windows
Messenger/MSN Messenger, set [BASIC] >>
[USB FUNCTION] >> [WEB CAM] on Tape
Playback Mode before connecting the
Camcorder to your personal computer.
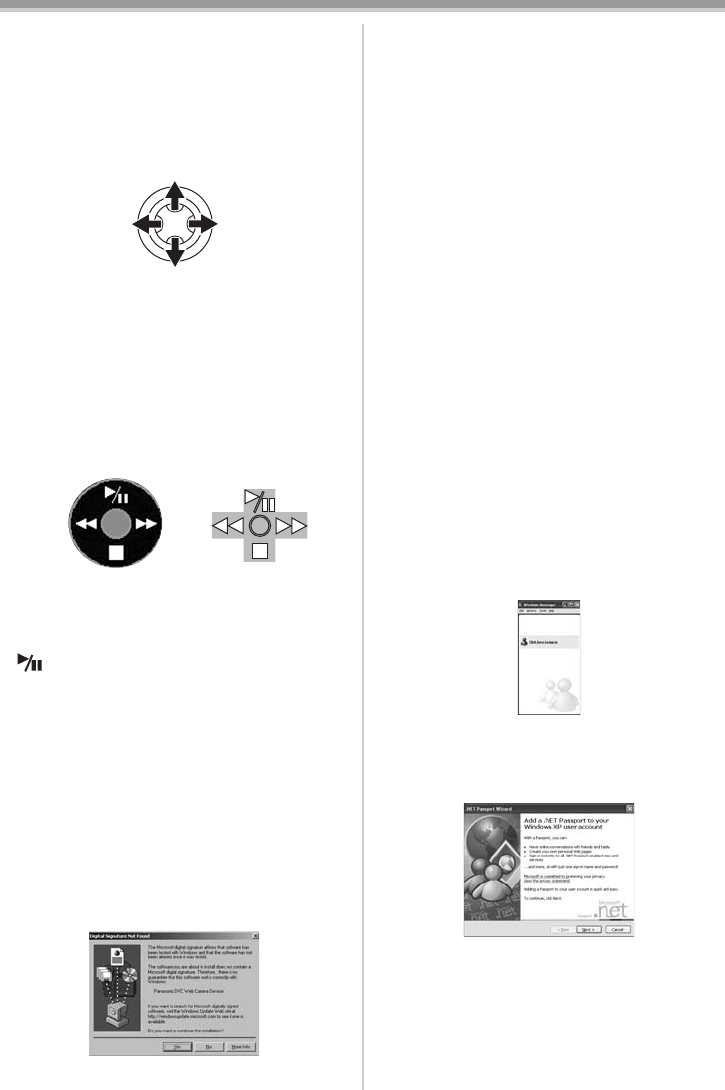
When you use the Camcorder as a Web
camera in the Tape Playback Mode, the
indication of the operation icon is different
from the one in usual operation.
1 In usual operation
2 In the WEB CAMERA mode (Tape Playback
Mode)
≥Even if you move the joystick up/down/right/left
(, ∫, 5, 6), the selected direction on
the operation icon is not lit in yellow.
≥The operation icon blinks on instead of
appearing from the side of the screen when you
press the center of the joystick.
4 Connect the Camcorder to a personal
computer with the USB connection cable.
≥When the Camcorder and personal
computer (with Windows 2000) are
connected via USB cable, a message, such
as the one below, is displayed. However,
testing by the manufacturer has confirmed
functionality of this Camcorder with
Windows 2000. Click [Yes] and proceed.
5 Start Windows Messenger (for Windows XP
users) or MSN Messenger (for Windows XP/
2000 users).
≥Click [start] >> [Programs] >>
[Windows Messenger] or [MSN Messenger].
≥When you use Windows XP, the other parties
via the network have to use same Messenger
application (or software) on Windows XP. When
you use Windows 2000, the other parties via the
network have to use MSN Messenger on
Windows 2000.
≥If the Camcorder is used as a Web Camera, the
quality of the video to be exchanged will depend
on the Internet connection status.
≥In the WEB CAMERA mode, video cannot be
recorded onto a tape or a card.
≥You cannot output the video input from the DV
terminal to the display of the PC.
≥In the WEB CAMERA mode, the audio may be
interrupted in the middle of communication
depending on the communication environment
or the performance of the personal computer.
ª
Setting up Windows Messenger
When starting Windows Messenger for the first
time, its setup screen is displayed. (However, the
screen is not displayed if the Windows
Messenger setup has already been done.) For
more details, please read the corresponding Help
file.
1 Click [Click here to sign in].
2 Select [.NET Messaging Service] and click
[OK].
3 After the .NET Passport Wizard is displayed,
click [Next].
≥Please refer to the instruction manual of your
personal computer for how to configure the
audio and the microphone.
≥To communicate with persons using Windows
in other languages, setting up using
alphabets or numbers is recommended.
12
LSQT0975_ENG.book 61 ページ 2005年12月19日 月曜日 午前9時51分


