With a PC
65
LSQT0975
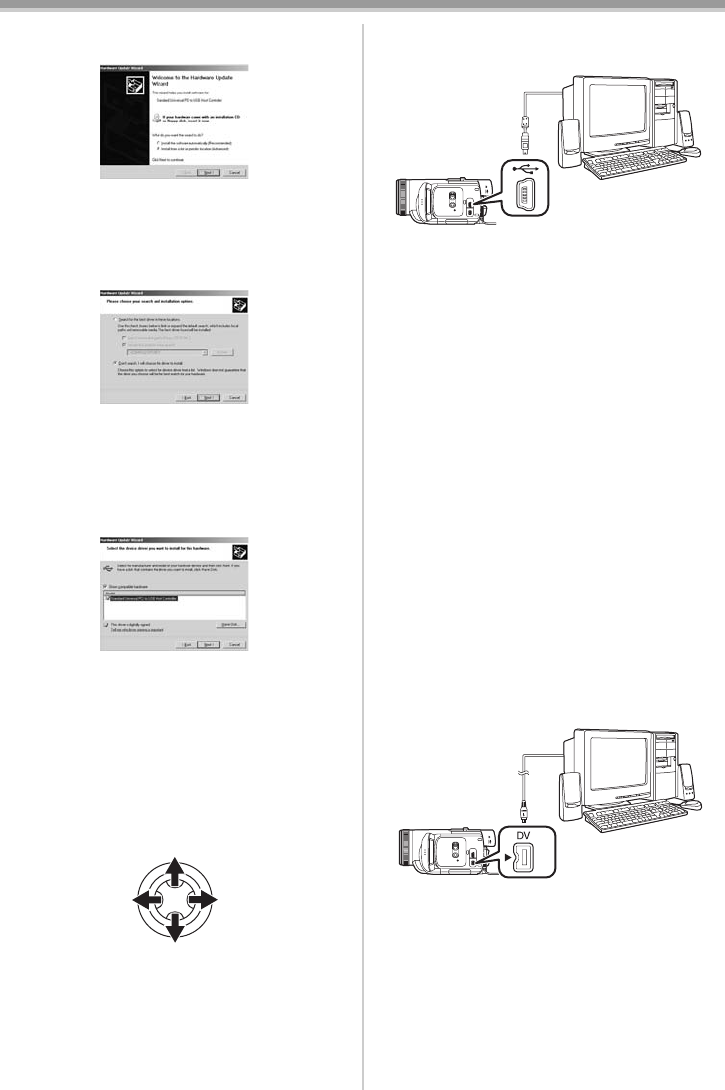
2 Check [Install from a list or specific location
(Advanced)] and then click [Next].
≥When your OS is Windows 2000, click [Next]
after [Update Device Driver Wizard] appears.
3 (For Windows XP Users)
Check [Don’t search. I will choose the driver
to install] and then click [Next].
(For Windows 2000 Users)
Check [Display a list of the known drivers
for this device so that I can choose a
specific driver] and then click [Next].
4 Click [Standard Universal PCI to USB Host
Controller] and then click [Next].
5 Click [Finish].
≥The update of the driver is completed.
Connect the Camcorder.
Connecting the Camcorder to a personal
computer
1 Set the Mode Dial to Tape Recording Mode
or Tape Playback Mode.
2 Set [BASIC] or [ADVANCED] >>
[USB FUNCTION] >> [MOTION DV].
3 Connect the Camcorder to the personal
computer with USB connection cable.
4 Select [start] >> [All Programs (Programs)]
>> [Panasonic] >> [Quick Movie Magic 1.0E]
or [MotionDV STUDIO 5.6E LE for DV] >>
[Quick Movie Magic] or
[MotionDV STUDIO LE for DV].
≥Using the MotionDV STUDIO for Windows, a
variety of visual effects can be added and titles
can be created.
≥You cannot record a video edited by the PC
onto the tape in the Camcorder.
≥When 2 or more USB devices are connected to
a personal computer, or when devices are
connected through USB hubs or by using
extension cables, proper operation is not
guaranteed.
≥When connected to the keyboard USB terminal,
normal function may not be possible.
With DV cable (optional)
OS:
Windows 2000/XP
1 Set the Mode Dial to Tape Recording Mode
or Tape Playback Mode.
2 Connect the Camcorder to the personal
computer with DV connection cable.
3 Select [start] >> [All Programs (Programs)]
>> [Panasonic] >> [Quick Movie Magic 1.0E]
or [MotionDV STUDIO 5.6E LE for DV] >>
[Quick Movie Magic] or
[MotionDV STUDIO LE for DV].
≥You can record the video edited by the PC onto
the tape in the Camcorder.
LSQT0975_ENG.book 65 ページ 2005年12月19日 月曜日 午前9時51分


