


-32-
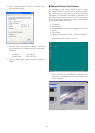
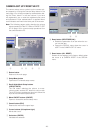
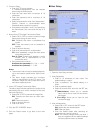
1. Open the Alarm Setup window.
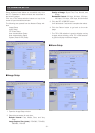
2. External Alarm
• Select ON or OFF, and click the SET button.
ON: Receives alarm inputs via the ALARM IN
terminal.
OFF: Ignores alarm inputs via the ALARM IN
terminal.
3. E-Mail Notice Setup
• Select ON or OFF for E-mail Notice.
ON: Sends an e-mail when an alarm operates.
OFF: Does not send.
• Enter the e-mail server address.
A hostname.domainname can be entered
when using the DNS function.
• Enter the sender name. The default setting is
NW_camera.
• Select ON or OFF for Attach Image.
ON: Attaches the image data to an e-mail.
OFF: Does not attach.
• Click the SET & REBOOT button.
• Enter a maximum of 4 destination addresses,
and click the SET button.
• Click the DEL (delete) button after selecting an
unwanted destination to cancel it.
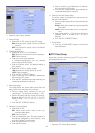
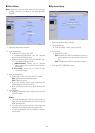
4. Recording Setup
The image fields are stored before and after the
alarm input in the memories of the camera.
• Set the image frame numbers for the pre
recording (0 - 10) and post recording (1 - 20).
•Set the recording rate (fps: frame per second).
Rates for Before: 1/10, 1/5, 1/3, 1/2, 1, 2, 3.3, 5
Rates for After: 1/10, 1/5, 1/3, 1/2, 1, 2, 3.3, 5,
10
• Click the SET & REBOOT button.
5. Panasonic Protocol Setup
• Select ON or OFF.
ON: Sends alarm notice mails to the cus-
tomized destinations.
OFF: Does not send.
• Enter the destination port.
The port number is
exclusively assigned to this function, and
any other usage is not allowed.
•Enter the retry times from 1 to 25.
• Click the SET button.
• Enter a maximum of 8 destination IP address-
es, and click the SET button.
• Click the DEL (delete) button after selecting an
unwanted destination to cancel it.
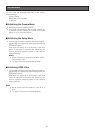
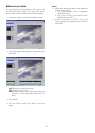
6. External Terminal Output Setup
The alarm output is supplied from the terminal on
the rear of the camera.
• Select a signal type that the connected device
accepts.
Pulse: Holds active status during the specified
time width.
Latch: Holds active status until it is reset man-
ually.
• Enter pulse width (n x 100 milli-seconds) if you
selected Pulse. A number from 1 to 100 is
allowed.
• Click the SET & REBOOT button.
7. Alarm Reset
• Click the ALARM RESET button to cancel the
activated alarm.
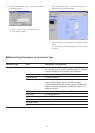
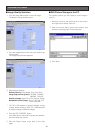
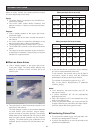
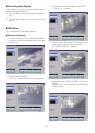
■ FTP Client Setup
Image files can be transferred to the FTP server within
the scheduled time zone.
1. Open the FTP Client Setup window.